This translation may not reflect the most recent updates from the source guide. Help update the translation or view the source guide.
Введение
Замена аккумулятора iPhone 4S требует минимальную разборку.
Выберете то, что вам нужно
-
-
Потяните заднюю панель. Старайтесь не повредить пластиковые защёлки.
-
Удалите заднюю панель.
-
-
-
-
Удалите следующие винты, крепящие шлейф аккумулятора к материнской плате:
-
Один 1,7 мм Phillips(крестовой)
-
Один 1,5 мм Phillips(крестовой)
-
Используйте пластиковый инструмент, чтобы отключить шлейф аккумулятора от устройства.
-
-
-
Используйте пластиковый инструмент для отключения шлейфа аккумулятора от коннектора.
-
Будьте ОЧЕНЬ осторожны при отключении шлейфа аккумулятора. Не оторвите коннектор от материнской платы. Он держится на 4 очень маленьких точках припоя.
-
-
-
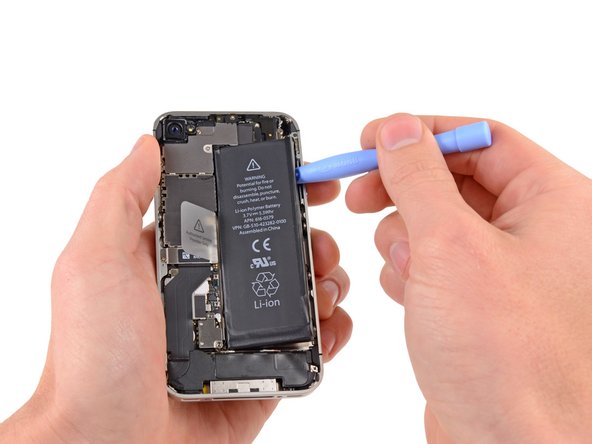
Вставьте пластиковую лопатку между аккумулятором и внешней рамкой в районе нижнего левого угла устройства.
-
Двигаясь лопаткой вдоль правого края аккумулятора отклейте его от корпуса.
-
Следуйте этим инструкциям в обратном порядке, чтобы собрать устройство.
Следуйте этим инструкциям в обратном порядке, чтобы собрать устройство.
Отменить: Я не выполнил это руководство.
4061 участников успешно повторили данное руководство.
Особая благодарность этим переводчикам:
36%
Эти переводчики помогают нам починить мир! Хотите внести свой вклад?
Начните переводить ›
254 Комментариев
When I removed the battery the glue was holding it in. I used the screw driver to pry it out. It sparked and I'm sure shorted the logic board. VERY IMPORTANT ONLY USE PLASTIC TOOL WHEN REMOVING BATTERY! Now I have no service. I swapped a different logic board into same phone and works fine. Any suggestions on how to fix the old logic board are appreciated.
Used a screw driver once to lift up battery, shorted the board. No display. Had to give another iPhone 4 to customer.
I now on always use my nail to lift up the battery. Never had issues since doing that.
Ben -
Well, the phillips screwdriver was a bit awkward. Had to hold screwdriver top down with one hand and turn driver with other hand. All else was as stated. Never had to touch any internal parts with my bare hands just used tools. That saves the worries about static or corrosion. One part that I failed to see in write up is the small case ground. Don't loose it it will come loose once screw is out.
A couple of suggestions.
1). If you are over about 40, some sort of hands free magnifier helps a lot - I used a headband mounted jewelers magifier called an Optivisor.
2). A pair of fine tipped tweezers and a gentle touch will let you grab the pressure contact in step 5 without getting skin oil on it.
3). Work over some sort of tray to stop small parts from rolling away.
4). If you don't have a spudger or a set of plastic case opening tools (or you know you have them, but can't recall their exact location at this moment...*cough*), the corner of an an expired credit card, or a stiff guitar pick will work to pry the battery loose. It will likely bend the card though, so do use an expired one. I used an empty Starbucks gift card I found in a junk drawer...
I'm over 40, I wish I read your tips first! both a magnifier and tweezers would have helped, and possiby prevented the spark... It's charging, fingers crossed that the tiny spark wasn't enough to fry anything!


