This translation may not reflect the most recent updates from the source guide. Help update the translation or view the source guide.
Выберете то, что вам нужно
-
-
Если стекло дисплея разбито, то в процессе ремонта важно предотвратить его дальнейшее разрушение (которое, кстати, может повлечь за собой серьёзные травмы). Заклейте стекло клейкой лентой.
-
Наложите столько слоёв прозрачной ленты, сколько потребуется. Дисплей должен быть заклеен полностью.
-
-
-
Открутите оба 3,6 мм Pentalobe-винта рядом с разъемом Lightning.
I would recommend keeping multiple pieces of double-sided tape for each step that requires removing screws. Also perhaps label them, or take notes, so you know which piece of tape (and the screws attached to it) go with which step number. It's easy to confuse screws, especially if you go past these instructions to remove everything required to replace the ribbon cable that is necessary for the buttons.
To avoid misplacing screws or other elements, printout the instructions, apply transparent tape onto the print wherever you have colored circles marking different screws. Then, as you start removing screws, tape each one on top of its image on the instructions. At the end, to reinstall everything, proceed from the end of the instructions, removing each taped screw from its image, to return it to its original position. I have done this with many iFixit repair instructions, never losing or misplacing any screw!
bduault -
Ordered and received the Phillips #00 Screwdriver ($5.95 · 50+ In stock). It is a tiny Philips screwdriver. The screws next to the lightning port have tiny star-shaped holes. I will have to find a different screwdriver.
Unfortunately, the kit I ordered that was to come with a suction cup didn't include one; thanks for quality control, ifixit. Tape doesn't work. Now what?
I'm sorry to hear that. I have a suction cup being sent out today (Tue 3/11/14) and it will be there tomorrow for you.
I've managed to replace the battery successfully in my iPhone5, but something went wrong with a friend's (battery status is stuck, sometimes the phone reboots for no reason).
So, i decided to open it up again and reseat the ribbon cables in case they came loose.
I can't open it now. The Pentalobe screwdriver is worn out! I can't open these screws no matter what. I don't know what to do now as I can't be sure I haven't worn out the actual screws themselves, too. Any ideas?
I seem to be having a similar situation. Attempting to open the phone again and either the pentalobe screws or the screwdriver itself is stripped. Any suggestion is welcome for removing the screws.
Battery replacement went well and works great. But I must have a loose (hopefully not damaged) display ribbon.
Saltank, thanks to your comment I didn't overtighten those little screws! I would try to get a better quality driver from a local hardware store to see that helps, the one ifixit sent are not very good quality. If that doesn't work, you may have stripped the screws.
Wish I ordered a back case as well with my repair being so easy!
my phones screen displays the dead battery sign and the plug below it sign too, when your phones battery is dead. Bought a new battery and charged overnight...... any ideas?
Hi Steve! I'm experiencing the same issue. Were you able to fix it? Please let me know
Steve. Please contact me asap re: the issue on your phone. Thank you.
Now here's an issue that would seem to apply to many users doing this repair: if the screen is nonfunctional, how do you power-off the device? When I dropped my iPhone, the screen went almost completely dark, midnight blue, actually. I can use the power button at the top of the phone to turn the display on and off, but I can't get the phone to power off. Seems the only way to do it is to wait until the battery is exhausted.
Protip: take all the soda out of a case of pop and complete the repair in the empty cardboard tray. That way if you drop a screw it won't go flying off the table.
Ok, at the end of the repair, I tried to use the new pentalobe screws that came with ifixit replacement battery but they did not seem to fit. So, reverted to the original pentalobe screws for the final step to close up the phone. Beside that, everything went smooth. I also skipped the steps about detaching the frontpanel (seems not necessary if only replacing the battery)
Weirdly I had to use two different screw attachments to remove the pentalobe screws so possible they use different screw heads for each one sometimes.
The “Pentalobe” screws require the STAR DRIVE driver, NOT a Phillips driver.
Hi, i am trying to remove the serews, i have all the tools neded for it but when i try to unscrew them, they turn but they don’t came out, any ideas of what to do? Tank you.
Hi Joel,
Chances are, the threads may be slightly stripped. You can try to wedge the point of some tweezers behind the screw head to pry the screw out.
This was the second repair in the same iphone5. First was the screen, and all the screws came easily. After a year, I wanted to change the battery. From the two Pentalobe screws, one came easy. The other just turn but did not come out. I search and tried to glue the screw with superglue to the screw-driver, but did not work. Finally, I separated the glass from the phone, removed the button, and pushed the screw from inside to outside. It came just enough I could catch it with tweezers and turned meanwhile pulling. Finally came out. I know, not the best solution, but I did not find another way. I put the battery and works.
-
-
-
Откройте «челюсти» с присосками, сведя ручки iSclack вместе.
-
Поместите iPhone между присосок, вложив его в пластиковый ограничитель.
-
Верхняя присоска должна оказаться чуть выше кнопки Home.
-
Сведите присоски вместе, разведя ручки. Крепко прижмите присоски к передней и задней панелям iPhone.
The iSclack is a marvel. I've had it in my toolkit for a while but this was its first use. I recommend this tool.
-
-
-
Удерживая iPhone, вновь сведите ручки iSclack вместе. Передняя панель выскочит из корпуса.
-
Угол раскрытия iSclack специально подобран , чтобы корпус и панель можно было отсоединить друг от друга, не повредив шлейф кнопки Home.
-
Отсоедините детали от присосок.
-
Сразу переходите к шагу 7.
Step 4 is a bit dangerous, as the Display is pulled out very fast and (depending on the position, the suction cups are placed at) it could stress the cabels connecting display and mainboard. So, please, hold the phone with finger and thumb at the top, to avoid the display is pulled out to fast.
I sure wish they did a better job showing in the video how hard it is to take of the front screen without the iSclack tool!
I had to position the suction cup _over_ the home button in order to get the screen far enough away from the frame to slide my trim tool in there. Putting it down above the home button just wasn't working at all...
Was someone able to answer this question? I have the same issue
without this suction cup clamp thing, removing (and replacing) the screen was the hardest part of this job. Especially when the screen is cracked badly as the suction cup loses suction due to air leaking through the cracks. In this case, use tape over the screen to create a smooth surface. ***Also, the screens have rubber running along the side, so use a heat gun or hair dryer to make the rubber softer for removal of cracked screen and installation of replacement screen
-
-
-
Закрепите присоску на экране как раз над кнопкой Home.
I found it was easier to start opening from the top left of the display and working straight down towards the home button as there are no clips in this particular area. I realize there are cables on the right side right next to the area, however, this way requires less force as a starting point. Let me know what you think.
This part was the most frustrating part of the guide, granted I didn't do the whole thing. I was expecting to slip the plastic separator tool in-between the case and the display. This did not happen and I ate away at the tool in the process. For me after much pushing on the top edge of the case and pulling the screen away it released all of a sudden. I managed to make a dead stop at 90 degrees, but felt like I almost ripped off the ribbon cables(I didn't).
No matter how hard I tried, I could not get the screen to separate far enough to where the pry tool could get it. Reading through some of the other comments, I followed 2 other people's advice to work the bottom left corner above the headphone input and then use a pushpin at the same time. (this is not recommended, but it worked!) I made a couple of hard to see marks in the corner but was finally able to get the screen off. I also did NOT take off the connectors to the screen and skipped the next few steps all the way down to step 14. Looks like a lot of people damaged their phones that disconnected the top screen.
I'd recommend to use packaging tape to attach the upper edge of the display to the back of the phone so you won't rip off the ribbon cables if the display suddenly comes loose.
I took the suction cup off of an old navigation Tom Tom and it worked great!
My battery needed replacement because the battery had swollen and was warping the glass. Looking at it from the side it looks like gasket that was partly sticking to glass and partly to the case. This is actually part of the glass frame and you need to make sure to separate it from the case not the glass. I did it wrong and ended up removing the glass but there was a metal case covering the inside. I eventually got the rest of the top off but now I'll have replace it all because I can't find a good way to glue the glass to plastic.
I initially had trouble, but focusing on the area of the faceplate right above the headphone jack worked for me. There's a slight divot that allows you to slip in the prying tool earlier than in other places around the faceplate. Once I got the prying tool in there, I was able to pop out the bottom, and then continue up the sides.
IMPORTANT TO NOTE: The top of the screen is attached to delicate cables inside the phone! Pull up carefully and keep a hand on the top of the screen so it doesn't pop up.
My iPhone 5 only had a weak battery. Now it has a cracked glass panel. Suction cup is strong - so strong the glass breaks before the suction cup lets go. Apparently some of the tolerances in Apple's design occasionally add up to make a front panel assembly that refuses to let go. Phone not worth repairing at this point as it only cost $190 refurbished to begin with. A note of warning - you might want to have this done by an experienced tech - go ahead and spend the $100 or so to have someone experience replace the battery and keep the rest of your phone intact.
The suction cup with the blue plastic handle that came with the kit did not work, but I still had the cup with the silver ring that came with an iPad repair kit and it worked nicely. Also, I found that the guitar style picks that came with the iPad kit worked best for getting the screen started.
I used a heavy duty iFixIt suction cup (used for repairing an old iMac) for the job. Worked like a charm.
-
-
-
Удерживая iPhone одной рукой, потяните вверх присоску, чтобы слегка отделить переднюю панель от задней части корпуса.
-
Пластиковым инструментом для открывания начните аккуратно оттягивать заднюю часть вниз, от экрана, одновременно вытягивая присоску вверх.
The suction cup didn't work, because of my destroyed front glass.
So i take "tesa powers trips".
With that help, i had enough force to pull up the front display from the rear case.
Suction cup didn't work for me. I tried for half hour with my nerd biceps. In the end, I inserted an xacto blade below the home button to create a gap big enough for me to put in a guitar pick and finally able to pry it open. In the process I scratched the frame so you have to be very careful if you decide to take this approach.
Where can you buy "Tesa Powerstrips?
The glass on my phone was completely destroyed, making the suction cup entirely useless. I was pretty close to giving up when i tried putting a strip of clear packing tape on the screen and squishing out all the bubbles. Put the suction cup on this and it worked perfectly.
Used a suction cup from my Garmin Navi. The one you use to stick it to your windshield. It has a nice plastic "handle" and made things a lot easier... almost too easy that I nearly pulled the screen off the cables. Go easy on this step.
I'd Advise Against The Suction Cup Here As It Will Separate The Glass From The Black/White Framing That You're Actually Supposed To Pry Under. I Found When Using The Suction Cup, The Glass Came Up, But The Framing Stayed Stuck. If You're Replacing The Entire Display It's Not As Much Of A Problem, But If You're Installing Any Other Part Or A Custom Housing, You'll Notice Your Screen Has A Bit Of "Play" When Pressing Down.
While holding down on the lower sides of the iPhone, I found inserting the plastic separator just to the right of the audio jack while gently applying pressure down and back from the edge popped the bottom of the display assembly up. Keep in mind to do this while pulling back on the suction cup ring, like the guide says constant, but gentle force at the same time. Another note is to have the suction cup ring vertical to align with the length of the display, that made the process much easier.
You rock! I was having trouble getting the thing to budge, but the moment I put the plastic tool near the audio jack, the screen immediately popped up.
Justin -
This should be in the guide. The front panel is actually recessed a bit here making it much easier to get a tool in at this point. No way I would have opened it without this tip. Thanks!
dave -
Thank you so much! This should DEFINITELY be added to the main guide.
After struggling for half an hour and nearly giving up, I was able to easily lift up the screen once I tried to wedge it near the headphone jack!
Thanks so much!
This was the key for me. Thank you so much for this tip :)
I was having a lot of trouble. Should be in the guide.!!
Coact -
Thank you very much, this worked for me!
I've been using a metal flat opening tool along with the suction cup to pop these bad boys open - remember the tape on the screen trick if you have a smashed screen - so the suction cup can grip and stops the glass going everywhere!
Definitely a difficult step. Make sure not to pry the screen from framing. Also, I kept pushing the power button on while attempting separate the frame. Keep your fingers clear from the top of the phone because having it turn on while the casing is popped is a little nerve racking!
I had trouble with this step too, since I had to apply quite a lot of force on the suction cup when pulling up on the screen while holding down on the frame with my fingernails. Eventually it popped free, but came almost to 90 degrees before I was able to stop it. No damage, but nerve-wracking, and if there was a better technique, it would be good to figure it out and share the information here.
Be very gentle! I overdid it and, though the repair was successful, there's now a bit of play when pressing on the top right quadrant of the screen.
When i was reassembling, the screen broke form the pressure. I recommend putting the screen towards your working surface and press your phone downwards. That way your screen is always straight.
Need extra careful while pulling the screen.
Once there is a gap between the screen and the frame, insert the plastic opening tools and move it around the screen. But don't use it for top area (near to power button) as there is a location for flexible ribbon cable.
Once the bottom part is free, the screen will pop out easily.
I had trouble opening the screen due to a warped suction cup that was bent up at one spot and also due to my cracked screen. My solution: used double sided tape between the suction cup and the glass. I had some command strips, but I think any double-sided tape could work.
The suction cup will hold if you put a piece of tape over the cracked screen.
BE VERY, VERY CAREFUL, HERE!!
-The repair went horribly wrong during this step, for me. I pulled-up on the suction cup, gradually increasing force. Instead of just opening a gap to get the plastic prying tool into, the whole thing gave way at once. This damaged the connection between the display assembly and the rest of the iPhone.
-During this step, I would recommend placing a rubber band around the phone, over the home button and one near the top of the iPhone for good measure. Even better, invest in the "iSclack". In my case, it would have saved me about fifty bucks and three days without a functional iPhone.
-When I reassembled, The screen was blank, but I could still sync with iTunes. I may have been able to replace only the cables, but I wasn't sure how extensive the damage was and I was done messing around with it. I replaced the whole display assembly, and now it works just fine.
-This was STILL cheaper than buying a new phone, and I learned a lot. Overall, it was a good experience.
my phones screen displays the dead battery sign and the plug below it sign too, when your phones battery is dead. Bought a new battery and charged overnight...... any ideas?
Was someone able to answer this question? I have the same issue
1. This is very difficult, you have to use much more strength than it appears and it's very easy to rip out the connector cords. Mine did not rip, thankfully.
2. Upon replacing the screen, I had to do this 3 times, I would not recommend putting the screws back in but turning on the phone and testing all screens before putting the panel back.
3. When I finally managed to ensure all displays were working, I was pushing the screen back in and cracked the glass just below the home button. This part is very sensitive as it is the thinnest portion of the glass so be careful and ensure you push from the top and go all the way around. I also had to do this twice because after cracking the glass on the first try, I also realised the top was not fully pushed back.
We highly recommend using the iSclack tool for opening the phone up. It simply pops it up with very little effort, and you won't risk damaging your screen or device.
I was in no mood to pay for the special tool and wait for it. Took the "right of headphone jack" suggestion and pushed down vertically at the edge of the frame with a "ice pick" sharp tool, " I had two of them. Who cares if you scratch the frame a little, I usually have my phone in a protective case anyhow. I kept working with this until the corner was up, and then the rest of the display was loose without any further work.
My phone is in pristine condition for a 5 year old phone, I have no cracks to speak of on the glass and the suction cup that ifixit sent me doesn't stick to the glass.
Holding the other side (top of the phone) down with another hand is extremely important. Plenty of people have damaged their screens by pulling the panel right off, ripping all the cables.
I made a series of gentle pulls and the front panel came up without problems. The opening started to appear next to the audio jack, as other people indicated. Then, I used the pry that came with the kit and the panel opened easily.
Upon reassembly, I cracked the glass at this step. The top of the screen seemed to have too play in it and on my phone—I suspect from right side brackets that may have been damaged already. Was nearly finished and applied too much pressure? to the top of the screen area to get it back into position. Snap!
I pulled and pulled on the suction cup with no results then read the comments! Ugh! Found a kiosk at the mall that will replace battery for $15. Should have saved the cost of tools. They were very pretty and well packaged though! Good fortune to all that succeeded.
This went easy. Place the opening tool in the seam near the earphone jack to pry as others have stated. Also, as insurance I wrapped a rubber band around the top end of the phone (covering the listening speaker and camera lens) so if the cover suddenly popped open when pulling the suction ring, (which it did!) the cover would not pop entirely off and damage the connector ribbon inside.
I used the suction cup that came with the replacement battery kit. It took me quite a while to get the screen loose, but ultimately it came open. They are not kidding when they said this device is tighter that most. I also use the iOpener to get the battery to let go. The iOpener worked like a charm.
-
-
-
Продолжайте отсоединять защёлки слева и справа от передней панели.
I didn’t see any side clips! Could they have fallen out previously because my screen was bulging out from the case? Or did I miss them somewhere? I managed to separate the front panel from the body, but there is yet another metallic looking panel on the body. The back of the panel still attached to the front part is mirror shiny on the back of that panel.
Hey Tom! Unfortunately you only separated part of the display panel, try to reseat the display and open it again, paying special attention to step 3 which shows you where you should be prying to get those clips on the metal rail out of the phone body.
The thin glass front panel has partially separated from the plastic frame along both sides. Should I try to put a small amount of adhesive to keep it from popping out? It was pushed out by an expanding battery!
-
-
-
Когда все защёлки снизу, слева и справа отсоединены, начните отделять нижнюю часть дисплейного модуля от нижней части корпуса телефона.
-
Осторожно расположите модуль примерно под углом 90 градусов к корпусу.
When reinserting the screen, be sure to start from the top and insert the plastic tabs on the screen into the case before advancing the rest of the screen into place, finishing at the bottom. The screen will snap into place once lined up to complete the insertion.
This is actually very important, I was having trouble getting the front panel to go on by starting at the top. I started from the bottom instead and the bottom ended up secure, but not the top. I then tried to take the front panel back off, but because the top portion was already loose the force required to pull off the bottom led to one of the ribbon cables at the top of phone breaking.
When reattaching the screen, please start from the top. BEFORE you try to push the bottom of the screen down and snap it in, use some pressure from the bottom edge to push the screen towards the top of the phone. I suggest that by the time you get to the middle of the phone (starting from the top), you do this. It will allow for getting the clips at the bottom by the sync cable clipped in and will sit nicely and allow for you to use overall pressure to make sure the whole screen is secured. I didn't do this and I damaged the seal on the right side of the phone and almost separated my screen from the digitizer trying to reseparate it to reattach the screen. Be very carefull to follow these steps I listed. If you do this while reattaching the screen, you'll have no problem.
I also agree with it being not necessary to remove the complete front panel. I just kept it attached and kept it at an angle as I pulled with gentle, continuous force (at a 45 degree angle as suggested) on the battery pull tab. It eventually came loose, I set the new battery in and everything works perfectly.
That's the way I did it too. I put a piece of packing tape from the screen, over the top of the phone, and onto the back. That kept me from putting any pressure on the ribbon cable should the phone slip and the whole screen try to lift away from the backing.
Be careful taking the front panel off. I tried to pull it very careful but it ripped. One of the cables was damaged but luckily, it was the cable that goes out with the old front panel. It also ripped 4.1 mm Phillips screw from step 13 and it jumped to the floor. I was lucky and recovered it from the floor.
In the end everything was fine and phone works great. But remember to be super careful.
Hello guys, I would like to first thank iFixit for these amazing repair guides they have always worked for me! Thank you!.
When reassembling the phone make sure to put the screen from top to bottom, but be aware there are 2 small flaps on the top left side of the screen (you can notice them using another iphone as a flashlight) if you don't put these 2 flaps first then you are going to have a little space between the top part of the screen and the aluminum frame, at least this happened to me and then I inspected the screen using a flashlight and then I found these 2 tiny flaps behind the screen near the top left corner.
I hope it helps!
Was it just me or did anyone else discover a ribbon cable (or something like it) on the bottom end of the phone (under the home button)? It kept me from opening the front panel more than 30 degrees or so, making the replacement impossible. Thoughts?
It looks like you might actually have an iPhone 5s, that is probably the Touch ID cable, check out the iPhone 5s Display Assembly replacement here!
Thank you, Sam!
What the heck only the top part of the lcd came off, NOT together with the shield plate. I used the stupid islack opener but only the very top layer came up. I don't see the battery or anything underneath because the shield plate is still in there. I can't even put it back closed and resuction it open because the shield plate is solidly stuck in and there is a cable at the top not settling properly. I have an open lcd top part of this phone. IDK man, PLEASE ADVISE.
Hi Gabrielle, sorry you're having trouble! This frame step was meant to show you how to avoid that issue, however, you should be able to use it to pry up the frame and shield plate. You'll need to carefully pry the frame itself up. Insert a thin prying tool between the black or white plastic display frame, and the metal phone case, to lift the frame assembly out of the phone body. If you continue to have trouble, try posting a question in our forum for faster feedback!
Hello, I've changed the earphone piece on my iPhone5 following this guide but I've skipped from step 9 directly to step 17 without problem, just shutting down first. Once opened I've tied the iPhone's body vertically to a small box with an elastic ring, the display assembly resting horizontal at some 90 degrees allows enough place to unscrew and replace the earpiece.
So easy! My biggest problem is my eyesight. LOL! Had to wear glasses and use a magnifying glass. Battery took about 20 minutes. Re-installing the cover for the screen ribbons was the toughest for me. If you cant see...have someone hold the screen while you gently wrestle the screws, while holding the plate, back in.
Worth adding to the main tutorial that the screen re-install must start from the top.
I found the suction cup to be very effective in removing the front glass. Didn't take that much force to start to see the glass separate from the frame. It's a lot easier if you have a fingernail you can insert when you start to see the glass separate from the frame so that you can let go of the suction cup ring and grab a spudger to pry down one side and then the other.
Add a rubber band in the picture as mentioned, I couldn’t figure out how it should be positioned, also put in instructions that front panel does not have to be disconnected as I agrree with some of the other comments it is difficult to reattach the plate, although it may be a lot easier to pry the battery out without messing with the vertical top. Otherwise, great instructions, thanks Ifixit,new iPhone battery is wonderful. Bil - 1/16/2018
The rubber band and soda can idea for holding the display in place at the proper position as depicted works great!
-
-
-
Удалите следующие винты, крепящие шлейф модуля к плате:
-
Два винта 1,2 мм Phillips (крестовые)
-
Один винт 1,6 мм Phillips (крестовой)
Anyone have any idea why the 1.6mm screw is not magnetic? Just wondering why this screw seems to be made of aluminum, its the first screw of its kind as far as iphones go.
The compass is right next to it.
Tom Chai -
I'd recommend if they made that clearer in the guide, luckily I put them back in right, its the one with the little bit of blue on it if i recall that isn't magnetic
Matt -
is it necessary to disconnect the front panel assembly cables fore removing the battery ?
or can you leave it on wile replacing the battery ?
I just finished this process using the battery replacement kit from ifixit and it went easily. I did NOT remove the entire screen but rather just had someone hold it at less than a 90 degree angle until I got the battery out. I found it took a while to slowly pry the battery out. Take your time and alternate between gently using the plastic tool and pulling on the plastic pull tab that says "for authorized use only" or something like that. It was MUCH easier than disconnecting the entire screen for the process. Hope this helps.
david -
Rule #1 on electronics repair methodology: to prevent damage to the electronics, power should be the first thing to be removed and the last to be restored. I'd disconnect the battery before touching anything else, a slip of the screwdriver or a loose screw could cause a fatal short circuit.
Mon téléphone a pris l'humidité et présente un fond d'écran d'aspect granuleux. Du coup l'éclairage n'est plus uniforme, nuisible pour une bonne lecture de l'écran.
J'ai démonté l'écran, une pellicule grasse et collante entre le LCD et la plaque métallique. J'ai nettoyé à l'alcool. Tout remonter avec la crainte que le téléphone ne fonctionne plus.
Le téléphone s'est rallumé, tout fonctionne normalement mais j'ai toujours ses traces sur le fond d'écran. Il faut le changer!
Mes difficultés étaient de remettre les petites vis aimantés, difficiles à remettre!
Merci à IFIXIT pour ce tutoriel très explicite.
Patrick Rosa, june 23 2014
So, of COURSE I dropped the screw that you are not supposed to lose. I was being careful, but as I did not want to lose track of it, I attempted to put it back ing the phone FIRST. Bad idea. This makes the plate kind of springy, and my screwdirver slipped, and the screw popped up, spun in the air, fell between my legs, bounced off my padded chair, and clattered around on the floor. I searched for an hour, and could not locate it. BE IT KNOWN, at least in MY CASE, the screw WAS INDEED attracted to my magnet (I keep a powerful round magnet stuck to the shaft of my drivers to provite the magnetism, far more powerful than a regular magnetic screwdriver. This being the case, I WAS able to provide a substitute fron a bag of iphone 4 screws, and my compass calibrated flawlessly upon power-up. YOUR MILEAGE MAY VARY, but I thought I'd add my experience.
Be warned, the 1.6mm screw is exceptionally easy to strip. I haven't been able to get it out yet (already tried rubber band trick and a few others) and am on the verge of giving up. The #00 screwdriver that comes with the set did not do a very good job of catching.
Were you ever able to get it out? Mine seemed stripped from the get go, rendering my attempt to troubleshoot my blank screen fruitless. Rubber band, glue, flat-head all did not work for me. Buying a soldering iron tomorrow to try that.
I did the repair without disconnecting the screen. I skipped down to step 13 and carefully held the screen while removing the battery. Adds a small element difficulty, but helps prevent all the issues others are having when reconnecting the screen.
The non-magnetized screw was very difficult to install. This is how I ultimately succeeded:
Install the two magnetized screws first. They are easy because the magnetized screws will stick to then end of the screwdriver. They will hold the cable bracket in place.
Place the third, non-magnetized, screw on the center of the cable bracket. Take a toothpick and nudge the screw toward the screw hole. The threaded part of the screw (the shaft) has enough weight that it will fall into the hole, and the head of the screw will be pointed upward. You will then be able to use the screwdriver.
Put a piece of tape on the table sticky side up. Set the screw on the tape head down. lift the tape and guide the screw in place. drive the head of your screw driver through the tape and tighten screw. lift off tape. throw away. :)
rdgentry -
The tape trick works well. Another way is to dip the screwdriver in alcohol (isopropanol, do NOT use water) and put the screw on its tip. It will be held there until the liquid is evaporated, which should be sufficient to put it in place.
Kater_S -
One of the screw is completely stuck and I cannot remove it! What can I do?
When putting it back together, I replugged in all three of the ribbon cables and powered on the phone to test before putting everything back together. All was OK except for the Home button, it had no effect when pressed. I ended up unplugging and replugging the 3 ribbon cables a few times and retrying. I then cleaned the connectors using a can of compressed air, screwed the little silver cover back on and snapped the whole phone back together, hoping everything would be fine. It was. I don't know if the problem was a dirty connector, or if you need to close the phone to make the home button work again.
I recommend wiping the plastic prying tool after lifting the screen off, it gets dirty from the gunk build up and some of that could eventually fall inside the phone.
My battery was really stuck, so much that the plastic tab broke when pulling. I followed someones advice to heat the back of the phone with a hair dryer, still wasn't super easy but I managed to get the battery out, only deforming it slightly.
The contacts for the home button are on the phone base so the screen needs to be in place for the button to work..
Step 9-12 are totally unnecessary unless you need to replace a broken screen. All you need is to keep the front panel in a vertical position once the front is open. The battery can be removed without taken out the 3 connectors which by the way the screws are very very tiny and difficult to put back.
I completely agree. These are unnecessary steps. Might be a little easier to pry the battery out with the display completely off, but not enough to make it worthwhile IMHO.
Is the 1.2mm a #000 or #0000? I have a small set and can't get one of these out. The instructions say a 1.2mm, the tools list shows #000, but my set says #000 = 1.5mm.
1.2 mm refers to the length of the screw (from head to end), the screw head size is compatible with a Phillips #000 driver. So as long as you have a #000 you should be set! Good luck =)
frustrated...screws to battery holder is stripped, now what?
Maybe a small amount of loctite. I noticed the P2 screws holding the display down had a small amount on my iPhone 5.
Como se ha comentado más arriba, no es necesario desmontar la pantalla, yo he sustituido la batería aplicando calor con el iOpener y siguiendo atentamente la guía. Resultado óptimo.
Yes, right! I, too, do not see the need to remove the LCD display at all; except, when one is replacing a broken display. The battery is ready for replacement once you had removed its bracket.
I found that it wasn't at all necessary to remove the front glass. I did need to use a hair dryer to soften the glue holding the battery, but I simply laid the phone down on the face glass and blew the hot dryer on the back for a couple of minutes at almost point blank range. Then I simply held the phone open with one hand, making sure the front glass never went back more than about 80 degrees (no need to stretch it all the way to 90 degrees), and used my other hand to work the spudger around the battery, making sure not to touch any delicate electronics in the area. The top right corner gave away first and then I worked it down from there and the battery came out pretty easily. The trick is to use the hair dryer for a few minutes beyond the phone being too hot to hold in your hand! (you might need to use a towel to pick it up when you pry the battery out.)
The battery of my 2012 iPhone 5 was working well but started to inflate pushing the front panel assembly out from the case. Replacing is faster and easier than on iPhone 5s. No need to remove the front panel completely, just holdig it at near 90º is enough but needed to warm the case to soften the battery glue. Thanks to iFixit for this guides and you guys for your comments.
As other people already indicated, steps 13 to 16 are not needed and risky. I asked another person to hold the front panel at 70 degrees while changing the battery.
I rushed in and did steps 13 to 16 without reading the warning. There were some unexpected events that happen. The short version of this story is my screen comes up with funny looking grey squares but phone is still usable. I don’t care as my main phone is an iPhone SE and I bought the battery as a learning exercise. Plus iOS 11 doesn’t install on an iPhone 5 so it’s days are numbered as a productivity tool.
Long version. Dissemble was easy. I made sure I had used the phone so the battery was warmed up . First problem with reassembly is in step 13 the bottom most 1.2mm wasn’t biting and screwing in. So it looked like the top of the hole got threaded. Also a screw fell out of what I think is the loud speaker. That was unexpected. This iPhone 5 isn’t my original, it was a replacement phone that came in a white phone that the Apple Store gave me when my original phone from 2012 had 2 recalls on it. So I strongly suspect this is a factory refurbished phone and not 100% mint off the line.
I found I didn’t need to remove the front panel at all so I skipped this step 13 through step 16. These steps seem to add potential problems.
-
-
-
Отключите коннектор шлейфа дисплейного модуля от платы.
My iPhone 5 (1428) model don't has this bracket and replacing the earpiece don't fix my problem (don't hear anyone).
You might check that front camera flex cable.there can be a damage also where war speaker connects
Remember to put this plate back such that it's sitting evenly. The side towards the battery some times tends to stick up a bit, this in turn will put pressure on the backplate of the screen. After putting everything back together, you see a small yellow smear just to the left of the battery % indicator, you have not put that plate on correctly. Open up the phone, remove that retention plate and put it back such that it sits properly!
Opened my iPhone 5 etc. When reassembling, I notice the screen doesn't stay clipped into the back tray and is raised a couple of mils.
There is also a new brighter spot on the screen. Any ideas anyone?
I really wonder about the wisdom, and risk, of removing this upper plate in step 14 - unless I missed it, those three cables are NOT connected to the battery in anyway - and the chances for stuffing up said cables re-assembly are moderate to high! I can see that one would have to be careful taking that bracket and disconnecting those three cables ( I certainly was), but it looks to me like there's a case for just undoing the battery bracket & screws and carefully - very carefully - with great patience and some good spudgers, esp the black ones we use in desktop iMacs, - flat one end; pointy the other - plus the usual blue plastic ones and even a guitar pick - prying the battery out from its hideyhole! Much less stress regarding the upper bracket and the three cables while only a bit more stress over releasing the battery from its sticky grip! Anywho, I might have to stand corrected - but next time I'll go for this abreviated method. :)
please do not do this part....after you remove the bracket over the battery don't mess with the 3 cables at the top or remove its bracket. Just carefully remove the battery and insert the new one. the idea of using the rubber band helped a lot with the entire procedure and i did it in one very easily. thank you ifixit and most importantly the comments. Make sure to read all the comments before doing each step even when you r reassembling.
I confirm the previous post! It’s the third times I change the battery and I just realize this time that it’s completely useless to remove the front panel. You just have to be careful if it’s your first battery change because the original one is strongly sticked on the board. Don’t be brutal! Proceed slowly.
I think that lots of problem may occur when you reassemble the front panel cables. So just don’t disconnect them !
Ifixit is great. The comments are usefull too.
I also made the mistake of trying to remove the cable bracket. Once again I had to resort to another screwdriver since the included 000 in the battery kit did not work on these. But once I got the three screws removed I noticed the bracket’s top corner (near the top of the unit) was stuck even when I properly pulled the bracket back to unhook the lip from the logic board. I tried pulling it free every which way but nothing seemed to work so that’s when I checked the comments here and realized I shouldn’t have even bothered trying to remove it.
-
-
-
Используйте пластиковый инструмент, чтобы отключить три шлейфа передней панели:
-
Шлейф фронтальной камеры и сенсора
-
Шлейф дисплея
-
Шлейф цифрового преобразователя
The part itfixit sent only has two cables: the digitizer and LCD are combined into a single cable. (And the guide is great! Thanks!)
After replacing the screen I was presented with a no image screen (but backlight was ok), so I refited the shartered one, same issue, no image, but backlight. thinking I might damage the pcb, I just did a power cycle (disconnecting the battery) and now it's fine.
so... always powercycle :)
Be very careful here, at this point the phone power is live! a slip of the connectors or a loose screw could let the magic smoke out of the chips (chips won't work without their magic smoke, you know :-)
I'd disconnect the battery before messing with the connectors.
This is a troublesome step, since the LCD connector is particularly difficult to reconnect, and know that you've gotten it on. And thanks to the note claiming that if it's disconnected, if you might just get a black screen, you're left with having to disassemble the entire unit again, without knowing if it's powered off (since you presumably tried to power on). That's also nerve-wracking. I had this problem and disassembled and reassembled the entire phone, only to have the problem again. On the second try, I plugged the phone into power, and after a little bit, got the dead battery screen showing. So the problem was that the battery was discharged, not that I'd biffed the LCD connector.
A tip for knowing when your device is powered:
Activate VoiceOver before you start. this can give you audio clues with the volume control.I did not do it on purpose, but it saved me, because I got the black screen.
I also had to re-insert the display cable for like 3 to 4 times until it worked for me.(Note: Check if the display port cover is hinged on the battery side, otherwise there will be room for the connectors to come loose.)
The hint to disconnect the battery was very useful for my successful repair. After rebooting the phone everything was working just fine. Thanks!
BE CAREFUL HERE.
Take a good look at that camera loosely sitting there. It is possible that it will be slightly offset when shutting the assembly back into place. This causes it to not properly focus on closeups. If you don't move it around you will probably be okay.
Also, look at the display assembly, it has three small locking tabs that can bend easily if not pushed in at the right angle into the iPhone frame. Be careful not to be too forceful. Good luck.
I am having issues removing the white lines on my screen. I made sure to connect the digitiizer connector was seated all the way and I also power cycled my phone several times. Anyone else having this issue?
If your lcd is properly fine then it can be a LCD Ic issue on pcb
When I was reassembling this the front facing camera cable was a bit longer than the previous one. I had to kink the ribbon cable a bit to get the connection to line up. Everything seems to be working but I wanted to note that the part might be slightly off spec.
I am very satisfied with the replacement display assembly (including FaceTime camera and Home button) iFixit sent. It arrived a day early, fit perfectly, and has fixed the color banding, cracked screen, and scratched edges very well. In addition, the home button now has a much crisper "click" to it, more like the new MacBook's keys vs those of an older MacBook Pro.
This step is not needed to remove the battery and complicates the process by having to reconnect the sensors.
if my lcd metal plate is scratched can i replace it to remove the lines or do i need a new lcd
When I started the phone again, there was a grid pattern and touch was not working consistently. It turns out there were two separate problems. (1) We had over-handled the cables and a quick swab of alcohol helped remove the oil from the connections. (2) The first connection is really tricky to get right and comes undone easily during the final reassembly.
I had this problem too (not the oil though). When I first restarted the phone, I had white crosses over the display, and the digitiser didn't work. The only way to shut down the phone was to hold the home key & power key for 8 seconds until the display went black. Reseating the LCD & Digitiser connectors, and power cycling by reconnecting the battery fixed the problem. Hope this info helps others.
In the image you can see the camera has lifted out a bit. Mine did this too, because the old screen had levered it out. To push the camera back into position you need to insert a fine tool behind a small metal spring contact because it catches on the camera's casing otherwise. This little spring is to the left of the metal case, between the camera and ribbon.
So I keep getting the "white lines on the LCD" bit with no resolution. I've tried reconnecting the connector like 6 times and power cycling and I get the exact same thing every time? Is it possible that the replacement screen has an issue?
Watch the soft pad between the rear camera enclosing and the top side of the frame, especially when reassembling. After replacing the battery, my camera pictures gradually showed lots of dust spots. I opened the device again and discovered that the pad had been displaced. However, I am not fully sure if that is the reason for the spots.
On reinstall, I can't get the connectors to line up and the replacement screen has 3 connectors where as my busted screen had only 2. The cables on the replacement screen are too short? Is that even possible?
I’d say removing the screen is BS. I realized that I didn’t have to remove my screen cable as I was able to flip the screen vertically while I take the battery out. Removing the screen cables causes more problems- you may end up with white squares on the top of the screen which seem to expand over time. Also it is very easy to bend little metal legs on the socket when prying the connector.
totally agree, no need to remove the screen. It means you will have to do everything with only one hand (the other one is holding the screen), but you skip so many steps that overall it’s well worth it.
It is very important to make sure the cables are fully seated. When I finish assembling the phone I too had a vertical white stripe on the display. I disassembled the phone and reconnected the cables very carefully, and also made sure the shield was properly seated. When I turned the phone back on I found a very faint white line, but after doing a power cycle it disappeared to my great relief. Also, I would definitely recommend removing the display because it’s so hard to get the battery out you don’t need the extra risk of damaging the display.
After replacing a friend’s iPhone 5’s rear camera and reassembling their phone the screen displays verticle black lines on the right side now like this: http://i1091.photobucket.com/albums/i393...
Anyone else have this problem? I didn’t think about cleaning the display connectors with alcohol at the time.
Also, when the battery was too low and before the display produced vertical lines the display showed half of a low battery symbol:
http://i1091.photobucket.com/albums/i393...
Like the right side of the display was blank.
On reinstalling the front panel assembly, I had a difficult time lining up the digitizer cable. After struggling with it for a while, I noticed that the plastic shoulders of the small mounting bracket at the ends of the pins had become rounded over. After cleaning these up with a razor blade, everything slid together perfectly. Thanks so much for these guides and all the helpful comments!
I have done all these operations 6 times to get back a good displaying. The last was the last: nothing on the screen now. It is now black, no sound, no vibration, BUT the iPhone show up in iTunes O.O
iTunes asked me to update the iOS to 10.3.3 but it’s already done. I clicked OK but nothing more. Still black and quiet.
The new battery is 100% charged.
What is my problem, please help :-(
I found the part who was deffective: the connector of the screen has broken due to too much movements. :-( Screen is perfect and clean but dead.
-
-
-
Снимите переднюю панель.
My display was not turning on and my home button was not working (I verified this by trying to activate siri which didn't work). When I replaced the display assembly everything works except for the home button. Since this assembly comes with the button and the ribbon cable, I'm not sure what else can be wrong. I checked the contacts on the phone and I see the little copper 'pins' sticking out. I can't tell if they are making contact since the display has to be closed, but it appears they are lined up correctly. Does anyone have any suggestions or ways to test the contact pins? Could the home button on my replacement be defective? I've already emailed support, but just curious if anyone has any suggestions I could try while waiting to hear back from them. Thanks! By the way, SUPER grateful the rest of the display works. I can now back up my phone and can probably deal with a broken home button if I need to. Woohoo!
I'm having issues where the screen jumps around when you get a finger near it. I'm reading it might be grounding but no idea where any tape could be applied. Replaced the screen twice thinking it was a bad part. Now, I just don't know.
My front camera does not work. I took apart and ensured the connection several, several , several times.... no front camera... anyone else have this issue?
Try replacing the camera and flex assembly.
Greg M -
-
-
-
-
Удалите два винта, фиксирующих металлический держатель коннектора батареи на материнской плате:
-
Один крестовой 1,8 мм (Philips)
-
Один крестовой 1,6 мм (Philips)
-
-
-
Используя пластиковую лопатку, аккуратно приподнимите коннектор батареи от его разъёма на материнской плате.
-
Будьте очень осторожны, поднимайте только коннектор батареи, но не разъём. Если вы поднимете разъём материнской платы, это повлечёт за собой поломку.
-
-
Just wanted to add to these comments, the clear plastic tab (says Authorized Service Provider Only on it) is the way to go. The plastic for this tab goes under the battery and around and through the adhesive, if you pull it at a 45° angle the battery comes off without the need to pry on it at all. You will want to pull with a constant force, as the adhesive is very strong, but it starts fairly easily, and comes up evenly-- you'll be able to see the glue releasing as you pull.
Depending on exactly where your battery is glued, you will (or you won't) have enough room for the plastic opening tool. I didn't and had to leverage off the other side. Unlike the front cover which required surprisingly little force to remove it (almost ripped the flex cords joining the front and the back), the battery required superhuman strength to remove, destroying the two spodgers (parts yet to be found they flew off with such force) and deforming the battery (which personally I would have no use for reusing in any case).
Reading other comments of how applying too much force caused breaking of components I was too timid and the battery removal process was very time consuming. I recommend watching the video in the battery replacement guide. I was able to see how much force was being applied to remove the battery. I found that the opposite end of the plastic removal tool was bitting into my hand, which was more sensitive to the required pressure than that applied to the components. The adhesive was quite strong and I used the point end of a spudger to gradually pry up the battery where it was most stuck at the bottom right. As useful as the comment about using the plastic tab was, mine was slightly cut by the edge of a flat cable, it split and the tab came off, making prying the battery necessary. Being mindful of the balance of force is what makes the removal successful.
I can confirm with con (mar 4). The adhesive was pretty firmly holding my battery down. So I used a metal screwdriver to help leverage the battery out from the top of the battery. Not knowing that the ribbon for the volume button and switch from the left side of the phone were under there. I severed the ribbon and now those buttons don't work anymore. But I was able to replace the battery and everything else works fine. I just have to learn how to live without those buttons anymore...
*My plastic tag ripped while trying to pull the battery out.
*I then used a spudger type tool to GENTLY pry the battery out from the LEFT side of the case in the middle of the battery.
*Turns out all the adhesive is on the plastic tab side underneath the battery, so it is MUCH easier to leverage the battery out that way without causing damage. There is nothing you can really hurt on the left middle side either so I recommend this way if your plastic tab does not work to pull the battery up.
I couldn't pull the battery out after pulling on that tab for over 10 minutes. I used a knife on the left side where it seemed nothing was and luckily the battery slid right out no problem.
The battery was really glued down tight, and pulling the plastic tab eventually ripped the tab off and I could no longer use it. After 15 minutes of gently lifting with the plastic opening tool and getting nowhere, I followed the suggestion about using a hair dryer to soften the glue. I blew heat on the back of the phone where the battery is for about 30 seconds, and then used the plastic tool on the side of the phone with the volume buttons, and it lifted out with very little resistance.
I want to stress that it was not a ton of heat--I held the phone in my hand while using the hair dryer, and it was hot on my hand but never so hot that it burned me. The point isn't to cook the phone, just to warm up the glue so it gives a little.
Prying from the volume side will also reduce the chance that you dislodge the GPS connector.
Well, the battery was really giving me problems when trying to remove it. I had no chance just using the plastic tag so I had to pry it loose. I would not recommend prying the upper side of the battery as shown in the pictures due to the audio control and power button cable running just under the upper edge of the battery. I was not aware of this cable and ended up damaging it when the plastic removal tool slipped under the cable when prying. I believe this cable supplies power to the vibrator as well since that's what ended up not working when everything was back in its place. Fortunately this cable can be replaced but it looks like a bit of a hassle but i'll try. Try using the hair dryer before prying too much would be my recommendation.
I put a bowl of water in the microwave with a plate on top. Once the plate was mildly hot, I took it out and placed my iphone on it to heat up the adhesive. I tried pulling the plastic tab, but nothing would happen. I noticed that there is an ideal prying point on the opposite side of the battery from the plastic tab (an inch below the volume buttons). There are no ribbon cables or circuits there, and there is a cutout large enough to fit the plastic pry tool. Pry gently there against the case (once the phone is warmed up on the plate) and the battery comes out very easily. It really seems like that cutout is there just for that reason.
Wish I'd read your comment before I did this step! :-)
It would have been helpful if the notes for step 16 (prying out the battery) had mentioned that the Audio Control and Power Button Cable is fragile and behind the top of the battery! I was gently prying out my battery from the top when I tore the power button ribbon that I could not see.
This step is the toughest one. My old battery glued on the board stubbornly and refuses to come out. It took me half hour or so to pry it out. It has deformed and way beyond usable state. The key here is to pry from all allowed angles (refer to the pictures and video), and pry patiently. Mine starts to come out after prying from the top.
When prying the battery off at the first battery position shown in the picture (the gap between battery socket the battery itself), a small rounded metal spudger (like the one that comes with the iFixit Pro Tech Toolkit) is recommended if you break your plastic prying tool (like happens to me) during this step. Just make sure that when prying up, you are not touching either the battery socket nor any other logic board component.
I also recommend to use a tool like the iOpener and put it on top of the battery for few minutes to reheat the battery and soften the battery adhesive during this step.
I just wanted to mention that the battery can be VERY DIFFICULT to pull out. I used the plastic tab, but it broke off. I was forced to pry it out, but like I said, it didn't come out easily and the battery was all mangled by the time I pulled it free from the adhesive. This guide tells you where to pull and where to be careful, but it still made me very nervous! Just keep working at it if yours is also stubborn.
I would suggest using both the clear tab and the plastic opening tool simultaneously to be able to remove the battery.
Easy does it on this step. The adhesive is very strong. I though my battery wasn't going to come out. But even prying from all three indicated locations does it eventually.
I was able to remove the battery after applying the iOpener twice for about 10 minutes. I pulled at the plastic tab and used the plastic opening toll together. The battery lifted while applying permanent strong force.
How about using a suction cup on the battery, along with a pry tool?
I followed this advice above: “ I noticed that there is an ideal prying point on the opposite side of the battery from the plastic tab (an inch below the volume buttons)”. Worked really well. I did not have to use any other prying point. The battery was fixed with one drop of glues and with tape sticky on both sides.
Well, I looked at a different video which showed the battery removal after lifting the battery cable. So I used the pry tool at the battery cable to forcefully lift the battery. After that I happened to look at this site and saw that what I did was not a good idea. I don’t see any damage so will order a battery and insert. Luckily, this is not my current phone. I am only going to use it like an ipod (if it works).
-
-
Удалите батарею.
Hello from Cyprus there ...i have a problem when i open my iphone white lines appear on the screen so i disconnected the battery and then connect it again and the screen got black i mean black 'light ' no image appear at anyway ... Anyway i listen the sound when the phone open or change ... Any help to get reed of it?
That’s a backlight ic issue in pcb.you have to change it
I can't recommend changing the battery, I did everything as shown but my iPhone doesn't work anymore. If I connect it to itunes it wants it to restore and when I do that. It sets itself back in recovery mode. I did not break anything and used only plastic tools to remove the parts. Even after I put the old battery back in it still shows the "connect to iTunes"
Does anyone have an idea what to do?
Have the same problem... Have you found any solutions?
Hi, I thought that when I prised the battery out, I'd knocked 2 chips off the logic board, chances are this is what's happened to you too... They need to change this tutorial to use the plastic tab to remove the battery as I've seen several people with this issue. The only way to fix this is to get 2 jumpers soldered onto the logic board. For now, I used tinyumbrella to get it out of recovery mode & I have enable to assistive touch options.
Any luck finding a solution to this? I replaced my battery and the repair went relatively smoothly... but now it's stuck in an endless loop trying to restore the firmware. Any advice would be greatly appreciated.
Quick tip: Don't completely peel away the plastic from the base of the phone. The plastic has a mechanical (but not electrical) purpose and should not be removed. The step directions make it seem that you can peel away the plastic, but don't do that. Peel and pry the battery out but leave the plastic in place. I made this mistake and Apple wouldn't repair my iPhone because the plastic was missing. The guy said that the plastic holds the circuitry in place and away from the battery. Do not remove the plastic.
My iphone 5 keeps switching from vibrate to ring randomly on its own. Do you think this would solve the problem"
Well, I followed all the instructions...took some time/muscle to get both the cover off and the battery out. I followed all the instructions and when I put it back together, all I get are white lines on the screen. shoulda paid the extra $50 for apple to do the battery replacement.
TO ANYONE HAVING GPS ISSUES
After replacing my battery on iPhone 5, my GPS was shotty and couldn't pinpoint my exact location. Opened it back up and realized that that longer thiner cable running the length of the battery on the circuit board side wasn't clipped in its spot. WORKS LIKE A CHARM NOW!
Be careful to make sure your replacement battery gets put in the case seated at the bottom, if not when you close up the front facing camera will be on the battery and if you force it (not realizing) you will damage the front camera
Hi Mike Hebert. Thanks for the suggestion. I went ahead and added a warning on step 16.
BLACK SCREEN AFTER INSTALL ISSUE:
The first time I put the phone back together, I turned it on but had a black screen. I took it back apart and put it back together again, same thing. I thought that I must had torn something but kept tinkering with it. I discovered that some of the foam adhesive strip that goes on top of one of the wiring harnesses that snaps the screen back to the phone had come off and was actually on the receiving side of the wiring connector bracket (probably not using proper terms here). I used the plastic tool that came with the kit and removed it (I was careful not to touch with my fingers for fear or oil getting on the harness). Tried again still nothing.. thankfully I did not give up as it turns out that connector on the far right of the screen connection harness is tricky. I thought I had heard it click before, but I really looked at this time and realized I had to turn it slightly inward to get it perfectly straight, and then it clicked. Success! Hope this helps someone.
hi,
I have done everything correct, but I have 2 problems, the power button and the home button is not working anymore. Can somebody help. Thanks
have u fixed maine also not working stuck in recovery mode and home power button not working
blero -
I have the same problem. I need help
The recovery mode problem as ive found so far is unfixable apple geeks said its toast as well as att. Ive tryed redsn0w and tinyumbrella to kick it out of recovery mode and it does but restarts right back into it. Itunes fails to update or restore. This is a significant risk to be sure, i had no problems changing the battery no clips broken no unnecessary prying and its well powered brick now.on the plus side im gonna leave it plugged in cause im hoping the added power drain will end the zombie apoc sooner.
knave3b -
I thought I'd done something wrong because my phone would not turn on.... even after a few hours. I finally charged it overnight and then did a hard restart (holding the power button and home button at the same time) and it worked! I have no experience doing this sort of thing and it was a little intimidating, but the video really helped, and it was manageable... not easy, but if you have the motivation and steady hands you should be able to pull it off.
I thought I did everything correctly but my phone didn't power on as I thought it should. I went back and double checked that everything was connected correctly (which I hope it is and I didn't damage anything in the process) I figure maybe the battery has to charge but usually once it plugs in after a few minutes it shows that its charging and in this case it is not charging. Also, I received a liberation kit with a small piece on it. Can you tell what this is for?
This is hard. Tab broke pretty easy and a hair dryer did nothing. I put a plat in the microwave with a large bowl of water under it. Heated it till I could barely touch it and then laid the phone on it. Make sure the plate is big enough for the whole back of the phone to touch it. Leave it on a few minutes and the phone should get pretty hot but still touchable. I GENTLY pried at the top and on the outside edge and it came out fine. Patience is a huge virtue on this step.
I can't get the new battery connector to snap into the port. This doesn't seem to be mentioned as a problem step for other people. Any hints?
oops, figured it out, battery was for 5s, not 5
Have followed all instructions and was careful and I think everything is intact but on trying to charge am not getting anything. Will try leaving it plugged in to charge overnight as per someone's suggestion above. But if anyone has any other suggestions as to things to look out for / check if I can put right on reopening then these would be much appreciated!
When reinstalling the cover, ensure the top edge of the cover is first pressed up towards the top edge of the body at about a 10-15 degree angle before pressing down on the cover to ensure the whole cover snaps in place properly.
I want my money back this isn’t a scam it does not work I have repaired multiple phones in my live and I haven’t see a battery part as disgraceful as this one. I demand a refund
-
-
-
Используйте диэлектрическую лопатку, чтобы подцепить коннектор сотовой антенны от материнской платы (рядом с динамиком).
REMOVING THE LOGIC BOARD ASSEMBLY IS COMPLETELY UNNECCESSARY FOR THIS REPAIR!!!! The dock connector flex cable can be slid under the board wihtout removing it. I just did it myself without a problem.
Stages 16-27 need to be removed from this guide!!!
Actually, you can skip 16-19 and 23-27 -- I found the others to be necessary.
I also think you can probably skip removing the battery altogether - I removed it just to be safe, but do not think it was necessary. That said, removing the battery gave me more room to work with (or seemed to, at least).
Absolutely true. For replacing the dock connector, there is no need to remove the logic board! Just skip the corresponding steps. Removing the battery or disconnecting the display is (strictly speaking) not necessary either. However, I would strongly recommend to do so for convenience.
This tear down and these comments were my lesson to read ahead here. My phone has been in pieces because I do not have the finger to get the antenna cable back on. REALLY wish I would have seen these comments and skipped these steps.
These comments concerning the dock connector and/or speaker should be removed. That’s not what this guide is about! Misleading and confusing.
-
-
-
Удалите два винта, фиксирующих крепёж верхней части материнской платы на задней крышке:
-
Один крестовой 1,5 мм (Phillips)
-
Один крестовой 2,3 мм (Phillips)
-
-
-
Удалите крепёж с верхней части материнской платы.
Retirar esta platina, es un trabajo fácil, pero la platina queda adherida a la rear cam, se debe retirar con cuidado de la camara, pues tiene un patica que se acopla de forma mecánica a la camara.
Se debe retirar con cuidado , para luego utilizar la misma platina en la nueva camara de reemplazo.
De toda la guía en nuestro caso , este fue el paso mas engorroso.
Superado esto todo fué normal.
Nota: Perdimos 2 tornillos de esta guía:
Un tornillo de la platina en el paso 17
Otro tornillo en el paso 10, el tornillo central que asegura las 2 platinas .
Gracias,
Gonzalo
Je fajn, ze tu pises vo svojej reci, tak isto ako ja. Rozumiet ti bude presne tolko ludi co mne, tak nabuduce tu pis v anglictine a neotravuj ostatnych svojou domorodou skomoleninou.
My phone had the bracket attached to the camera and snapped off. When I put everything back together my bottom mic stopped working. Could this top logic board bracket not being attached anymore cause this?
What if I broke the tiny grounding tab next to the rear camera that he warns against? Is it possible to find this replacement part?
-
-
-
Используйте диэлектрическую лопатку для отключения трёх шлейфов от материнской платы:
-
Верхний соединительный шлейф
-
Шлейф клавиатуры
-
Нижний соединительный шлейф
This is important and left out.
First Connector - Lift from the top of the phone to the bottom.
Second Connector - From the top right corner of the connector lift straight up. It will go to the left.
Third Connector - Hold the second cable back and again lift from the top right corner of the connector and it will go to the left.
Despite being VERY careful I managed to split the upper connector head from the cable. Strangely, after reassembling the device I cannot find any malfunction. I wonder what the connector is for…
Exact same thing happened to me. Tested every function of the phone and nothing seems broken.
-
-
-
Удалите два крестовых винта 1,3 мм (Phillips) внизу внутренней стороны корпуса.
I had to remove the battery to get the correct angle for these screws.
Yes you have to remove battery first otherwise it may cause a short circuit sometimes.so that phone can be dead also
What is this used for ? I broke the one at the left (because the screw was impossible to remove...) but my phone seems to work fine after reassembled :o
That is gps antenna
I was unable to remove the screw on the left. Consequently, I ended up tearing the cable right where it is attached to the left screw, but as far as I can tell, everything on my iPhone is working properly.
Turns out this is the GPS antenna.
Whey did we take these screws out? Removal doesn't seem a pre-requisite for any other steps. In trying to put the phone back together, I can't get these screws back in - they don't seem to grab. But I also have this miscellaneous part that I don't know where it came from - it has one hole in the center and looks a bit like a wing. Anyone know what this is and whether it has anything to do with these two screws?
I just watched the video and this step wasn't included. So why is it here?
mbrooks -
OK, I got the screws back in, but it still looks like an unnecessary step. And I still have that little wing thing. But the phone is working and charging!
mbrooks -
Hi mbrooks! These screws secure some thin cables with contacts on the end of the logic board. If you don't remove the screws, you'll end up tearing the cables (Sorry Arnold and dtmcquade =C).
What are these two cords are for? I broke one on the right because, I couldnt open the screw.
Those 2 cords are for GPS antenna to send and retrieve signals
Some here states they are hard to remove. I used one of my Philips screw drivers. I'm not sure what type, but it removed the two screws easily. In the years that have past, doing repairs, I have got a lot of different equipments. Just be sure to use exatly the right screwdriver.
Is The gps antenna can cause my iphone's date and to time to mess up? If its broken
These two screws are a pain! Had a iPhone 5 and broke the cables by accident and repair of the GPS antenna was so much!!! 2 years later and I want to replace my other iPhone 5’s rear camera and these two screws are stuck again!
This time I wont let this happen to me and I applied some WD40 on them. Hopefully I can unscrew them.
Will update soon!
-
-
-
Удалите один крестовой винт 1,2 мм (Phillips) в центральной части устройства.
When putting this back together, you may find this bracket gets in the way of clipping the battery connection back on. If you do, losses the screw and swivel the bracket out of the way.
-
-
-
Удалите центральный крепёж с материнской платы.
When I did this the ribbon cable beneath the plate stuck to the plate, and this guide makes no mention of this cable at all. Be aware that it has to be re routed and re attached to its positions on the logic board or your phone will not work, as i looks like some kind of RF cable.
That cable is for sim networks. You have to remove very carefully.if it will break then you won’t get a sim single on your phone
-
-
-
С помощью диэлектрической лопатки отключите коннектор шлейфа разъёма Lightning от его разъёма на материнской плате.
-
Аккуратно отведите шлейф от материнской платы.
-
-
-
Извлеките лоток SIM-карты с помощью скрепки или специального приспособления.
-
Remove the SIM card tray from the iPhone.
-
-
-
Удалите винты, крепящие материнскую плату к корпусу:
-
Два крестовых 2,3 мм (Phillips)
-
Три винта 2,7 мм
-
One non-magnetic 2.7 mm standoff screw
Using a flathead driver for the standoff screws is actually very irritating. Funny thing, if you just use the pentalobe driver you used to take out the first two screws for the iphone, the standoff screws come out very easily (I think this was by design, since the pentalobe driver fits snuggly into the opening of the standoff screw).
The top/right standoff 2.7mm screw us made from aluminum. It is not equivalent to the remaining two 2.7mm standoffs. It should be kept apart and put back in its exact place.
If you happen to mix it with the other 2 screws, it is easy to differentiate: since it is made from aluminum, it will not stick to the tip of the magnetized screwdriver or the magnetized mat.
The "2.7" mm screws are not phillips screws. The center hole is threaded to receive other screws. If you look at the previous steps, you can see the screws that screw into each one. While the instructions talk about a flat-head bit, I suspect there is a special bit for these, a "+" shaped bit, possibly with a recessed center (hard to tell without more magnification than I had.) Without that tool, the best alternate is a flathead. I would avoid using a bit in the center hole, since it may damage the threads.
- pentalob - did not work for me
- metal splunger flat side - did not work
- flat head that came with the ifixit kit, no size worked
- what did work was another set of nice miro-screwdrivers. The flate heat second from the biggest fit in the slots good enough. The little bastards are on there tight!!
The 2.5mm flathead doesn't fit the standoff screw. I used a 2mm flathead, but I had to be very carefully because it may be easy to slip.
A little sad that I don't have any flathead tips and missed that they were needed! Bah. Anyhow to make this standout even more? I have the iOpener with a decent assortment of tips so my overconfidence made me miss the requirement. Thanks.
My spudger tip broke-off inside one of the standoff screws, so after trying a few things to clear the plastic tip manually, I just took the standoff screw out and held it up to open flame. The tiny bit of plastic burned-away in no time at all and after cooling the standoff screw down, it worked just fine again :-)
-
-
-
Поверните материнскую плату в направлении батарейного отсека.
-
Если вспышка осталась на материнской плате - снимите её с помощью пинцета и поставьте на место.
-
Note: when reassembling your device, be sure that the lower interconnect cable is not tucked underneath the logic board.
When reassembling the logic board in the case make sure the logic board connector for the Power/Volume cable is not under the logic board.
I second John Mihalko's comment - when reassembling the logic board in the case, make sure the button assembly cable (from step 18) is not under the logic board. It was a bit annoying to almost get to the end of this repair only to find I had to go back and take the logic board back out again. Argh.
See the yellow/orange circles? I thought I already remove it but it turns out I only remove the top screw. There's actually "another" screw in the "same" position, which is in disguise because it looks like a hole. It needs a rather small flat screw head to remove. I kept pulling the circuit board out but couldn't because I didn't know it. Be careful!
Re the first picture - HOW??? Where do you put what tool to start lifting/rotating the MLB to the left as shown? How do you even get this move started without damaging something? Would be helpful to know!
-
-
-
Острым концом диэлектрической лопатки аккуратно отключите коннектор антенны Wi-Fi от нижней части материнской платы.
I didn't bother taking the antenna cable off the board. I just had it flexed back and worked on removing the camera with the cable still on. It's only two screws and one connector to swap the camera out. Found it a little fiddly disconnecting it so if you have trouble just leave it on and work with the slack.
-
-
-
Удалите материнскую плату.
I believe there are three washers on the case side of the logic board that can come loose at this point.
A note when putting it back together make sure that the antenna cable does not get stuck under the logic board.
Guys, there is no need to remove the logic board at all. Just disconnect battery, remove loudspeaker, and remove charge port. Boom.
i agree with josh, if speaker seems to tight to get out then loosen a few of the bottom board screws...
I’m glad Josh said that ,I was just thinking why is the logic board being removed when it isn’t necessary ,loosing the screws should be enough s the speaker assembly can be removed.
This guide isn’t about changing the charge port or speaker. Above comments re those items should be removed. Not relevant to this topic.
-
-
-
Острым концом диэлектрической лопатки удалите резиновый амортизатор из-под кнопки питания.
You do not need to remove the rubber bumper. I did the replacement without removing it and that works just fine.
I agree with Johnny on Step 31, removing the rubber bumper is pointless as once its removed you end up with a floating rubber bumper piece OR to replace it. The rubber bumper (pretty sure its just foam anyways) is fine staying attached as it is. Other than that the guide is spot on! Thanks!
blitzn -
-
-
-
Удалите винты между окнами вспышки и задней камеры:
-
Один 2,9 мм винт типа standoff
-
Один крестовой винт 1,6 мм
-
Удалите один крестовой винт 1,9 мм (Philips), фиксирующий держатель кнопки питания на корпусе.
If you only take off the top screw on this bracket and just loosen the bottom one you can spin the bracket out of the way. This helps you when putting everything back together. YOu don't have to align this little bracket while holding a screw and screwdriver.
I lost the One 2.9 mm standoff screw , please let me know where can I buy new screw
I had an interesting discovery when I got to this step. The 1.6mm Phillips screw indicated in this guide was not a Phillips screw head. Mine was more of a circle. It's like it was stripped already. My magnifying glass is not great so I couldn't see if it was stripped or if a different bit was needed. I ended up leaving it in and just swinging the bracket to the right just as the5dunhams suggested. Thankfully it worked and I was able to continue on my 4.5hr repair (problems arose during the start of the installation process). Everything now works. It's weird using my power button since it's been broken for a couple years. Thanks.
-
-
-
Острым концом диэлектрической лопатки откиньте металлический держатель от верхней части корпуса.
The screw on the left side had to be removed, but I believe these guides are skipping that step.
Do you mean the screw which is removed on step 32 picture two?
Step 35 picture 2... these guides rarely if ever miss/skip steps.
-
-
-
Нажмите снаружи на кнопку питания острым концом лопатки.
-
Удалите кнопку питания.
im swapping over a housing from one phone to another and the new housing dosent have a metal hinge, are these detachable from the old housing?
you can use thin pliers and a screw driver to "bolt out" the old one with force. then use the Pentalobe screwdriver to widen the pin hole in the new housing a little bit, then drive it in with not too much force (in order not to break it). I found these instructions on the internet, and it worked for me - many replacement housing seem to lack that pin.
Andi -
I accidentally got the black power button instead of the white one for my white iPhone 5 and the button doesn't click like it should. I wonder if there is a difference in size of the white button vs. black one. Seems odd.
Did you also replace the cable or just the button?
I only replaced the button, but I may replace the cable to see if that makes a difference. The button now is not working as well as it did first.
I replaced the cable with the power switch AND put everything in a replacement housing. My power button clicks and works fine, but it a bit loose, so as if there is about 0.5mm space between the button and the switch. In the original state from the factory, the button sits tight. Anyone an idea?
I successfully replace my power button, and it worked fine for about two weeks, but the responsiveness of the button has gradually become worse. I'm wondering if this means I need to also replace the cable. Any help or advice would be greatly appreciated.
You need to replace the cable.
I put my lock button into the hole and when I tighten it up the power button is loose and moves around abit. I’m not sure what has happened.
When replacing the cable, attach the power button before adhering down the ribbon.
I ruined 1 cable by trying too many times to put the button together after sticking the ribbon down first.
-


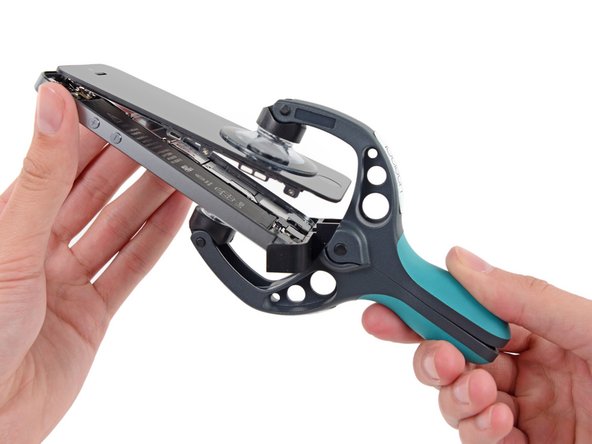


Следуйте этим инструкциям в обратном порядке, чтобы собрать устройство.
Следуйте этим инструкциям в обратном порядке, чтобы собрать устройство.
Отменить: Я не выполнил это руководство.
292 участников успешно повторили данное руководство.
Особая благодарность этим переводчикам:
66%

Jasper Fleischhauerпомогает нам починить мир! Хотите внести свой вклад?
Начните переводить ›
Прикрепленные документы

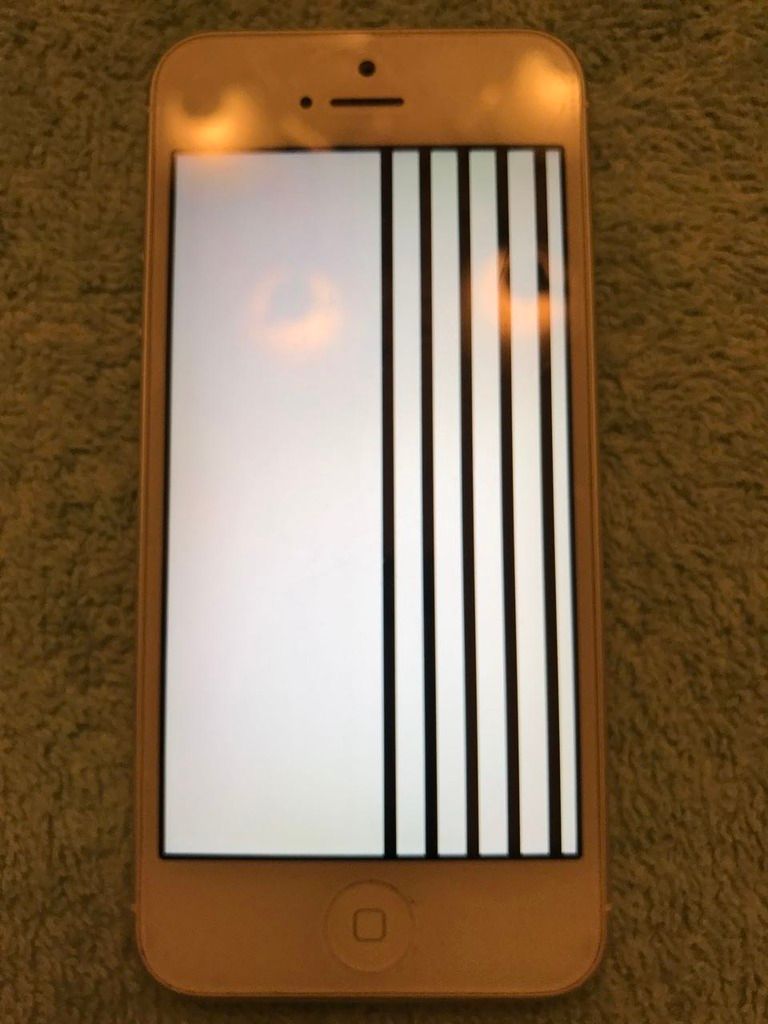
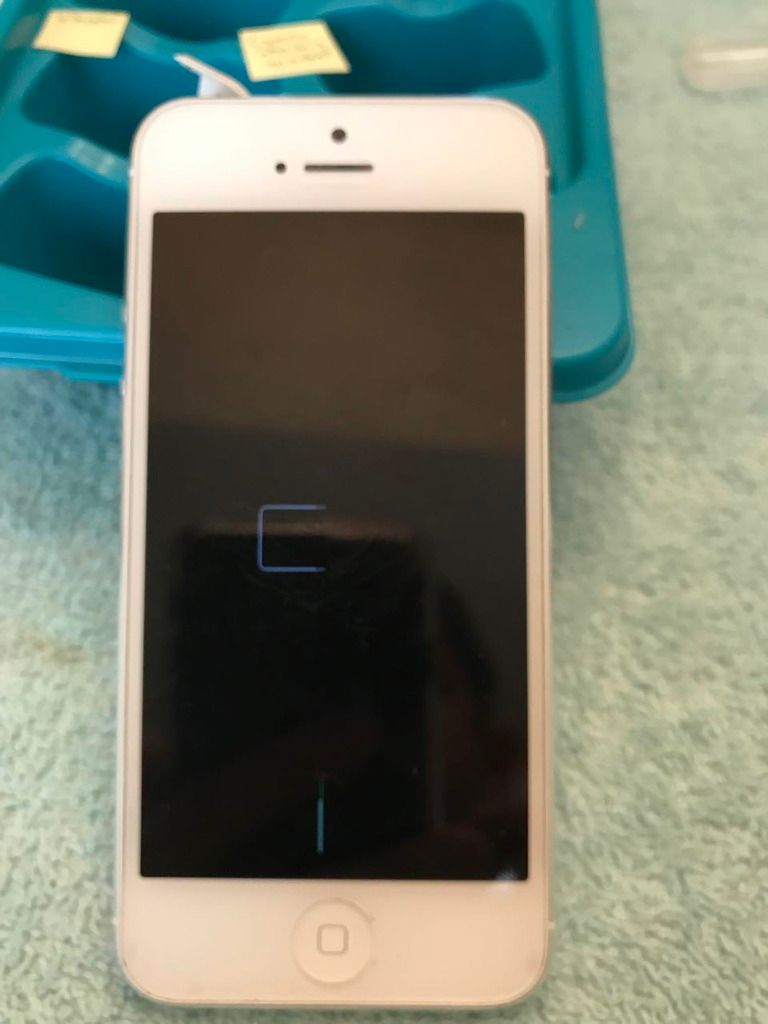
40 Комментариев
Hi! Great step by step guide. I did it twice today and my iphones 5 are working great. Just thing. In my opinion there is no need to remove the battery. It is how I did it without any complication. Keep it up.
This is an extremely helpful guide. I was quite surprised when I opened my iPhone 5 that there were 2 screws lose inside it. I bought it new and have never taken it apart or had it serviced before. Never heard any rattling either so who knows. haha
I noticed that needed the smaller Phillips head screwdriver than the one recommended in the guide.
The only advice I can give is to take your time and go slow slow slow. There were many small heart attacks when prying the screen off and taking out the battery.
I was skeptical that replacing the tiny power button alone would fix my issue of turning my phone on and off and putting it to sleep, but it did the trick to my great surprise. You'll need a steady hand (ie. no caffeine) to complete this repair because of all of the small screws. Thanks iFixit for a great guide!
My volume and silent toggle switch works great but I'm having issues only with the power button. Does this mean I just have to replace the power button or do I have to replace the flex cable also?
Thanks!
It's highly recommended to replace the cable.
This is the best on the net but the video leaves some steps out. It would be good to tell people to refer to the steps below. I assumed everything below the video was ads so I didn't look there unit I realized something was missing.
After watching this video I ordered my parts and planned to do this. Once I got the phone apart i realized that my button problem (where it works but you have to push hard) wasn't going to get fixed by this video. The button that this video replaces is just a mechanical block. The actual "button" is on a flex circuit\harness and if that is bad you have to replace the harness which you can buy. For me, I just cleaned everything the best I could (don't forget to clean the camera and lens over the camera while you are in there) and put it back together. Everything works great now. No new parts were needed - just a cleaning.
What did you clean it with? Thanks.
Matt Tan -
Die Anleitung ist nicht komplett
Fehlt der Tausch des Powerflexkabels
Gibte es das als PDF ?
Udo
Next to "Formats:" there is a link that allows you to download as PDF
Help! I followed the guide exactly, including putting the logic board in an anti static bag. Afterwards the iPhone 5 wont turn on, just a blank screen. When connected to power it makes a loud beep, and pauses for several seconds and beeps again etc. I back tracked and did it all over double checking every connector. Checking the display connector. All seemed fine. What could it be?
I had that too. You need to make sure to turn off your power when doing any repairs. After a week I checked back and my phone started working again.
I repaired the power switch problem by just cleaning it. I did not remove the battery or camera, but did remove the small metal bracket just below the power button. I carefully used a contact cleaner spray and small knife to clean out some dust.
The power button now has the 'click feel' again and powers the phone on and off.
I didn't turn my iPhone off before taking the display assembly apart. How will this affect my iphone ?
You should be just fine. Just power off after this. Until you change connectors there is no reason for the power to be off aside from safety.
I tried this today for the second time, Power button won't come back up.
I think the metal bracket, holding the button up, is broken or bent, I forced it a little.
But I can't find this part nowhere online.. Help Meeeee
Hi, did you finally find that part?
I replaced the button just fine, and I also did not need to remove the battery. I noticed though that there is a little pin that holds the button back that was also broken on my phone (or fell out) that I had to get on ebay.
I'm in the process of changing the rear housing for my 5s, and I've come to a problem with the lock button. It seems the pin to hold the metal cover for the sleep/lock button-on the top right inside of the phone-isn't in the new housing. Can i take it out of the previous housing, or can i buy a new one for the new housing? What should i do?
I got a pair of small (4 inch/10cm) micro 'cutting' pliers, I had to very carefully tear the aluminium on the old case to retreive the pin. Try not to bend the pin. Pin was then straightened slightly with flat pliers and re-slotted into the new case, keeping the 'fat' end at the top it will need forcing home slightly. Phew! it doesn't have to be dead-on straight because the wake button clip only has to wrap around it. Took a few goes to get the clip back but wake button clicked fine.
great guide; however, i followed the iPhone 5 rear housing replacement guide and replaced power button cable with a new one. there's been a problem thou with only the volume down button does not seem to be working. any idea?
I also replaced the volume control buttons, specifically because the volume down button didn't work, but the problem persists even with the new volume control buttons and new cable assembly. I suspect that it's not a hardware problem, but I haven't found a software fix. Tried everything I could think of, even a full factory restore, still doesn't work. As a workaround I use the system setting that displays a moveable touch control that allows volume to be changed:
Settings --> General --> Accessibility --> AssistiveTouch --> On. This displays a finger-tip dot that you can move anywhere on screen. Touching the dot displays 6 icons, touch "Device" then there are more icons including "Volume Up" and "Volume Down", which do work. Of course this problem first appeared soon after my AppleCare expired.
Need to make sure the cable you received is not defective.
Followed this and it worked for the most part but now my phone does not charge. If I insert the power cord while the phone is turned off it will boot the phone up but does not actually charge the phone. What could have gone wrong? The cable isn't an official apple one but was working before the repair.
HI Michael,
Did you resolve the problem you were having with battery not charging ? I am having the same problem, everything worked fine after the replacement and just found out that the battery won't charge (the lightning connector when connected does not get detected).
Thanks,
-Gunardi
Hello,
I have exactly the same problem, did you find any solution?
Thank you very much
Jerome62 -
I had no success. 2 main problems:
1) When I first pulled apart the phone using the suction caps, only the glass came off, leaving a half of the display assembly still stuck inside the phone. There is a plastic cord which runs around the glass, half of which remained with the glass, and the other half remaining on the remaining part of the display assembly. I'm not sure what I did wrong for this to happen. But I can't put the phone back together.
2) I changed the power button but it does not seem to have been the problem. In any case, the power button now does not click. And floating bits of what I assume used to be a button (a small silver bubble, and a black dot on a piece of clear plastic) came out when I removed the the power button. I assume now that the power/volume ribbon is the problem, and theses little floating bits belong to it, rather than the power button.
Overall, disappointing. Won't try this again.
I tried fixing the power button, but it doesn't click. It sits very soft on the top...I can't figure out anything missing. When i reassembled and plugged in, phone just keeps flashing apple symbol but doesn't turn on at all. This could be due to the fact that power button is not clicking...
Attempt 2: I thought of replacing the whole ribbon, ordered and tried installing. I was successful installing it, but the vibrate/silent button part isn't properly installed, nevertheless, power button is still the same. I had thought that circuit button that connects to the power button had worn out, so decided to change so that power button would click. It doesn't click now. I am stuck, now I am thinking of resorting to some fix by the pros..........this totally sucks!! I wouldn't suggest anyone trying this.
chivaspm -
i changed the lock button and ribbon twice.. lock buttons still doesn't work . silent and volume buttons dont work, and the screen has lines on it also! can any one help, any tips would be great.. mainly on the screen.. i can live with a broken lock button but not screen.
Is there a way to tell if the problem is the metal button or the flex cable?
The whole thing needs to be replaced, since the flex cable includes volume and the rocker components. This is a poor guide because it is misleading. The steps are well done, but you need to include the steps for removing the volume flex parts as well.
Thanks! worked like a charm. I had to remove the power cable assembly as well, but by that time, it was pretty obvious which extra screws to remove. The detailed pictures helped me get it right.
Worth noting that sometimes the power button can start failing for a reason that has nothing to do with the button or its cable. Mine started failing because the battery was puffing up, pulling the button connections further and further apart. iPhone batteries do sometimes get puffy or bloated due simply to age, and this can cause all sorts of problems. Once you've got the phone open it's easy to see that the battery is pillowy. Before you open the phone you may see a vertical faint bluish stripe down the screen, or note that the case looks very slightly sprung. The solution to all these problems is to replace the battery. Before you buy parts you don't need, see if your battery is the culprit.
I tried this last night and it worked, brilliant i thought then realised that i have lost my carrier and signal has gone on the phone, i have tried all aspects of the internet, turn off, take sim card out and reboot network, still nothing. Help!!!!! is my phone knackered????
Done successfully for two phones. The standoff screws were a pain. To remove them I used a sharp knife placed flat into the groove on the screw and unscrewed a quarter turn at a time. The iFixit screwdrivers are not fine enough for that. To reassemble, I held the standoff screws in position with tweezers and rotated the phone underneath it. Great guide.
It worked!!! I used several guides simultaneously as there are many details to check and double check. I’ve never opened a phone before but managed to put in a new power button and power flex-cable. Together we can do anything!
Fixade sig sakta men säkert! Pilligt? Ja verkligen! Tänk till två gånger innan du gör något och titta efter noga. Guiden är verkligen bra, men bara några små saker saknas som när du ska byta ut knappen så lägg den med bygeln uppåt mot displaysidan. OBS! knappen ska sitta ovanför en liten kopplinsplast som finns under den svängbara metalluckan och kopplinsplasten ska alltså ligga under knappen in mot telefonen. Den är lätt att missa. Den petas lätt åt sidan. Lägg den rakt under knappen. Titta efter flera gånger att den sitter rätt. OBS! Rengör också !
Mvh: Thord:)
This is Swedish:)
Having completed this repair using the rear camera part from Ifixit I have to comment that the camera is noticeably lower quality. Its not huge - You don't notice it looking at the photos scaled down to fit but viewing one for one there is significant detail lost. My staff member has an Iphone 5 bough at exactly the same time as mine so I was able to take a photo side by side on his and mine after my repair and when you view 1 for 1 pixel in product boxes on mine the text was just a colored blur where on his although you couldn't read the text it was more obviously text. Overall though its still better than having a camera that wouldn't focus at all and being that Apple seem to refuse to supply genuine spare parts (Which there has to be a low against??? - Imagine if a car manufacturer did that) its still good buying one from someone who gives good support. At the end of the day its a phone camera not an SLR and its still better than the older Iphone 4 camera.
matt - Ответить
The majority of product manufacturers are not required to provide parts, and apple will fix items under the various warranties it offers. Car manufacturers on the other hand are required to make parts available by law. It is part of the regulation of their industry. They get a lot of protection for their business model, but have some obligations too. It's why the EV1 was pulled, they didn't want to have to make the parts, and why there are so many Delorian parts.
William Leeper -
This is a great guide. However, I'm having a hard time popping the screen back into place. Everything works but I'm afraid of putting too much pressure least I crack it again. Any advice?
amciotola - Ответить
To avoid broken screens during reassembling:
Put the hooks of the screen in the right place in the housing, then close it loose, don't press it. Turn your phone upside down with the screen on a very flat surface (e.g. table). Now press the housing on the screen -> no more risk for braking the screen because of inhomogeneous force applied on the glass!
mondbewohner -
I hope folks read this comment before proceeding to attempt a Sleep/Wake button repair on the iPhone 5! Apple has an iPhone 5 Sleep/Wake button replacement program, free, for iPhone 5 devices manufactured through March 2013. See program details at https://www.apple.com/support/iphone5-sl.... Don't do this yourself if you don't need to. It's a difficult repair.
Mark Luscher - Ответить
I was willing to add the following important remark on top of this guide but, strangely, it has been refused! Here it is:
---
*Check if your Iphone 5 is eligible to the Apple special program for a free battery replacement (devices sold between September 2012 and January 2013, within a limited serial number range).
* If not, watch the video and use this guide [video|https://www.youtube.com/watch?v=6ogE8USs...]
---
And thus, as my Iphone 5 was eligible, I went to the Apple store of Le Louvre in Paris and the battery has been changed for free instead of 65 euros. Thanks to Mark!
revher -
Hi every one i drop my iphone5s 16gb
I replace 10!new screen but cant back to live i see on the "logic board" where u conect the screen i se damage HOW CANT FIX THAT WHITOUT LOST MA DATA ??? Thaks for anny hellp!!!!!
aliroberto01 - Ответить
Steps 12-15 seem to be not necessary for battery replacement. They are not required to remove and replace the battery and they at least DOUBLE the amount of work. Most of the time spent on this process involved working with those tiny screws and maneuvering them in place and screwing them down. Steps 12-15 are three of the five screws that you work with inside.
Also, there should be a note at the beginning of Step 2 that if you bought the iFixit kit that you should go directly to Step 6.
Bob Hatcher - Ответить
please wear safety helmet too, integral helmet and cover mouth with an N95 facemask underneath, just in case the battery punctures, explodes, you knock your head back to the wall and slam it back forward hitting the screw in your eye and and inhaling toxic fumes! can never be too careful ;-)
ibisiki - Ответить