Перейти к основному содержанию

2005-2010 Hummer H3 Faulty Speaker Replacement

Выберете то, что вам нужно

  1. 2005-2010 Hummer H3 Faulty Speaker Replacement, Disconnect Battery: шаг 1, изображение 1 из 2 2005-2010 Hummer H3 Faulty Speaker Replacement, Disconnect Battery: шаг 1, изображение 2 из 2
    • Ensure the vehicle is turned off before accessing the battery.

    • Remove the negative terminal first, followed by the positive terminal. Removing the positive terminal first could result in a direct short to the ground.

    • Use your 10-millimeter wrench to remove the hex nuts on the negative terminal. (Image 1)

    • Once the negative terminal's hex nut is removed, we can tuck the negative terminal and cable beside the battery. (Image 2)

    • Repeat these two steps for the positive terminal.

  2. 2005-2010 Hummer H3 Faulty Speaker Replacement, Locate and Remove Plastic Covers: шаг 2, изображение 1 из 3 2005-2010 Hummer H3 Faulty Speaker Replacement, Locate and Remove Plastic Covers: шаг 2, изображение 2 из 3 2005-2010 Hummer H3 Faulty Speaker Replacement, Locate and Remove Plastic Covers: шаг 2, изображение 3 из 3
    Инструмент, используемый на этом этапе:
    Tweezers
    $4.99
    Купить
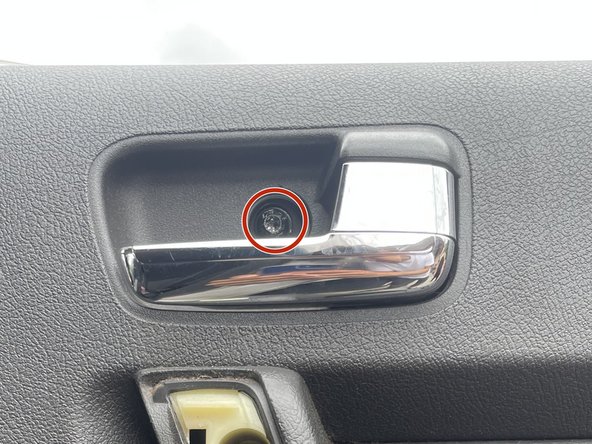
    • Identify plastic covers (Image 1)

    • Remove plastic covers with tweezers (Image 2 & 3)

    • Be careful not to scratch the plastic when you remove the coverings with the tweezers.

  3. 2005-2010 Hummer H3 Faulty Speaker Replacement, Removing the Fasteners: шаг 3, изображение 1 из 3 2005-2010 Hummer H3 Faulty Speaker Replacement, Removing the Fasteners: шаг 3, изображение 2 из 3 2005-2010 Hummer H3 Faulty Speaker Replacement, Removing the Fasteners: шаг 3, изображение 3 из 3
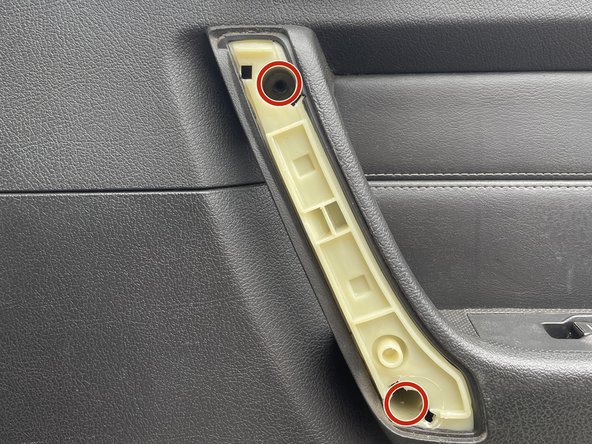
    • Remove the three highlighted fasteners with the T30 Torx Screwdriver. (Image 1 & 2)

    • Use the magnetic pickup tool for loosened stubborn fasteners that are difficult to remove from the socket (Image 3)

  4. 2005-2010 Hummer H3 Faulty Speaker Replacement, Detaching Door Panel: шаг 4, изображение 1 из 3 2005-2010 Hummer H3 Faulty Speaker Replacement, Detaching Door Panel: шаг 4, изображение 2 из 3 2005-2010 Hummer H3 Faulty Speaker Replacement, Detaching Door Panel: шаг 4, изображение 3 из 3
    • The door panel will not fully detach in this step. Do not yank after the panel is released from the frame!

    • It is recommended to have an extra helping hand for the following steps.

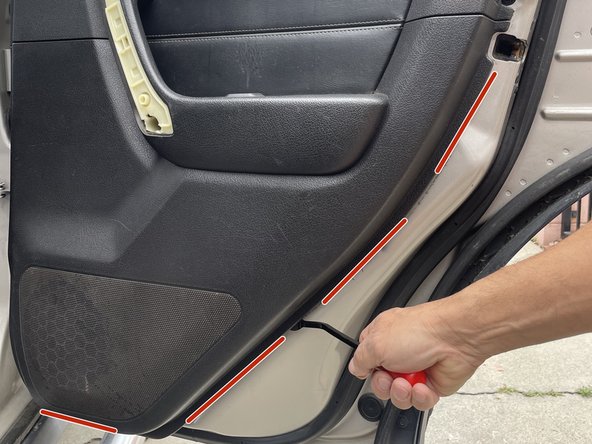
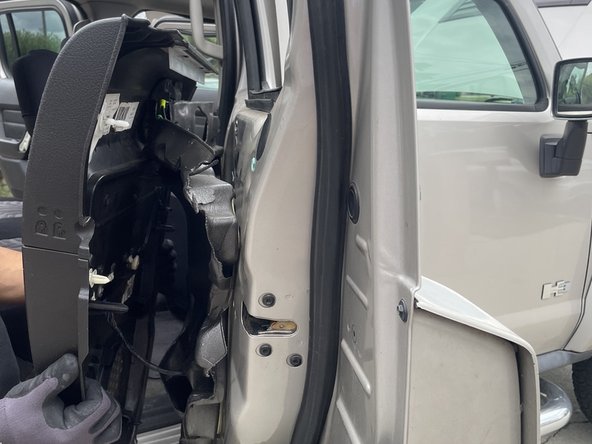
    • Shimmy the prybar along the outlined area until you feel a slight detachment from the door panel. (Image 1)

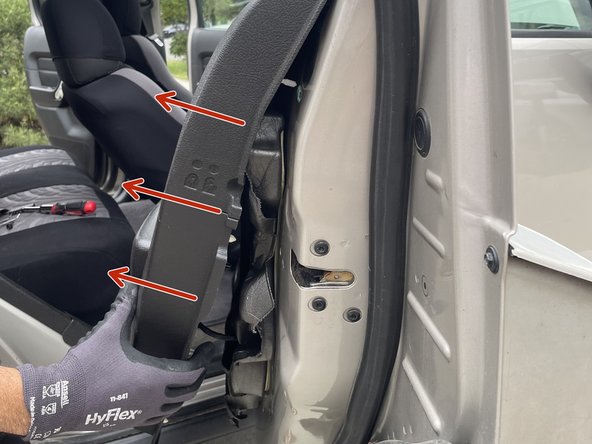
    • Grab the door panel and pull the bottom portion towards yourself slightly. (Image 2)

    • With the panel pulled slightly towards you, you can lift it, releasing it from the frame. (Image 3)

  5. 2005-2010 Hummer H3 Faulty Speaker Replacement, Disconnecting Cables from the Panel: шаг 5, изображение 1 из 3 2005-2010 Hummer H3 Faulty Speaker Replacement, Disconnecting Cables from the Panel: шаг 5, изображение 2 из 3 2005-2010 Hummer H3 Faulty Speaker Replacement, Disconnecting Cables from the Panel: шаг 5, изображение 3 из 3
    • Do not yank the door panel.

    • Having an extra helping hand hold the panel while you complete the following steps is recommended.

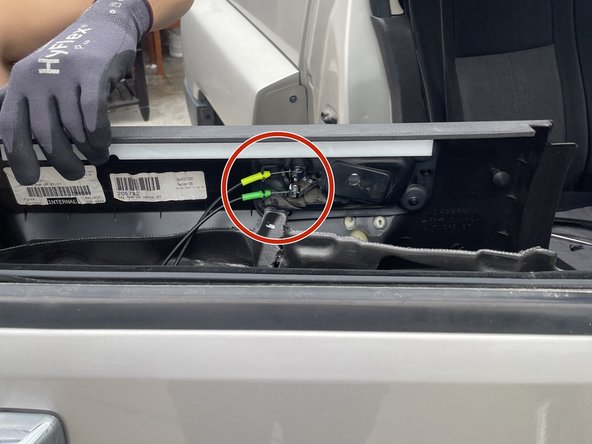
    • Locate the two metal cables used for the handle and locking mechanism attached to the ball sockets behind the door panel. (Image 1)

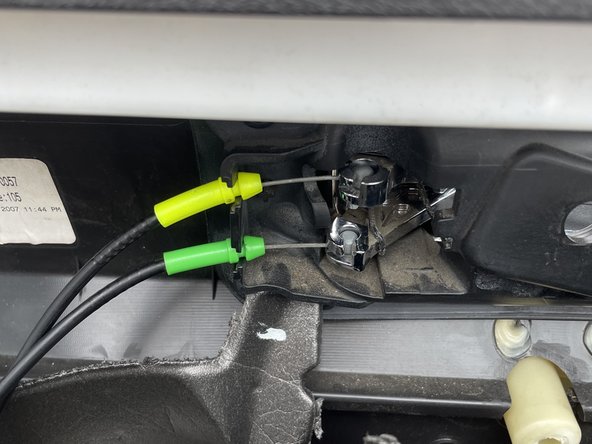
    • Rotate the yellow cable 90 degrees counterclockwise and lift the cable from the ball socket. Repeat for the green cable. (Image 2)

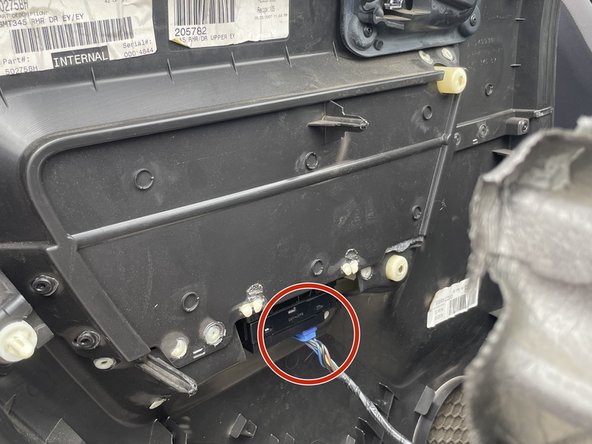
    • With both cables removed from the panel, we can now remove the Blue electrical cable.

    • Press on the clip of the blue cable and gently unplug. (Image 3)

  6. 2005-2010 Hummer H3 Faulty Speaker Replacement, Removing faulty rear side speaker: шаг 6, изображение 1 из 3 2005-2010 Hummer H3 Faulty Speaker Replacement, Removing faulty rear side speaker: шаг 6, изображение 2 из 3 2005-2010 Hummer H3 Faulty Speaker Replacement, Removing faulty rear side speaker: шаг 6, изображение 3 из 3
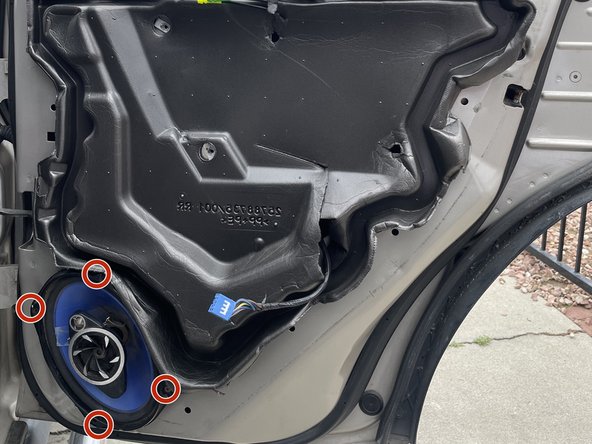
    • Locate the four fasteners that hold the speaker in place. (Image 1)

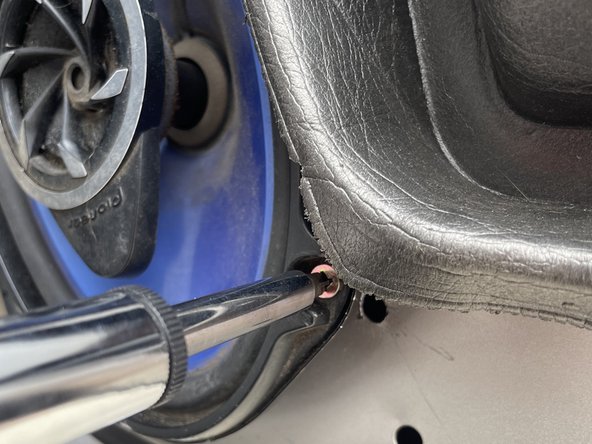
    • Use the Phillips Head Screwdriver size PH2 to remove the four fasteners (Image 2)

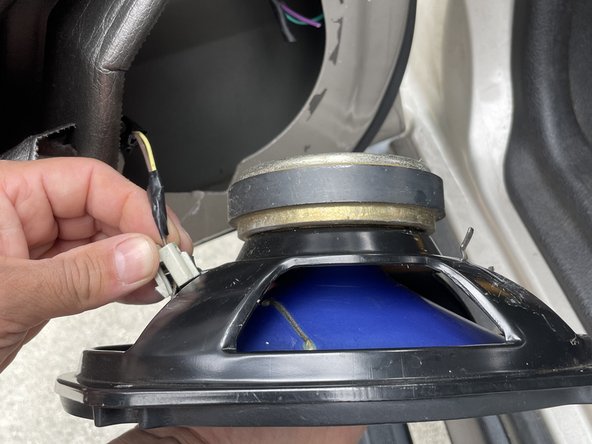
    • With the fasteners removed, we can gently pull the speaker out, which will reveal the final cable.

    • Locate the clip on the cable connected to the speaker and gently unplug it. (Image 3)

Заключение

To reassemble your device, follow these instructions in reverse order.

Justin Cobian

Участник с: 05/04/23

133 Репутация

1 руководство автора

0 Комментариев

Добавить комментарий

Просмотр статистики:

За последние 24часов: 5

За последние 7 дней: 5

За последние 30 дней: 32

За всё время: 181