Перейти к основному содержанию

2006-2013 Toyota Corolla Ignition Coil Replacement

Выберете то, что вам нужно

  1. 2006-2013 Toyota Corolla Ignition Coil Replacement, Ignition Coil: шаг 1, изображение 1 из 3 2006-2013 Toyota Corolla Ignition Coil Replacement, Ignition Coil: шаг 1, изображение 2 из 3 2006-2013 Toyota Corolla Ignition Coil Replacement, Ignition Coil: шаг 1, изображение 3 из 3
    • Pop the hood and remove the black plastic cover over the engine.

    • There is nothing to unscrew, or unlatch, and the cover should lift off. Once removed, the top of the engine will look like the third picture

  2. 2006-2013 Toyota Corolla Ignition Coil Replacement: шаг 2, изображение 1 из 2 2006-2013 Toyota Corolla Ignition Coil Replacement: шаг 2, изображение 2 из 2
    • Unplug the ignition coil you wish to replace. The coils are numbered one though four, left to right.

    • Do not unscrew the bolt on the ignition coil before this step. It makes the electrical plug more difficult to remove

  3. 2006-2013 Toyota Corolla Ignition Coil Replacement: шаг 3, изображение 1 из 1
    • Unscrew the bolt of the coil that needs to be replaced.

    • Be sure to put the bolt in a place you will not lose it!

  4. 2006-2013 Toyota Corolla Ignition Coil Replacement: шаг 4, изображение 1 из 2 2006-2013 Toyota Corolla Ignition Coil Replacement: шаг 4, изображение 2 из 2
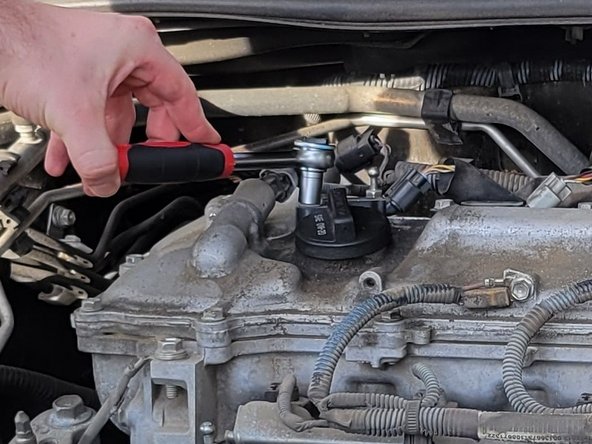
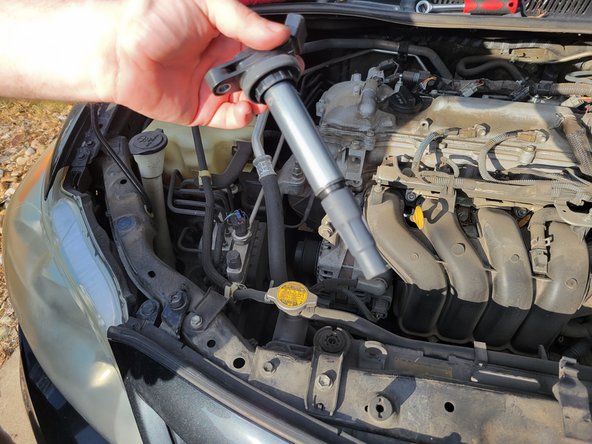
    • Pull the coil straight up and out. It should come off of the spark plug with little resistance.

  5. 2006-2013 Toyota Corolla Ignition Coil Replacement: шаг 5, изображение 1 из 2 2006-2013 Toyota Corolla Ignition Coil Replacement: шаг 5, изображение 2 из 2
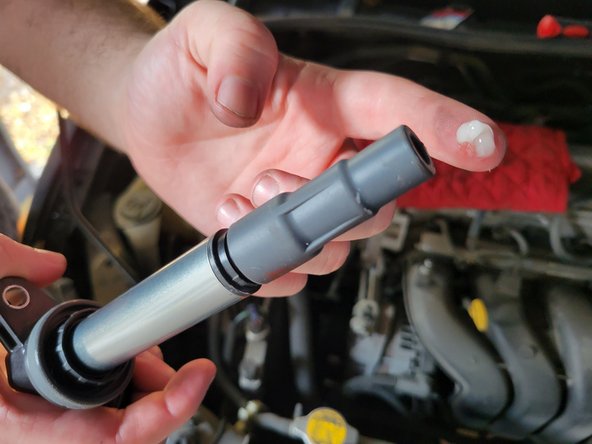
    • Apply a pea-sized amount of grease to the new ignition coil. It should be all around the rubber tip around the bottom.

    • While not required, this step will make any future replacements much easier.

  6. 2006-2013 Toyota Corolla Ignition Coil Replacement: шаг 6, изображение 1 из 1
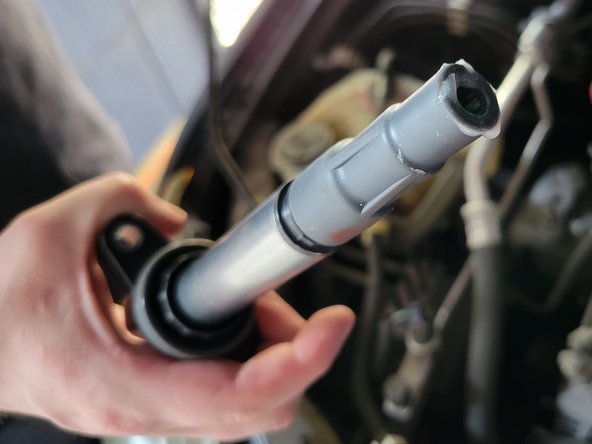
    • When inserting the new ignition coil, press down lightly to ensure it is completely in place.

    • Re-plugging in the ignition coil, and re-screw it in. This can be preformed in either order.

    • Repeat steps three through five as necessary for the other three ignition coils.

Заключение

To reassemble your device, follow these instructions in reverse order.

Еще один человек закончил это руководство.

Henderson Gillette

Участник с: 09/23/23

160 Репутация

1 руководство автора

Команда

Austin Community College, Team 22-3, Watkins Fall 2023 Участник Austin Community College, Team 22-3, Watkins Fall 2023

AUSTINCC-WATKINS-F23S22G3

2 членов

Автор 2 руководств

0 Комментариев

Добавить комментарий

Просмотр статистики:

За последние 24часов: 11

За последние 7 дней: 78

За последние 30 дней: 330

За всё время: 1,034