Перейти к основному содержанию

2006 Audi A4 2.0T Quattro Breather Hose Replacement

Выберете то, что вам нужно

  1. 2006 Audi A4 2.0T Quattro Breather Hose Replacement, Breather Hose: шаг 1, изображение 1 из 2 2006 Audi A4 2.0T Quattro Breather Hose Replacement, Breather Hose: шаг 1, изображение 2 из 2
    • Lift the hood and remove the engine cover by pulling it up with two hands.

    • Pull on both ends at the same time to avoid snapping the cover.

  2. 2006 Audi A4 2.0T Quattro Breather Hose Replacement: шаг 2, изображение 1 из 2 2006 Audi A4 2.0T Quattro Breather Hose Replacement: шаг 2, изображение 2 из 2
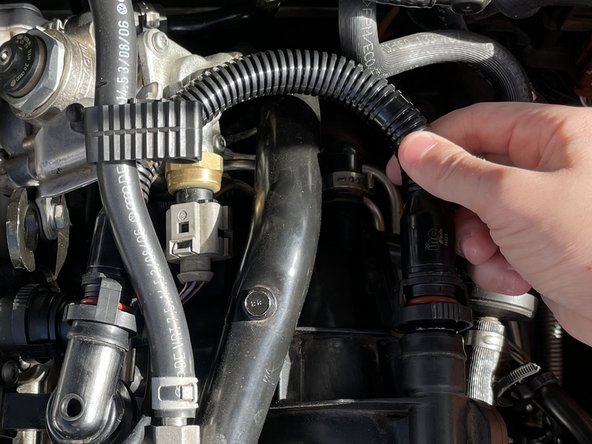
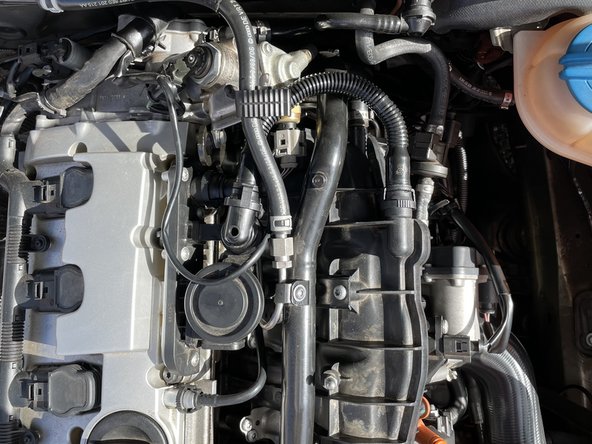
    • Locate the breather hose attached to the intake manifold.

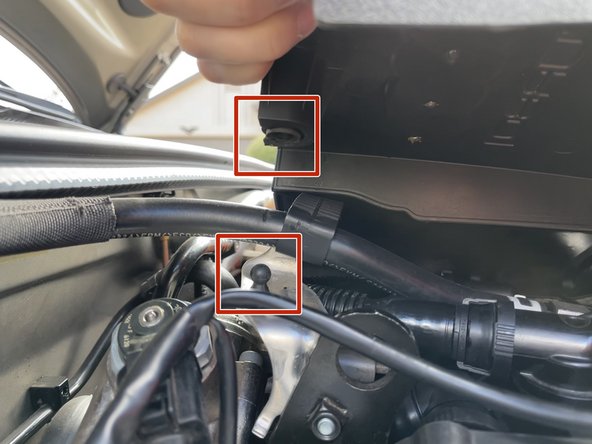
    • Look for the grooves on each end of the hose.

  3. 2006 Audi A4 2.0T Quattro Breather Hose Replacement: шаг 3, изображение 1 из 2 2006 Audi A4 2.0T Quattro Breather Hose Replacement: шаг 3, изображение 2 из 2
    • To detach the hose, squeeze on the grooves found in Step 2. Use pliers if needed.

    • At the same time, pull the same end of the hose away from its connection to the engine (the valve).

    • Repeat this step to remove the other side of the hose.

  4. 2006 Audi A4 2.0T Quattro Breather Hose Replacement: шаг 4, изображение 1 из 1
    • Maneuver the new hose around and under other hoses in the engine.

    • It should fit exactly like the old piece.

  5. 2006 Audi A4 2.0T Quattro Breather Hose Replacement: шаг 5, изображение 1 из 3 2006 Audi A4 2.0T Quattro Breather Hose Replacement: шаг 5, изображение 2 из 3 2006 Audi A4 2.0T Quattro Breather Hose Replacement: шаг 5, изображение 3 из 3
    • Line up the ends of the hose with the valves and push into place.

    • Because the hose is new, it may be hard to push in. DO NOT stop until you hear it click into place.

  6. 2006 Audi A4 2.0T Quattro Breather Hose Replacement: шаг 6, изображение 1 из 3 2006 Audi A4 2.0T Quattro Breather Hose Replacement: шаг 6, изображение 2 из 3 2006 Audi A4 2.0T Quattro Breather Hose Replacement: шаг 6, изображение 3 из 3
    • Replace the engine cover and close the hood.

    • To replace the cover, line up the connectors on the engine with the corresponding holes on the plastic cover. Push into place.

Финишная черта

Danera Wendling

Участник с: 01/12/21

133 Репутация

1 руководство автора

Команда

Northern Arizona University, Team S1-G4, Konrad Spring 2021 Участник Northern Arizona University, Team S1-G4, Konrad Spring 2021

NAU-KONRAD-S21S1G4

3 членов

Автор 1 руководств

0 Комментариев

Добавить комментарий

Просмотр статистики:

За последние 24часов: 1

За последние 7 дней: 9

За последние 30 дней: 62

За всё время: 2,036