Введение
This guide demonstrates how to replace the rear door speakers. This guide can be used for replacing a broken speaker, or upgrading the old speaker with a better one.
Выберете то, что вам нужно
-
-
Use the Phillips screwdriver to unscrew the 8x3/4" Phillips screw inside the door handle.
-
-
-
Use a flathead screwdriver to pry up the plastic tab inside the rear door armrest.
-
-
-
Use the Phillips screwdriver to unscrew the 8x3/4" Phillips screw inside the armrest.
-
-
-
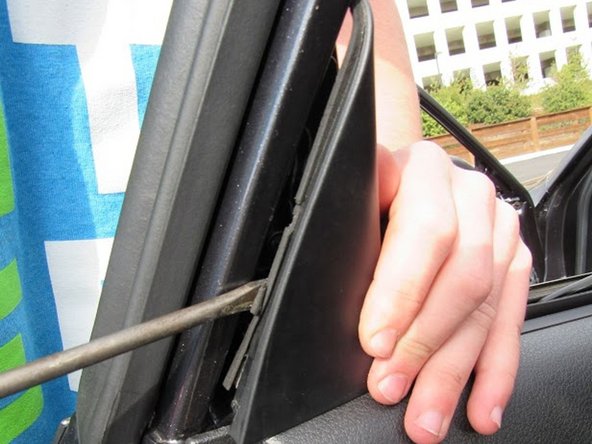
Use flathead to pry off the upper panel located at the top of the rear door panel.
-
-
-
Use the flathead screwdriver to pry off and remove the panel over the door handle.
-
-
-
-
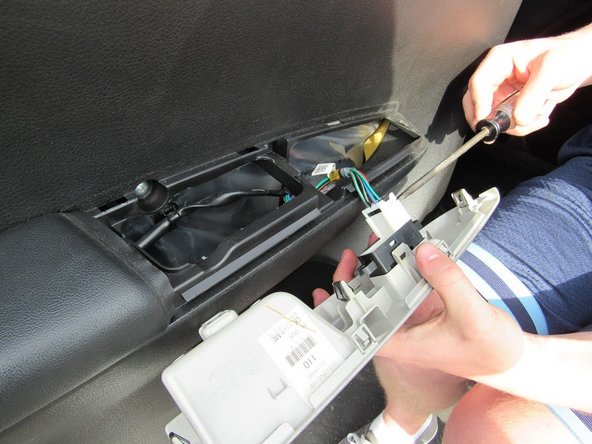
Remove the bundle of wires from the panel by pressing the tabs on the sides of the large white plastic connector.
-
-
-
Use the Phillips screwdriver to unscrew the 8x3/4" screws behind the door handle panel that was just removed.
-
-
-
Use the flathead screwdriver to pry off the door panel, starting from the outside edge of the door.
-
-
-
Using your hands, remove the two remaining wires connecting the door panel to the frame.
-
The door panel is now completely removed from the frame.
-
-
-
Locate and remove all three Phillips 8x3/4" screws. There's one on top and two on the sides where the arrows are pointing.
-
-
-
Once the screws are removed, the speaker will easily pop out of the door revealing two wires attached to the speaker with a white clip. Remove this white clip by simply squeezing one of the tabs that lock it in place.
-
-
-
Once the clip is removed from the speaker, you will want to then cut the wires from the white clip using a wire cutters.
-
-
-
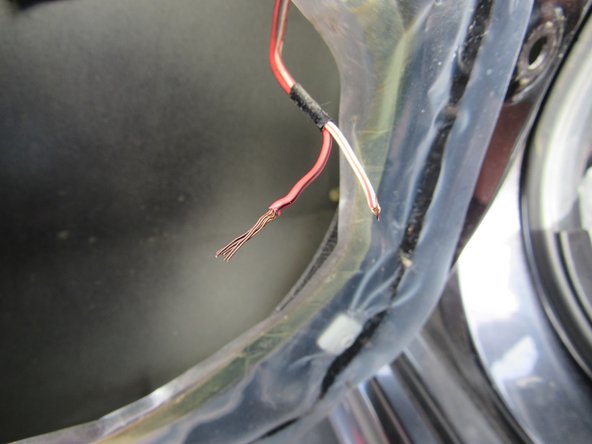
Once the white clip is removed from the wires, you will then want to strip about 0.5" of plastic from the wire revealing bare copper wire.
-
-
-
Once the wires are cut, you will then want to add separate clips on the end of the wires by placing the clips on the wires, and then using a pliers, squeeze the plastic to crimp the clip securely on the wire.
-
-
-
Once the new clips are now on the separate wires, place these clips into the back of your new speaker.
-
-
-
Insert your new speaker where the old speaker once was.
-
Use the same three screws that you removed in the first step to secure your new speaker in the door.
-
Congratulations! You are now done!
-


To reassemble your device, follow these instructions in reverse order.
To reassemble your device, follow these instructions in reverse order.

Команда

Cal Poly, Team 8-3, Regan Spring 2015 Участник Cal Poly, Team 8-3, Regan Spring 2015
CPSU-REGAN-S15S8G3
5 членов
Автор 5 руководств
Один комментарий
This would be A LOT MORE HELPFUL, if OP wrote which wires were positive and which were negative..