Введение
This guide has complete step-by-step instructions to replace the RAM sticks in your ACER Aspire V5-571P-6609 laptop with proper precautionary measures. If you want to use larger applications, prevent the laptop from crashing, or have a better gaming experience, this guide is for you.
Remember to unplug the device and turn the laptop's power off while performing the RAM replacement. This can help prevent software corruption, data loss, and boot failure.
Выберете то, что вам нужно
-
-
Make sure you completely power off the device before proceeding.
-
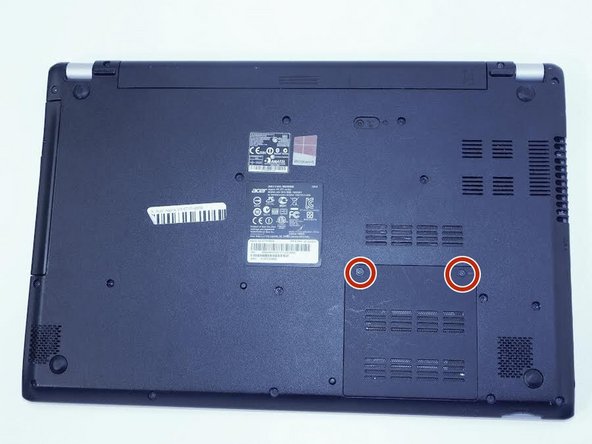
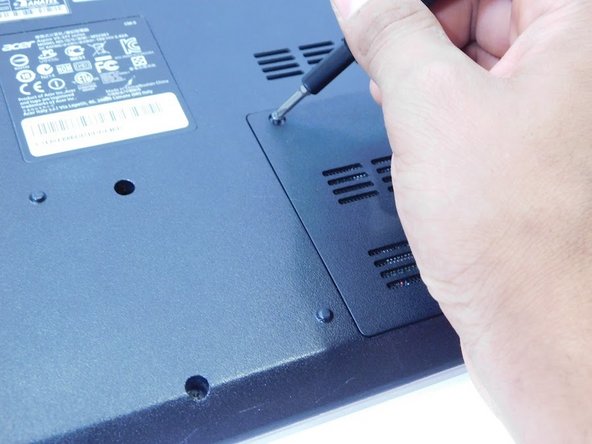
Turn over the device to display the back cover and remove the two marked Phillips #0 screws.
-
-
-
Once the screws have been removed, utilize a jimmy tool to pry open the back cover. Carefully lift the cover and set it aside for now.
-
-
-
-
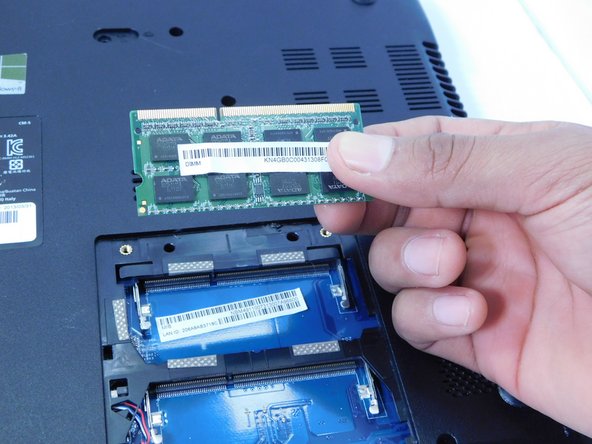
With two fingers, push the latches holding the DIMM to the sides.
-
The DIMM will tilt upward once it is released from the slot.
-
Carefully secure the DIMM and remove it.
-
-
-
Insert the replacement DIMM into the slot.
-
Once inserted, push the DIMM down gently until it snaps into place.
-


To reassemble your device, follow these instructions in reverse order with new RAM cards.
To reassemble your device, follow these instructions in reverse order with new RAM cards.
Команда

Gateway, Team 1-1, Pee Fall 2022 Участник Gateway, Team 1-1, Pee Fall 2022
GCC-PEE-F22S1G1
4 членов
Автор 6 руководств