Перейти к основному содержанию

ASUS Chromebook C200MA DS01 Motherboard Replacement

Выберете то, что вам нужно

  1. ASUS Chromebook C200MA DS01 Motherboard Replacement, Back Panel: шаг 1, изображение 1 из 1
    • Before proceeding, power down your Chromebook. Close the display and lay it on a soft surface, top-side down.

    • Remove the five 8.4 mm Phillips #0 screws.

    • Remove the four 4.6 mm Phillips #0 screws.

  2. ASUS Chromebook C200MA DS01 Motherboard Replacement: шаг 2, изображение 1 из 1
    • Use the plastic opening tool to gently work around the edge of the Chromebook until the back panel starts to lift off.

  3. ASUS Chromebook C200MA DS01 Motherboard Replacement: шаг 3, изображение 1 из 1
    • Remove the back panel by lifting it away from the Chromebook.

    • Some clicking will be heard as the panel is removed from the back, this is completely normal.

  4. ASUS Chromebook C200MA DS01 Motherboard Replacement, Battery Connection: шаг 4, изображение 1 из 3 ASUS Chromebook C200MA DS01 Motherboard Replacement, Battery Connection: шаг 4, изображение 2 из 3 ASUS Chromebook C200MA DS01 Motherboard Replacement, Battery Connection: шаг 4, изображение 3 из 3
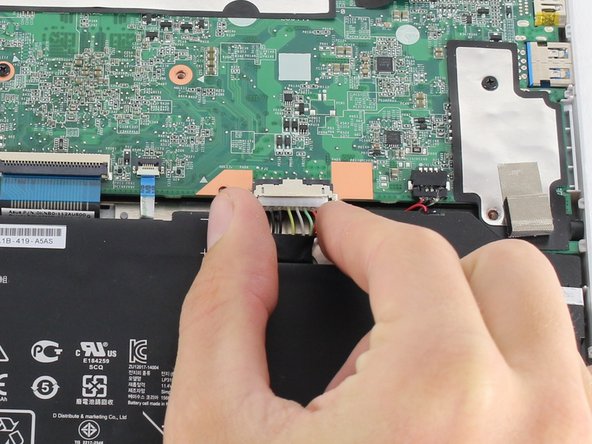
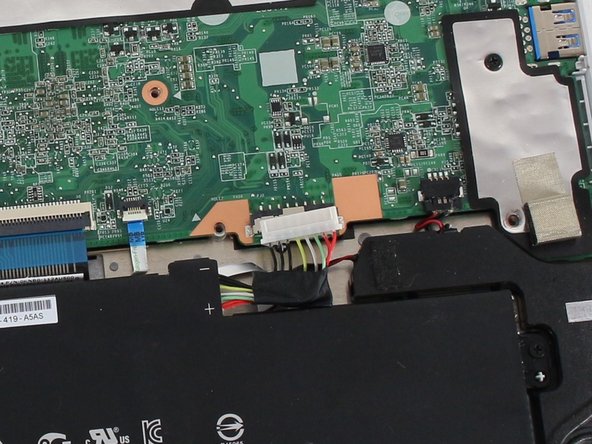
    • To disconnect the battery, pinch the multi-color bundle cable with your thumb and forefinger and pull directly back.

  5. ASUS Chromebook C200MA DS01 Motherboard Replacement, Motherboard: шаг 5, изображение 1 из 1
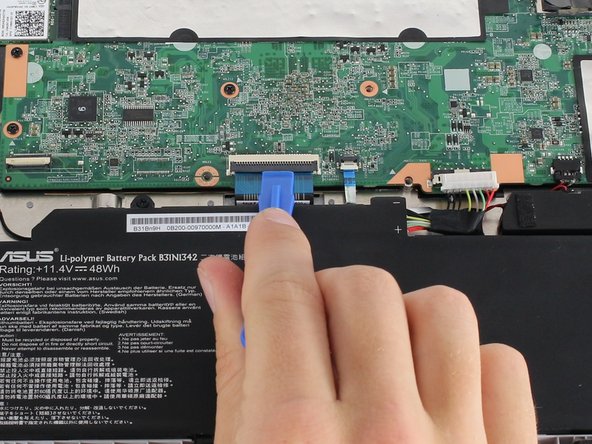
    • Disconnect the USB board ZIF (zero insertion force) connector located towards the bottom left of the motherboard.

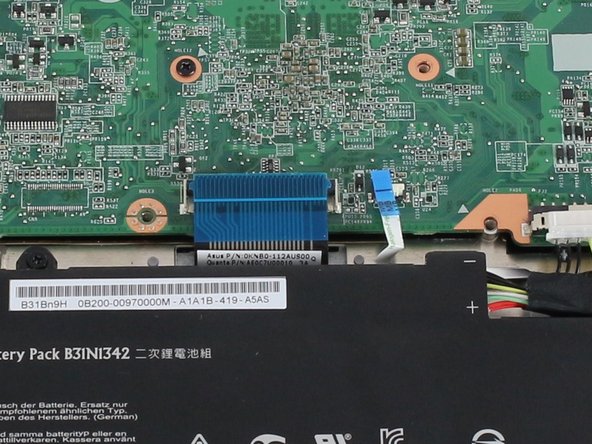
    • Flip the ZIF connector retaining flap up using either a spudger or your fingers.

    • Pull gently on the ribbon cable to disconnect it from the motherboard.

  6. ASUS Chromebook C200MA DS01 Motherboard Replacement: шаг 6, изображение 1 из 3 ASUS Chromebook C200MA DS01 Motherboard Replacement: шаг 6, изображение 2 из 3 ASUS Chromebook C200MA DS01 Motherboard Replacement: шаг 6, изображение 3 из 3
    • Disconnect the large keyboard and small touchpad ZIF connectors, both located in the middle of the bottom edge of the motherboard.

    • Flip both ZIF retaining flaps up using either a spudger or your fingers.

    • Gently pull on each ribbon cable to disconnect them from the motherboard.

  7. ASUS Chromebook C200MA DS01 Motherboard Replacement: шаг 7, изображение 1 из 2 ASUS Chromebook C200MA DS01 Motherboard Replacement: шаг 7, изображение 2 из 2
    • Disconnect the speaker's black bundled cable connector (the cable is white, black and red).

    • Pinch the black bundled cable connector between your thumb and pointer finger and pull.

  8. ASUS Chromebook C200MA DS01 Motherboard Replacement: шаг 8, изображение 1 из 3 ASUS Chromebook C200MA DS01 Motherboard Replacement: шаг 8, изображение 2 из 3 ASUS Chromebook C200MA DS01 Motherboard Replacement: шаг 8, изображение 3 из 3
    • Disconnect the screen cable connector located towards the top right of the motherboard.

    • Using a spudger, gently pry up the sides of the connector.

    • Pull off the connector with your hands.

  9. ASUS Chromebook C200MA DS01 Motherboard Replacement: шаг 9, изображение 1 из 2 ASUS Chromebook C200MA DS01 Motherboard Replacement: шаг 9, изображение 2 из 2
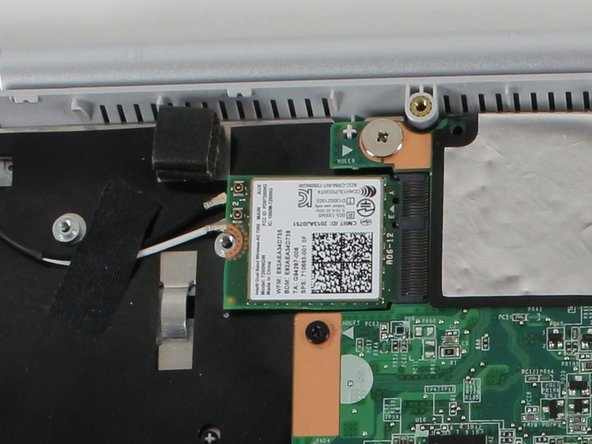
    • Disconnect the black and white antenna cable connectors for the WiFi card. The connectors look like small buttons on the ends of colored wires.

    • Gently pry the cable connectors off with your fingers or a spudger.

    • These connections are button-like and will have a little resistance when removing.

  10. ASUS Chromebook C200MA DS01 Motherboard Replacement: шаг 10, изображение 1 из 1
    • Remove the eight Phillips #0 4.7 mm screws.

    • Remove the Phillips #0 3.7 mm screw.

    • Remove the Phillips #0 2.8 mm screw.

  11. ASUS Chromebook C200MA DS01 Motherboard Replacement: шаг 11, изображение 1 из 1
    • Lift the motherboard from the Chromebook.

Заключение

To reassemble your device, follow these instructions in reverse order.

2 участников успешно повторили данное руководство.

Christopher Lim

Участник с: 04/26/17

779 Репутация

Автор 7 руководств

Команда

Cal Poly, Team S23-G4, Livingston Spring 2017 Участник Cal Poly, Team S23-G4, Livingston Spring 2017

CPSU-LIVINGSTON-S17S23G4

4 членов

Автор 19 руководств

0 Комментариев

Добавить комментарий

Просмотр статистики:

За последние 24часов: 1

За последние 7 дней: 3

За последние 30 дней: 13

За всё время: 2,044