Введение
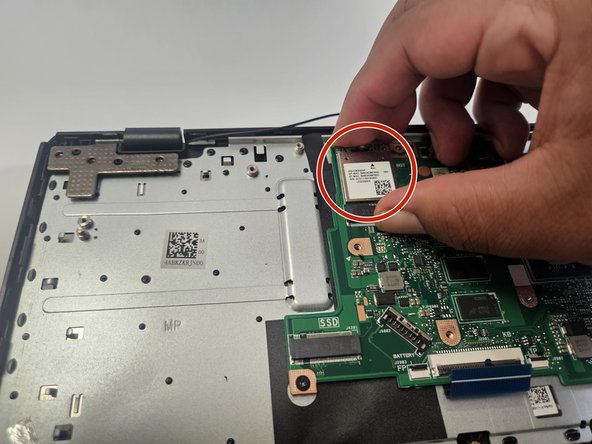
If you're experiencing difficulty connecting to a network, Its possible there is an issue with the wireless card In this guide, we go through the steps of configuration to correctly replace the wireless card. There are different types of wireless cards with different specifications and standards in our case it is a (802.11ac) (Dual band).
Выберете то, что вам нужно
-
-
Place the laptop with the bottom side facing up. Have the front (where the touchpad is) facing toward you.
-
Start by removing the ten 7mm screws on the bottom of the laptop using a JIS #00 screwdriver.
-
-
-
-
Double-check to make sure all of the screws are removed.
-
If you have a Jimmy or other flat, straight-edge object, slide it in the crack where the halves of the case meet.
-
When the parts are separated, pull them apart to expose the insides of the case.
-


To reassemble your device, follow these instructions in reverse order.
To reassemble your device, follow these instructions in reverse order.

Команда

Gateway, Team 73-6, Gonzalez Spring 2023 Участник Gateway, Team 73-6, Gonzalez Spring 2023
GCC-GONZALEZ-S23S73G6
5 членов
Автор 5 руководств