Введение
This guide will explain the process of installing a new screen, or replacing pre-existing screen. This process is more complicated than the other guides. The process to fix the screen is far more complicated and requires a professional. It is recommended to replace the screen should problems arise.
Выберете то, что вам нужно
-
-
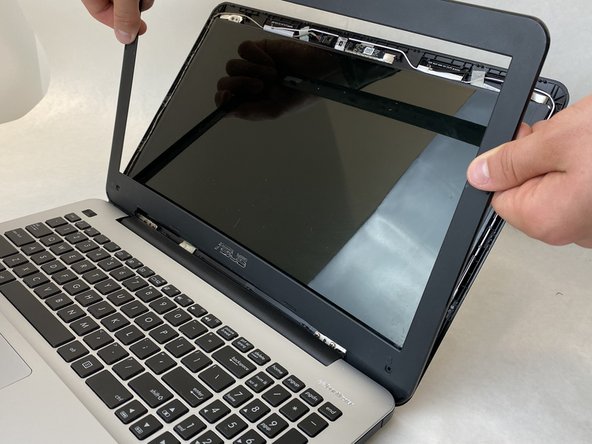
Use a Jimmy to separate the outer panel of the monitor from the bezel. This is accomplished by wedging the tool in the small crease and pulling apart.
-
-
-
Use a Jimmy to take off the two black, square stickers on the bottom left and right corner of the bezel. This will reveal two screws that are holding the bezel in place.
-
Use the Phillips #0 Screwdriver to take the two black 4 mm screws out.
-
-
-
-
To remove the bezel and gain access to the LCD screen, place your thumbs over the two holes where the screws used to be, and apply pressure.
-
Then, simultaneously apply pressure and push the upwards and the bezel will side off.
-
Once released, the bezel will lift off freely from the face of the screen.
-
-
-
To remove the LCD screen, use a Phillips #00 Screwdriver to unscrew the silver screws directly above and below the four corners of the screen.
-
-
-
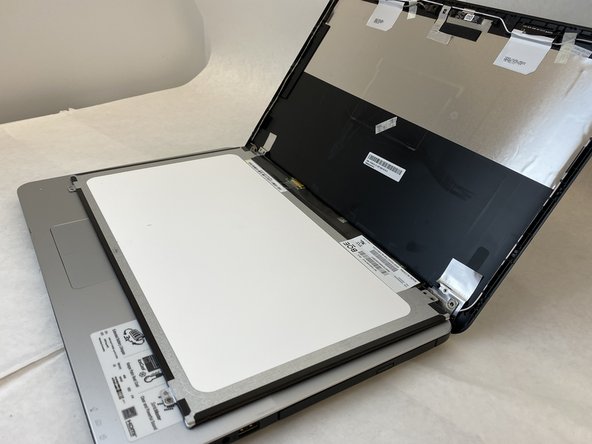
Using your hands, carefully lift the screen from its housing and lay it flat on the keyboard.
-
-
-
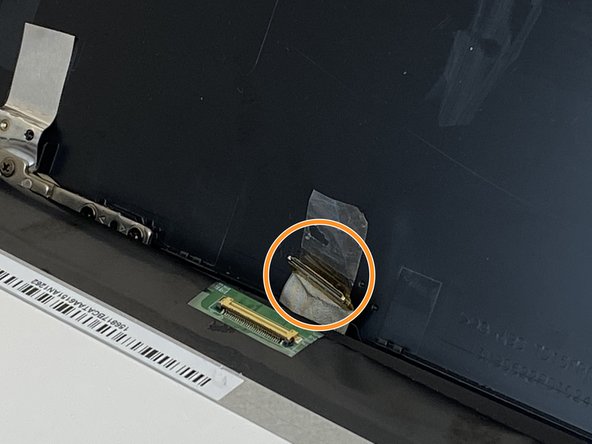
Remove the scotch tape that is on the bottom of the backside of the screen. This will expose the cable that is connected to the screen.
-
Carefully disconnect this cable in order to free the LCD screen.
-


To reassemble your ASUS F555UA-EH71 laptop , follow these instructions in reverse order.
To reassemble your ASUS F555UA-EH71 laptop , follow these instructions in reverse order.
Отменить: Я не выполнил это руководство.
Еще один человек закончил это руководство.

Команда

Embry-Riddle Aeronautical University, Team S24-G3, McClure Fall 2019 Участник Embry-Riddle Aeronautical University, Team S24-G3, McClure Fall 2019
ERAU-MCCLURE-F19S24G3
4 членов
Автор 5 руководств