Перейти к основному содержанию

ASUS Q536F Display Assembly Replacement

Выберете то, что вам нужно

  1. ASUS Q536F Display Assembly Replacement, Back Panel: шаг 1, изображение 1 из 2 ASUS Q536F Display Assembly Replacement, Back Panel: шаг 1, изображение 2 из 2
    • Remove ten 2 mm screws using a Phillips #0 screwdriver.

    • Remove the screw in the center using a T4 Torx screwdriver.

    • Use an iFixit opening tool to pry open the back panel.

    • It's normal to hear some cracking, but proceed with caution.

  2. ASUS Q536F Display Assembly Replacement, Display Assembly: шаг 2, изображение 1 из 1
    • Remove the six 2 mm screws from the hinges using a Phillips #0 screwdriver.

  3. ASUS Q536F Display Assembly Replacement: шаг 3, изображение 1 из 3 ASUS Q536F Display Assembly Replacement: шаг 3, изображение 2 из 3 ASUS Q536F Display Assembly Replacement: шаг 3, изображение 3 из 3
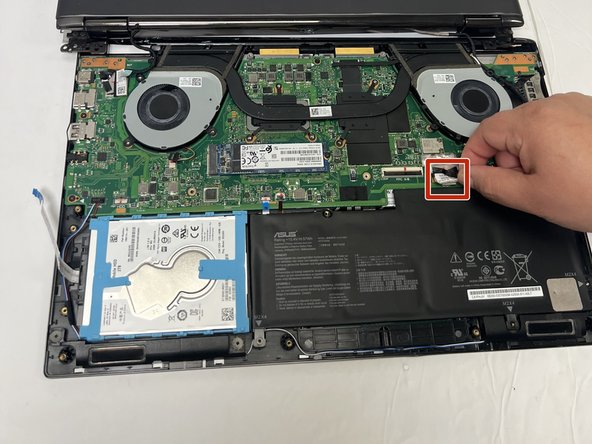
    • Using your fingers, unplug the two power cables connecting the display to the motherboard.

    • Remove the display assembly from the laptop.

Заключение

To reassemble your device, follow these instructions in reverse order.

Kristen Gismondi

Участник с: 11/12/14

82 695 Репутация

Автор 202 руководств

Команда

iFixit Участник iFixit

Staff

136 членов

Автор 17 420 руководств

0 Комментариев

Добавить комментарий

Просмотр статистики:

За последние 24часов: 0

За последние 7 дней: 1

За последние 30 дней: 3

За всё время: 20