Введение
In this guide we will be going through the process of replacing the keyboard. Be sure to keep track of screws by placing them in a cup or bowl while working on the laptop!
Выберете то, что вам нужно
-
-
Power off laptop.
-
Flip over the laptop so the model stickers are pointing towards the ceiling.
-
-
-
Use a Phillips #0 screwdriver to remove the six 10.5mm screws (shown in red).
-
Use a Phillips #0 screwdriver to remove the four 5.5mm screws (shown in orange).
-
-
-
-
Turn over the laptop with the keyboard facing upwards.
-
Insert a plastic opening tool under the edge of the laptop.
-
-
-
After prying open all sides of the laptop, carefully remove the keyboard from the laptop.
-
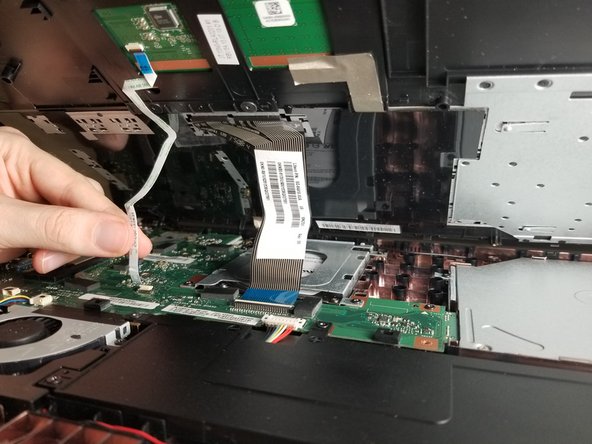
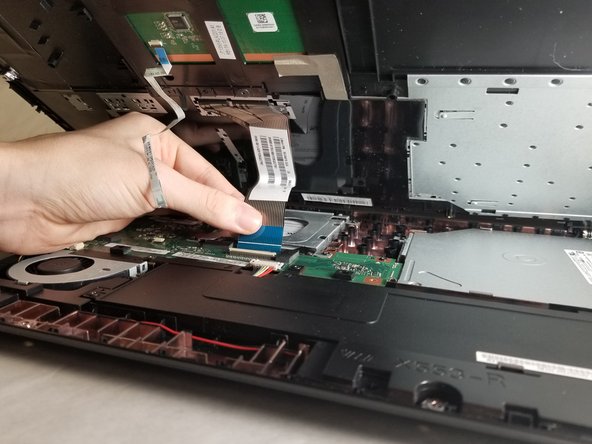
Carefully remove the two cables connecting the keyboard to the laptop by popping up the white clips and sliding the connector out.
-


To reassemble your device, follow these instructions in reverse order.
To reassemble your device, follow these instructions in reverse order.
Отменить: Я не выполнил это руководство.
Еще один человек закончил это руководство.
Команда

IUPUI, Team S2-G4, Harley Fall 2018 Участник IUPUI, Team S2-G4, Harley Fall 2018
IUPUI-HARLEY-F18S2G4
3 членов
Автор 2 руководств