Перейти к основному содержанию

ASUS ZenBook UX302LA-BHI5T08 Hard Drive Replacement

Выберете то, что вам нужно

  1. ASUS ZenBook UX302LA-BHI5T08 Hard Drive Replacement, Back Cover: шаг 1, изображение 1 из 2 ASUS ZenBook UX302LA-BHI5T08 Hard Drive Replacement, Back Cover: шаг 1, изображение 2 из 2
    • Flip the laptop over so the model stickers face the ceiling.

  2. ASUS ZenBook UX302LA-BHI5T08 Hard Drive Replacement: шаг 2, изображение 1 из 2 ASUS ZenBook UX302LA-BHI5T08 Hard Drive Replacement: шаг 2, изображение 2 из 2
    • Remove eleven 7mm Phillips #00 screws that secure the back cover.

    • Two screws are under the rubber pad.

  3. ASUS ZenBook UX302LA-BHI5T08 Hard Drive Replacement: шаг 3, изображение 1 из 2 ASUS ZenBook UX302LA-BHI5T08 Hard Drive Replacement: шаг 3, изображение 2 из 2
    • Using a spudger, carefully remove the back cover.

  4. ASUS ZenBook UX302LA-BHI5T08 Hard Drive Replacement, Battery: шаг 4, изображение 1 из 2 ASUS ZenBook UX302LA-BHI5T08 Hard Drive Replacement, Battery: шаг 4, изображение 2 из 2
    • Remove the six 3mm Phillips #00 screws holding the battery in place.

  5. ASUS ZenBook UX302LA-BHI5T08 Hard Drive Replacement: шаг 5, изображение 1 из 2 ASUS ZenBook UX302LA-BHI5T08 Hard Drive Replacement: шаг 5, изображение 2 из 2
    • Disconnect the battery wires from the motherboard by pulling on the black tab using a spudger or your hands.

  6. ASUS ZenBook UX302LA-BHI5T08 Hard Drive Replacement: шаг 6, изображение 1 из 1
    • Carefully lift the battery up and out of the laptop.

  7. ASUS ZenBook UX302LA-BHI5T08 Hard Drive Replacement, Hard Drive: шаг 7, изображение 1 из 3 ASUS ZenBook UX302LA-BHI5T08 Hard Drive Replacement, Hard Drive: шаг 7, изображение 2 из 3 ASUS ZenBook UX302LA-BHI5T08 Hard Drive Replacement, Hard Drive: шаг 7, изображение 3 из 3
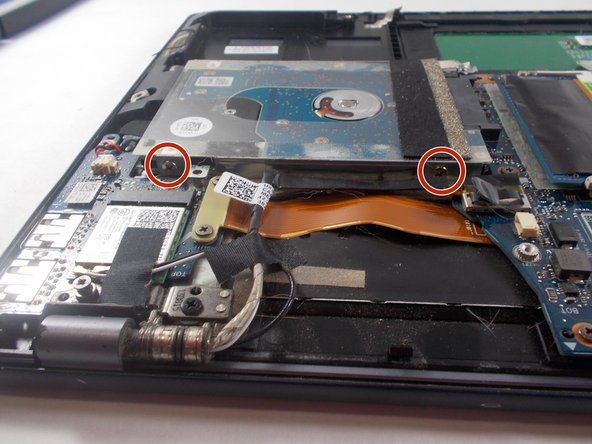
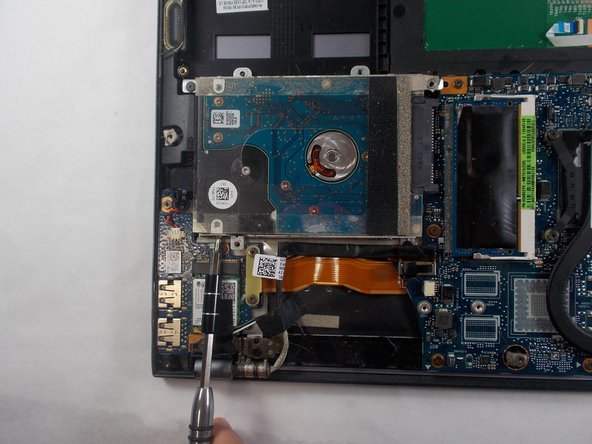
    • Remove four 3 mm Phillips screws (two on each side) holding the hard drive in the frame

  8. ASUS ZenBook UX302LA-BHI5T08 Hard Drive Replacement: шаг 8, изображение 1 из 2 ASUS ZenBook UX302LA-BHI5T08 Hard Drive Replacement: шаг 8, изображение 2 из 2
    • Grip the side of the hard drive and slide it out of the device.

Заключение

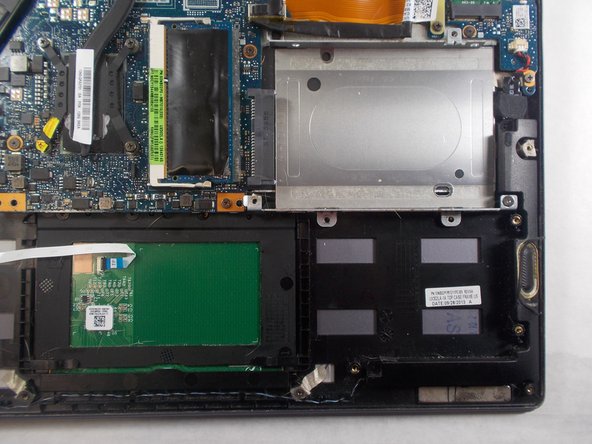
To reassemble your device, follow these instructions in reverse order.

Еще один человек закончил это руководство.

Joshua Letizia

Участник с: 10/30/19

193 Репутация

Автор 2 руководств

Команда

UMass Dartmouth, Team S4-G4, Saloman Fall 2019 Участник UMass Dartmouth, Team S4-G4, Saloman Fall 2019

UMASSD-SALOMAN-F19S4G4

3 членов

Автор 4 руководств

0 Комментариев

Добавить комментарий

Просмотр статистики:

За последние 24часов: 1

За последние 7 дней: 1

За последние 30 дней: 10

За всё время: 552