Перейти к основному содержанию

Access to RAM and CPU from why! W253EU

Выберете то, что вам нужно

  1. Access to RAM and CPU from why! W253EU, Battery from why! Remove W253EU: шаг 1, изображение 1 из 3 Access to RAM and CPU from why! W253EU, Battery from why! Remove W253EU: шаг 1, изображение 2 из 3 Access to RAM and CPU from why! W253EU, Battery from why! Remove W253EU: шаг 1, изображение 3 из 3
    • Turn off the computer.

    • Before each operation it is important to start with the removal of the accumulator.

    • Take the slide unlocked into position, remove the battery.

  2. Access to RAM and CPU from why! W253EU, Access to RAM and CPU from why! W253EU: шаг 2, изображение 1 из 2 Access to RAM and CPU from why! W253EU, Access to RAM and CPU from why! W253EU: шаг 2, изображение 2 из 2
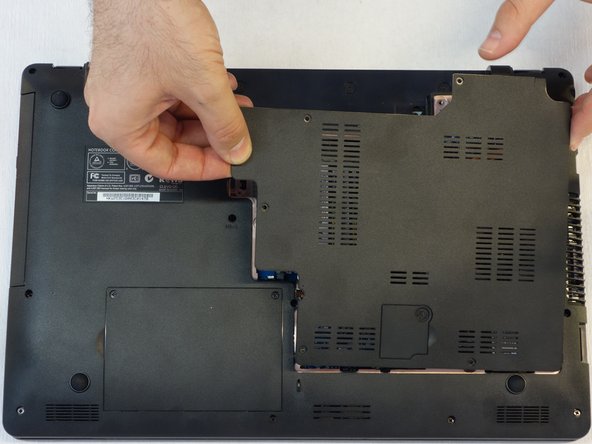
    • Using a Philips #1 screwdriver, unscrew the 5 screws securing the cover.

  3. Access to RAM and CPU from why! W253EU: шаг 3, изображение 1 из 3 Access to RAM and CPU from why! W253EU: шаг 3, изображение 2 из 3 Access to RAM and CPU from why! W253EU: шаг 3, изображение 3 из 3
    • Push the screwdriver a few millimeters under the cover so that it can be touched with your fingers.

    • Now lift the cover carefully.

    • Attention! Disconnect the ventillator cable so that the cover can be completely removed (see next step).

  4. Access to RAM and CPU from why! W253EU: шаг 4, изображение 1 из 1
    • Since the ventillator is mounted under the cover, its power supply cable must first be disconnected so that the cover can then be completely removed.

Заключение

For reassembly, follow the instructions in reverse order.

Особая благодарность этим переводчикам:

de en

100%

Эти переводчики помогают нам починить мир! Хотите внести свой вклад?
Начните переводить ›

Felice Suglia

Участник с: 06/15/13

30 884 Репутация

Автор 264 руководств

0 Комментариев

Добавить комментарий

Просмотр статистики:

За последние 24часов: 0

За последние 7 дней: 1

За последние 30 дней: 2

За всё время: 257