Перейти к основному содержанию

Acer Aspire 4810TZ-4120 Hard Drive Replacement

Выберете то, что вам нужно

  1. Acer Aspire 4810TZ-4120 Hard Drive Replacement, Hard drive: шаг 1, изображение 1 из 2 Acer Aspire 4810TZ-4120 Hard Drive Replacement, Hard drive: шаг 1, изображение 2 из 2
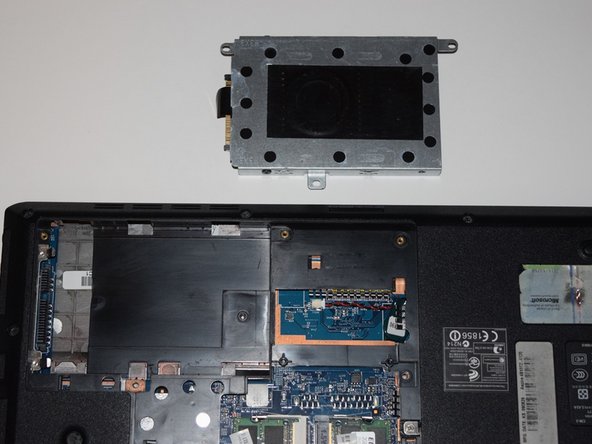
    • Lay the laptop upside down.

    • Locate and unscrew the seven phillips head screws.

  2. Acer Aspire 4810TZ-4120 Hard Drive Replacement: шаг 2, изображение 1 из 1
    • Remove the cover panel from the laptop

  3. Acer Aspire 4810TZ-4120 Hard Drive Replacement: шаг 3, изображение 1 из 3 Acer Aspire 4810TZ-4120 Hard Drive Replacement: шаг 3, изображение 2 из 3 Acer Aspire 4810TZ-4120 Hard Drive Replacement: шаг 3, изображение 3 из 3
    • Remove the hard drive from the laptop by using a Spudger tool to pry it out.

Заключение

To reassemble your device, follow these instructions in reverse order.

Antonio Kittrell

Участник с: 09/20/17

101 Репутация

1 руководство автора

Команда

University of North Texas, Team S5-G3, Thomas Fall 2017 Участник University of North Texas, Team S5-G3, Thomas Fall 2017

UNT-THOMAS-F17S5G3

4 членов

Автор 5 руководств

Один комментарий

Yes, but how do you get the hard drive out of its carrier, for example in order to replace it with an SSD?

Philip Le Riche - Ответить

Добавить комментарий

Просмотр статистики:

За последние 24часов: 0

За последние 7 дней: 4

За последние 30 дней: 7

За всё время: 499