Перейти к основному содержанию
Присоединяйся к сообществу ремонтников - Создай аккаунт
Acer Aspire 5100 CPU Replacement

Выберете то, что вам нужно

  1. Acer Aspire 5100 CPU Replacement, Fan: шаг 1, изображение 1 из 1
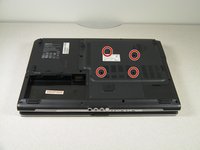
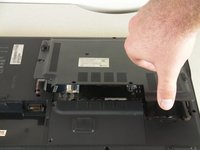
    • Flip the laptop upside-down.

    • Remove the battery as a safety precaution.

    • Remove the four screws attached to the large panel.

    Спросите у FixBot

    Добавить комментарий

  2. Acer Aspire 5100 CPU Replacement: шаг 2, изображение 1 из 1
    • Lift and remove the panel.

    Спросите у FixBot

    Добавить комментарий

  3. Acer Aspire 5100 CPU Replacement: шаг 3, изображение 1 из 1
    • Remove the two screws attached to the fan.

    Спросите у FixBot

    Добавить комментарий

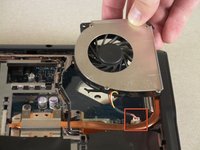
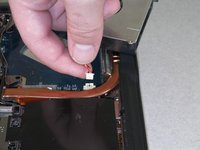
  4. Acer Aspire 5100 CPU Replacement: шаг 4, изображение 1 из 2 Acer Aspire 5100 CPU Replacement: шаг 4, изображение 2 из 2
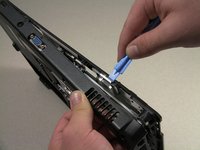
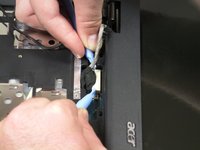
    • Lift the fan and detach the cable that connects the fan to the motherboard.

    • The fan can break easily. Be careful when removing.

    • When detaching the cable, do not pull on the cable itself. Instead, use a small spudger to detach it at the white section that connects it to the motherboard.

    Спросите у FixBot

    Добавить комментарий

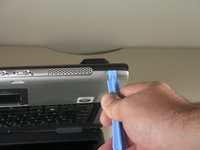
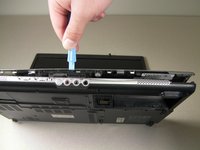
  5. Acer Aspire 5100 CPU Replacement, Keyboard: шаг 5, изображение 1 из 2 Acer Aspire 5100 CPU Replacement, Keyboard: шаг 5, изображение 2 из 2
    • Open and push the screen back all the way until it is horizontal with the rest of the laptop.

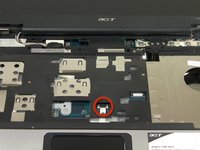
    • Use an opening tool to remove the panel above the keyboard that has the power button on it.

    • After you have released the tabs, lift up the panel.

    Спросите у FixBot

    Добавить комментарий

  6. Acer Aspire 5100 CPU Replacement: шаг 6, изображение 1 из 3 Acer Aspire 5100 CPU Replacement: шаг 6, изображение 2 из 3 Acer Aspire 5100 CPU Replacement: шаг 6, изображение 3 из 3
    • Under the panel, remove the two screws that connect the keyboard to the laptop.

    • One screw is located above the F5 button, and the other one is located above the F10 button.

    • Potential for device damage: Lift up the keyboard CAREFULLY because there is a ribbon that connects the keyboard to the motherboard.

    Спросите у FixBot

    Добавить комментарий

  7. Acer Aspire 5100 CPU Replacement: шаг 7, изображение 1 из 1
    • Release the catch on the ribbon socket by sliding the two tabs toward the ribbon.

    • Pull the ribbon under the keyboard to detach it from the motherboard.

    • Remove the keyboard.

    Спросите у FixBot

    Добавить комментарий

  8. Acer Aspire 5100 CPU Replacement, Track Pad: шаг 8, изображение 1 из 1
    • Remove the nine screws from the back edges of the laptop.

    Спросите у FixBot

    Добавить комментарий

  9. Acer Aspire 5100 CPU Replacement: шаг 9, изображение 1 из 3 Acer Aspire 5100 CPU Replacement: шаг 9, изображение 2 из 3 Acer Aspire 5100 CPU Replacement: шаг 9, изображение 3 из 3
    • Open the lid of the laptop and locate the cover that surrounds the keyboard and track pad.

    • Use the spudger to pry open the sides of this cover.

    • DO NOT lift cover off after detaching it because the track pad is connected to the motherboard.

    Спросите у FixBot

    Добавить комментарий

  10. Acer Aspire 5100 CPU Replacement: шаг 10, изображение 1 из 2 Acer Aspire 5100 CPU Replacement: шаг 10, изображение 2 из 2
    • Slightly lift up the cover to see the ribbon connection.

    • Release the catch by sliding the two lugs toward the ribbon, then pull the ribbon to detach it from the motherboard.

    • Lift up the cover from the laptop.

    Спросите у FixBot

    Добавить комментарий

  11. Acer Aspire 5100 CPU Replacement: шаг 11, изображение 1 из 1
    • On the cover that was removed, flip it around and locate where the back of the track pad is.

    • Remove the three screws located at the corners.

    • Lift up the bracket that you just unscrewed and remove track pad.

    Спросите у FixBot

    Добавить комментарий

  12. Acer Aspire 5100 CPU Replacement, LCD Monitor: шаг 12, изображение 1 из 1
    • Remove the two screws from each corner beneath the LCD screen.

    Спросите у FixBot

    Добавить комментарий

  13. Acer Aspire 5100 CPU Replacement: шаг 13, изображение 1 из 2 Acer Aspire 5100 CPU Replacement: шаг 13, изображение 2 из 2
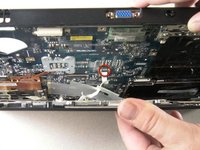
    • Detach the white rectangle located on the motherboard at the end of the wire connected to the LCD screen.

    Спросите у FixBot

    Добавить комментарий

  14. Acer Aspire 5100 CPU Replacement: шаг 14, изображение 1 из 2 Acer Aspire 5100 CPU Replacement: шаг 14, изображение 2 из 2
    • Flip the laptop upside down.

    • Remove the four screws from the back panel of the laptop.

    • Lift the panel up and set it aside.

    Спросите у FixBot

    Добавить комментарий

  15. Acer Aspire 5100 CPU Replacement: шаг 15, изображение 1 из 1
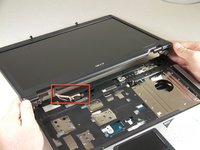
    • Detach the black and white wire.

    • You do not need to remove the cooling fan.

    Спросите у FixBot

    Добавить комментарий

  16. Acer Aspire 5100 CPU Replacement: шаг 16, изображение 1 из 1
    • Lift up the monitor to detach it.

    Спросите у FixBot

    Добавить комментарий

  17. Acer Aspire 5100 CPU Replacement, Motherboard: шаг 17, изображение 1 из 1
    • Remove the 15 screws from the motherboard.

    • There is normally only one remaining screw attached to the motherboard on the bottom right beneath the tape.

    • All the other screw holes (except screws holding the base cover on) are kept empty.

    Спросите у FixBot

    Добавить комментарий

  18. Acer Aspire 5100 CPU Replacement: шаг 18, изображение 1 из 1
    • Flip the laptop upside down.

    • Locate the heat sink, which is the copper "L" shaped component, and unscrew the four screws that connect it to the motherboard.

    Спросите у FixBot

    Добавить комментарий

  19. Acer Aspire 5100 CPU Replacement: шаг 19, изображение 1 из 1
    • Push out the back of the casing by the VGA connector to remove the motherboard.

    Спросите у FixBot

    Добавить комментарий

  20. Acer Aspire 5100 CPU Replacement: шаг 20, изображение 1 из 2 Acer Aspire 5100 CPU Replacement: шаг 20, изображение 2 из 2
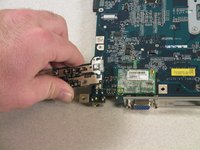
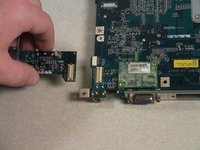
    • Lift up and remove the motherboard from the laptop casing.

    • Remove the USB add-on card to use it with the new motherboard.

    • To remove, grab on the sides and lift upward.

    Спросите у FixBot

    Добавить комментарий

  21. Acer Aspire 5100 CPU Replacement, CPU: шаг 21, изображение 1 из 1
    • Loosen the screw to the CPU by rotating counter clockwise. The use of a flat head screwdriver will be needed.

    Спросите у FixBot

    Добавить комментарий

  22. Acer Aspire 5100 CPU Replacement: шаг 22, изображение 1 из 1
    • Carefully pull up on the CPU from the circuit board without twisting or rotating as connections may become bent.

    • You now have the CPU, you may inspect it to check for any damages or replacement as necessary

    Спросите у FixBot

    Добавить комментарий

Заключение

To reassemble your device, follow these instructions in reverse order.

Отменить: Я не выполнил это руководство.

Еще один человек закончил это руководство.

2 Комментарии к руководству

Hello sir

Can I switch to cpu amd advanced chip intel or I can not do so

Thank you

Message me on email

rabaharif1993@gmail.com

rabah arif - Ответить Поделиться
It is not worth the improvement.

Imi13 - Ответить Поделиться

Добавить комментарий

Статистика просмотров:

За последние 24 часов: 0

За последние 7 дней: 3

За последние 30 дней: 49

За всё время: 5,139