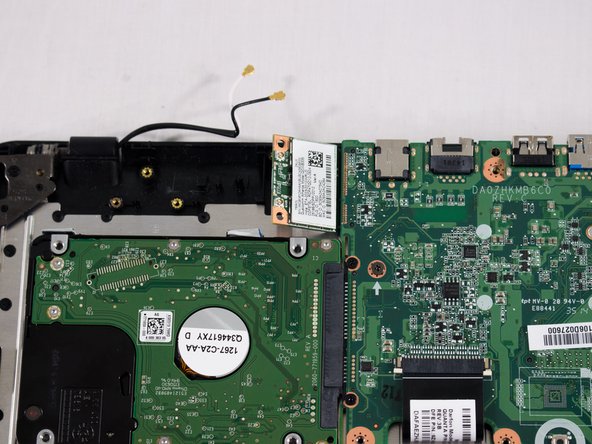
Перейти к основному содержанию

Acer Aspire ES1-111M-C7DE Network Card Replacement

Выберете то, что вам нужно

  1. Acer Aspire ES1-111M-C7DE Network Card Replacement, Back Cover: шаг 1, изображение 1 из 2 Acer Aspire ES1-111M-C7DE Network Card Replacement, Back Cover: шаг 1, изображение 2 из 2
    • Unscrew the 13 6.2mm screws located on the bottom of the laptop using the JIS #0 screwdriver.

  2. Acer Aspire ES1-111M-C7DE Network Card Replacement: шаг 2, изображение 1 из 3 Acer Aspire ES1-111M-C7DE Network Card Replacement: шаг 2, изображение 2 из 3 Acer Aspire ES1-111M-C7DE Network Card Replacement: шаг 2, изображение 3 из 3
    • Using a plastic opening tool, gently pry the lower case off. Place aside.

  3. Acer Aspire ES1-111M-C7DE Network Card Replacement, Network Card: шаг 3, изображение 1 из 2 Acer Aspire ES1-111M-C7DE Network Card Replacement, Network Card: шаг 3, изображение 2 из 2
    • You will see a white rectangular piece next to the upper left-hand corner of the motherboard that is connected with a black cord and a white cord; this is the network card.

    • Unscrew the one 6.2mm screw in the upper left-hand corner of the network card.

  4. Acer Aspire ES1-111M-C7DE Network Card Replacement: шаг 4, изображение 1 из 3 Acer Aspire ES1-111M-C7DE Network Card Replacement: шаг 4, изображение 2 из 3 Acer Aspire ES1-111M-C7DE Network Card Replacement: шаг 4, изображение 3 из 3
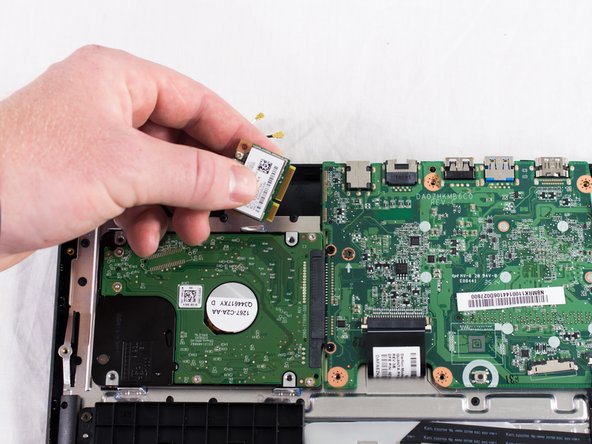
    • Remove the black and the white cords from the network card.

    • Slide the card out of the motherboard and replace it with the new one.

Заключение

To reassemble your device, follow these instructions in reverse order.

Payton Stewart

Участник с: 09/25/17

101 Репутация

1 руководство автора

Команда

USF Tampa, Team S3-G1, Cannon Fall 2017 Участник USF Tampa, Team S3-G1, Cannon Fall 2017

USFT-CANNON-F17S3G1

4 членов

Автор 6 руководств

0 Комментариев

Добавить комментарий

Просмотр статистики:

За последние 24часов: 1

За последние 7 дней: 6

За последние 30 дней: 8

За всё время: 261