Этот документ имеет более свежие изменения. Перейти к последней непроверенной версии.
Введение
This guide will walk you through disconnecting the display assembly. You may need to remove the display assembly if it is damaged and needs repair, or simply for cleaning.
Выберете то, что вам нужно
-
-
Remove the 12 5mm Phillips #00 screws.
-
Use a plastic opening tool to gently pry open the back panel.
-
Gently lift up the back panel, exposing the internals of the laptop.
-
-
-
Remove the motherboard connector cables by gently lifting the black latch that clamps them in place with a spudger or simply pull the connector from the port.
-
-
-
-
Remove the 5 5mm PH0 screws holding the motherboard in place.
-
Gently remove the motherboard from the chassis.
-
-
-
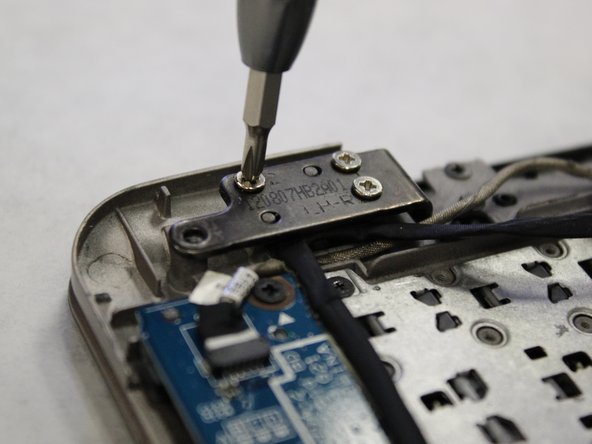
Unscrew the 10 5mm PH00 screws from the hinges attaching the display assembly to the base.
-
-
-
Unlatch the screen from the frame
-


To reassemble your device, follow these instructions in reverse order.
To reassemble your device, follow these instructions in reverse order.
Отменить: Я не выполнил это руководство.
3 участников успешно повторили данное руководство.
Команда

Washington State, Team S1-G4, Hope Fall 2018 Участник Washington State, Team S1-G4, Hope Fall 2018
WSU-HOPE-F18S1G4
3 членов
Автор 6 руководств
3 Комментариев
Hey where can I find the screen for this model, cause currently my laptop screen backlight spoiled.
You can find this screen on 3rd party sites such as newegg and ebay.
Please arrange me a screen for this acer aspire S3 ms 2346
Where i ger motherboard for this
Mmgage@rediffmail.com
MOHAN GAGE - Ответить
Be careful when removing the lid, since the power button on it is still connected to the motherboard through two cables; do it gently.
Milen - Ответить