Эта версия возможно содержит некорректные исправления. Переключить на последнюю проверенную версию.
Выберете то, что вам нужно
-
Этот шаг не переведен. Помогите перевести
-
Wedge your plastic opening tool into the crevice on the volume rocker and pull down like a lever to create space.
-
Slide the plastic opening tool along the crevice to separate the back plate.
-
-
Этот шаг не переведен. Помогите перевести
-
Use your screwdriver with the Phillips PH000 attachment to unscrew the single 4mm screw that holds the battery to the base plate.
-
-
-
Этот шаг не переведен. Помогите перевести
-
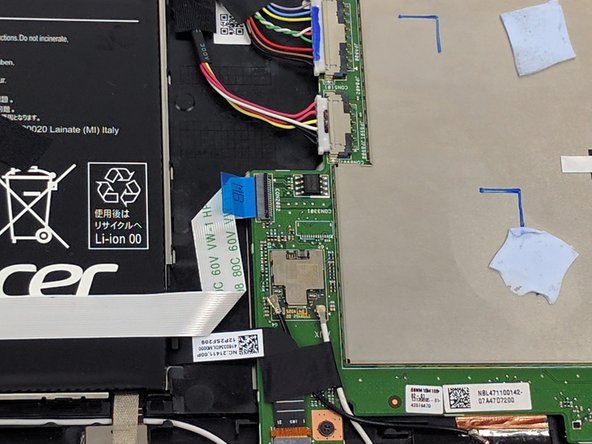
Gently slide the plastic opening tool under the black clip that is attached to the audio ribbon cable.
-
Pull down on the plastic opening tool like a lever to flip the black clip and remove the ribbon cable.
-
-
Этот шаг не переведен. Помогите перевести
-
Remove the tape to expose the left side of the ZIF connector.
-
-
Этот шаг не переведен. Помогите перевести
-
Use a plastic opening tool to flip up the black clip on the ZIF connector.
-
Once the black clip is flipped up, it is safe to remove the audio ribbon cable.
-
-
Этот шаг не переведен. Помогите перевести
-
Use a plastic opening tool to gently push the edge of the sliding bundle cable connector out.
-
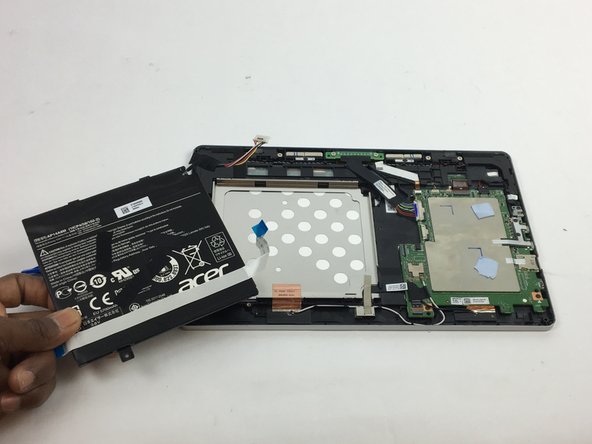
Remove the battery.
-


Отменить: Я не выполнил это руководство.
9 участников успешно повторили данное руководство.
Команда

USF Tampa, Team 3-4, Passmore Fall 2016 Участник USF Tampa, Team 3-4, Passmore Fall 2016
USFT-PASSMORE-F16S3G4
4 членов
Автор 4 руководств
3 Комментариев
How can i get a cmos battery off that pc
How does the Switch 10 back removal process differ from the Switch Alpha 12 back removal process. You don’t have much in the stored “fixes” files for the Switch Alpha 12. Can anything here apply to the “12” too? THANKS