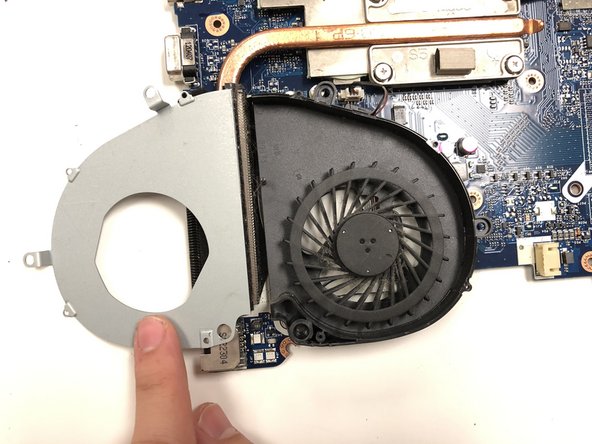
Перейти к основному содержанию

Acer Aspire V3-551-8469 Fan Replacement

Выберете то, что вам нужно

  1. Acer Aspire V3-551-8469 Fan Replacement, Fan: шаг 1, изображение 1 из 2 Acer Aspire V3-551-8469 Fan Replacement, Fan: шаг 1, изображение 2 из 2
    • To release the battery, slide the orange tab to the right with a spudger.

    • The battery is now released and can be picked up and set to the side.

  2. Acer Aspire V3-551-8469 Fan Replacement: шаг 2, изображение 1 из 3 Acer Aspire V3-551-8469 Fan Replacement: шаг 2, изображение 2 из 3 Acer Aspire V3-551-8469 Fan Replacement: шаг 2, изображение 3 из 3
    • Remove the 16 5.3 mm Phillips #0 screws.

    • Remove the three 3 mm Phillips #00 screws.

  3. Acer Aspire V3-551-8469 Fan Replacement: шаг 3, изображение 1 из 3 Acer Aspire V3-551-8469 Fan Replacement: шаг 3, изображение 2 из 3 Acer Aspire V3-551-8469 Fan Replacement: шаг 3, изображение 3 из 3
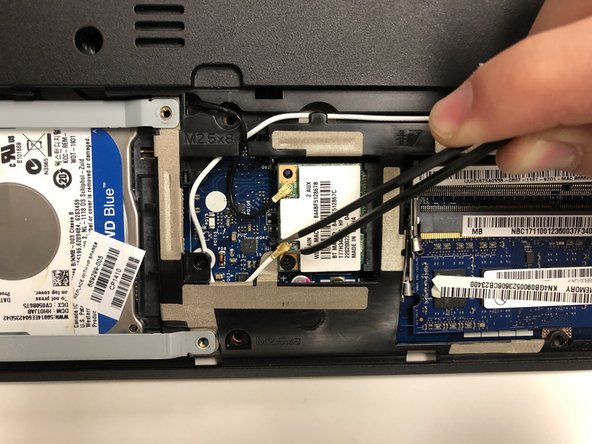
    • Remove the back panel, and remove the white cable from the wifi chip using a pair of tweezers.

  4. Acer Aspire V3-551-8469 Fan Replacement: шаг 4, изображение 1 из 1
    • Using a Phillips head #0 screwdriver, remove the four 5.3 mm screws.

  5. Acer Aspire V3-551-8469 Fan Replacement: шаг 5, изображение 1 из 3 Acer Aspire V3-551-8469 Fan Replacement: шаг 5, изображение 2 из 3 Acer Aspire V3-551-8469 Fan Replacement: шаг 5, изображение 3 из 3
    • Flip the computer over and remove the touchpad cover and keyboard.

    • Be careful doing this since there are two ribbon cables connecting both panels to the motherboard.

  6. Acer Aspire V3-551-8469 Fan Replacement: шаг 6, изображение 1 из 2 Acer Aspire V3-551-8469 Fan Replacement: шаг 6, изображение 2 из 2
    • Disconnect the four ribbon cables.

  7. Acer Aspire V3-551-8469 Fan Replacement: шаг 7, изображение 1 из 1
    • Remove the five 5.3 mm Phillips #0 screws.

  8. Acer Aspire V3-551-8469 Fan Replacement: шаг 8, изображение 1 из 1
    • Gently lift up the motherboard and slide it out to the right.

    • Do not force the board. If stuck, check that the ports on the left are loose, that no wires are still attached, and no screws are still in.

  9. Acer Aspire V3-551-8469 Fan Replacement: шаг 9, изображение 1 из 1
    • Flip the motherboard over and using a pair of tweezers, remove the cable.

  10. Acer Aspire V3-551-8469 Fan Replacement: шаг 10, изображение 1 из 2 Acer Aspire V3-551-8469 Fan Replacement: шаг 10, изображение 2 из 2
    • Remove the six 2mm Phillips #00 screws.

  11. Acer Aspire V3-551-8469 Fan Replacement: шаг 11, изображение 1 из 1
    • Using a pair of tweezers, remove the cable.

Заключение

To reassemble your device, follow these instructions in reverse order.

Еще один человек закончил это руководство.

Maritsa Garcia

Участник с: 10/22/18

800 Репутация

Автор 5 руководств

Команда

Baylor, Team S1-G4, Williams Fall 2018 Участник Baylor, Team S1-G4, Williams Fall 2018

BU-WILLIAMS-F18S1G4

3 членов

Автор 5 руководств

0 Комментариев

Добавить комментарий

Просмотр статистики:

За последние 24часов: 1

За последние 7 дней: 4

За последние 30 дней: 6

За всё время: 599