Перейти к основному содержанию

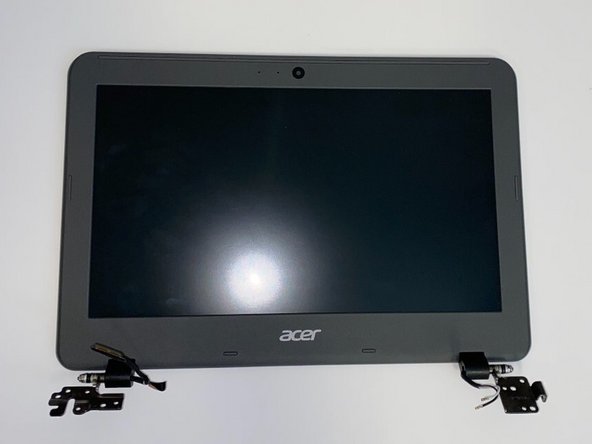
Acer Chromebook C731-C8VE Display Assembly Replacement

Выберете то, что вам нужно

  1. Acer Chromebook C731-C8VE Display Assembly Replacement, Display Assembly: шаг 1, изображение 1 из 1
    • Place the Chromebook face down.

  2. Acer Chromebook C731-C8VE Display Assembly Replacement: шаг 2, изображение 1 из 2 Acer Chromebook C731-C8VE Display Assembly Replacement: шаг 2, изображение 2 из 2
    • Make sure to completely turn off the device before beginning this step.

    • Use a JIS #00 screwdriver to remove the 11 screws on the underside of the laptop.

    • The 2 mm screws marked orange have washers attached and must be placed in these specific areas.

    • These 2 mm screws do not have washers and will be located on the left and right of the device.

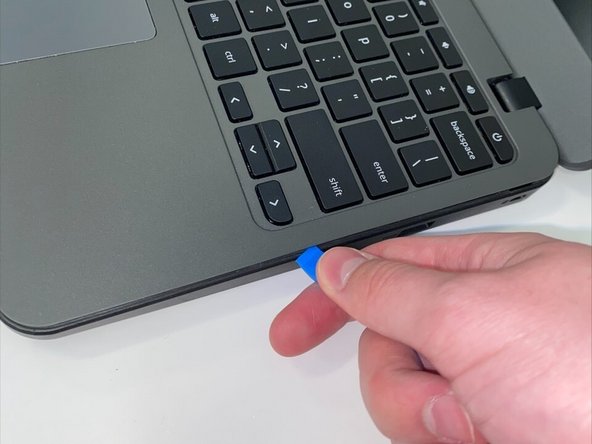
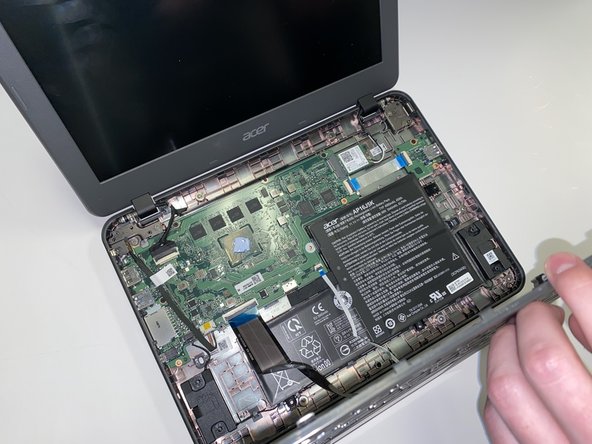
  3. Acer Chromebook C731-C8VE Display Assembly Replacement: шаг 3, изображение 1 из 3 Acer Chromebook C731-C8VE Display Assembly Replacement: шаг 3, изображение 2 из 3 Acer Chromebook C731-C8VE Display Assembly Replacement: шаг 3, изображение 3 из 3
    • Use the iFixit opening tool to remove the keyboard from the device by prying it loose from the base.

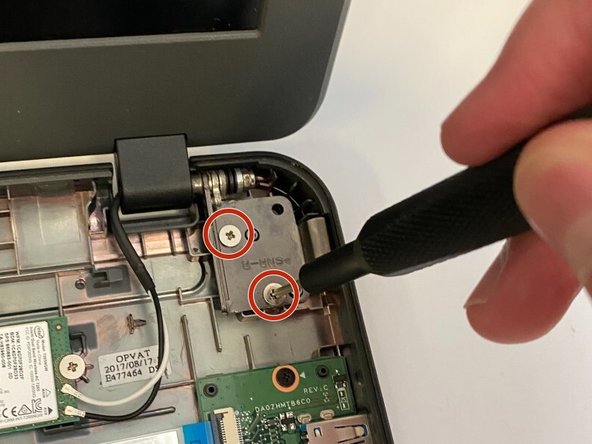
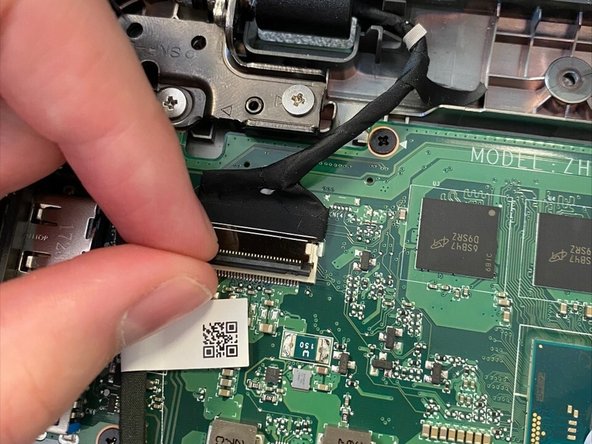
  4. Acer Chromebook C731-C8VE Display Assembly Replacement: шаг 4, изображение 1 из 3 Acer Chromebook C731-C8VE Display Assembly Replacement: шаг 4, изображение 2 из 3 Acer Chromebook C731-C8VE Display Assembly Replacement: шаг 4, изображение 3 из 3
    • Use the JIS #00 screwdriver to remove the four 1.5mm screws that connect the base of the laptop to the screen. There are two screws on each latch.

    • Carefully detach the cables that connect the screen to the motherboard. This includes a black display cable that connects to the mother board and two wires that connect to the Wi-Fi card.

  5. Acer Chromebook C731-C8VE Display Assembly Replacement: шаг 5, изображение 1 из 2 Acer Chromebook C731-C8VE Display Assembly Replacement: шаг 5, изображение 2 из 2
    • Do this step slowly to ensure that you do not damage the screen or the motherboard.

    • Remove the screen from the base of the device.

Заключение

To reassemble your device, follow these instructions in reverse order.

Justin Menninger

Участник с: 03/21/22

385 Репутация

Автор 3 руководств

Команда

University of Alabama, Team 3-1, Bedsole Spring 2022 Участник University of Alabama, Team 3-1, Bedsole Spring 2022

UA-BEDSOLE-S22S3G1

4 членов

Автор 4 руководств

0 Комментариев

Добавить комментарий

Просмотр статистики:

За последние 24часов: 0

За последние 7 дней: 3

За последние 30 дней: 20

За всё время: 265