Перейти к основному содержанию

Acer Chromebook CB5-312T-K 8Z9 Motherboard Replacement

Выберете то, что вам нужно

  1. Acer Chromebook CB5-312T-K 8Z9 Motherboard Replacement, Acer Chromebook CB5-312T-K 8Z9 Back Cover: шаг 1, изображение 1 из 2 Acer Chromebook CB5-312T-K 8Z9 Motherboard Replacement, Acer Chromebook CB5-312T-K 8Z9 Back Cover: шаг 1, изображение 2 из 2
    • First begin by flipping the laptop on its back and having the back cover face you directly.

    • Then unscrew the ten Phillips head screws that hold down the back cover using a Phillips #0 Screw Driver.  

  2. Acer Chromebook CB5-312T-K 8Z9 Motherboard Replacement: шаг 2, изображение 1 из 1
    • Using a plastic spudger, open the back cover and remove it from the laptop.

  3. Acer Chromebook CB5-312T-K 8Z9 Motherboard Replacement, Battery: шаг 3, изображение 1 из 3 Acer Chromebook CB5-312T-K 8Z9 Motherboard Replacement, Battery: шаг 3, изображение 2 из 3 Acer Chromebook CB5-312T-K 8Z9 Motherboard Replacement, Battery: шаг 3, изображение 3 из 3
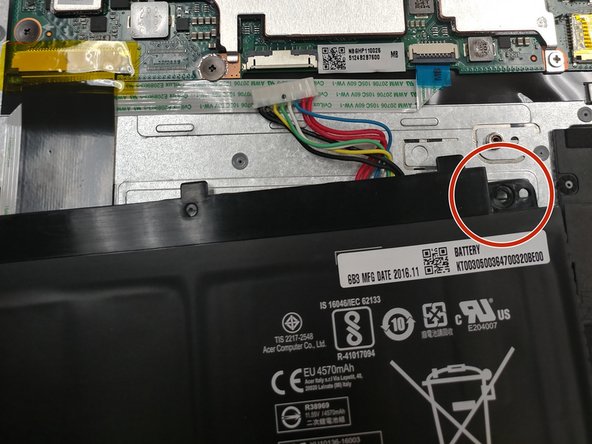
    • look for the battery in the bottom half of the computer

    • Once you have found the battery, look for the screws that secure the battery, in the upper left and right corners.

  4. Acer Chromebook CB5-312T-K 8Z9 Motherboard Replacement: шаг 4, изображение 1 из 3 Acer Chromebook CB5-312T-K 8Z9 Motherboard Replacement: шаг 4, изображение 2 из 3 Acer Chromebook CB5-312T-K 8Z9 Motherboard Replacement: шаг 4, изображение 3 из 3
    • Begin by unscrewing the two Phillips head screws that hold down the battery using a J1 sized screwdriver.

    • Finally remove the battery from the laptop.

  5. Acer Chromebook CB5-312T-K 8Z9 Motherboard Replacement, Motherboard: шаг 5, изображение 1 из 3 Acer Chromebook CB5-312T-K 8Z9 Motherboard Replacement, Motherboard: шаг 5, изображение 2 из 3 Acer Chromebook CB5-312T-K 8Z9 Motherboard Replacement, Motherboard: шаг 5, изображение 3 из 3
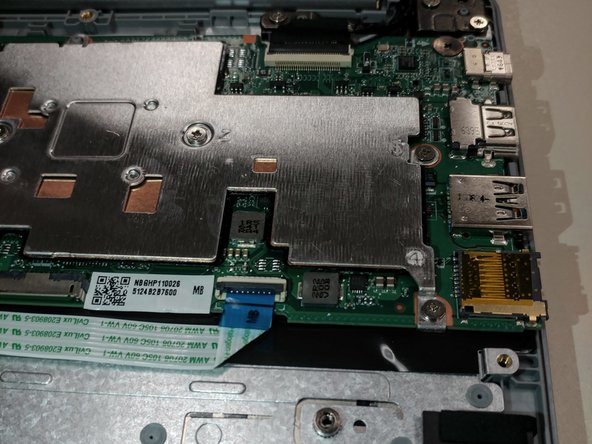
    • Remove the yellow tape covering the ribbon cable in the bottom left of the motherboard as shown.

    • Carefully remove the ribbon cable out from the connector.

  6. Acer Chromebook CB5-312T-K 8Z9 Motherboard Replacement: шаг 6, изображение 1 из 3 Acer Chromebook CB5-312T-K 8Z9 Motherboard Replacement: шаг 6, изображение 2 из 3 Acer Chromebook CB5-312T-K 8Z9 Motherboard Replacement: шаг 6, изображение 3 из 3
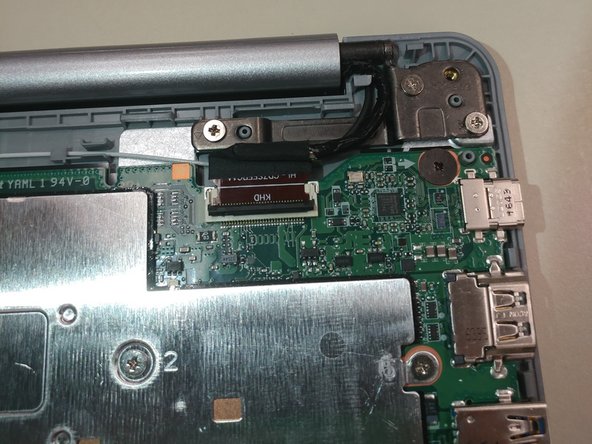
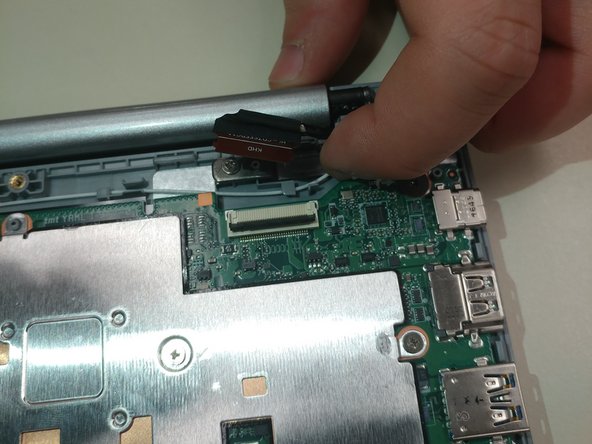
    • Fold up the grey cover to release the ribbon cable in the bottom right of the board as shown.

    • Carefully pull out the ribbon cable from the port by the blue tape.

  7. Acer Chromebook CB5-312T-K 8Z9 Motherboard Replacement: шаг 7, изображение 1 из 3 Acer Chromebook CB5-312T-K 8Z9 Motherboard Replacement: шаг 7, изображение 2 из 3 Acer Chromebook CB5-312T-K 8Z9 Motherboard Replacement: шаг 7, изображение 3 из 3
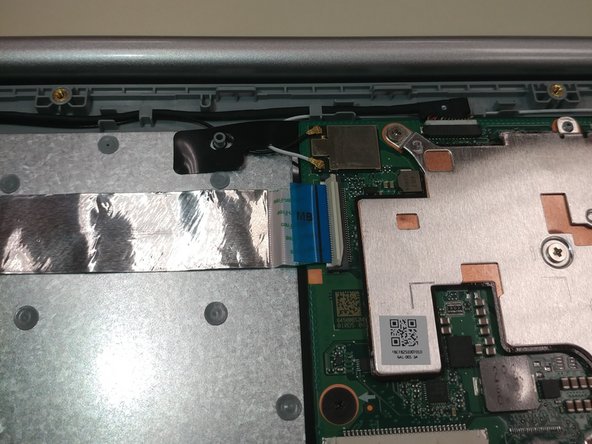
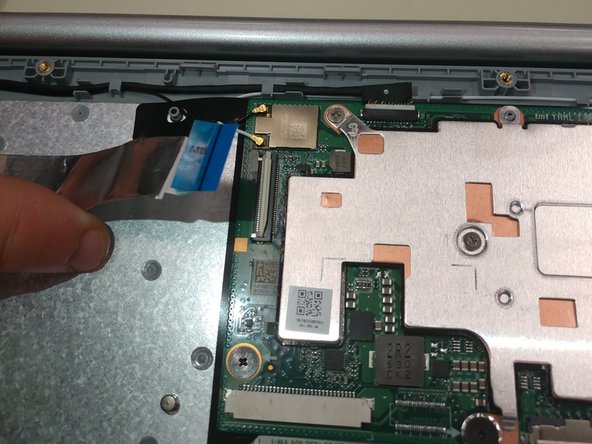
    • Fold up the white cover to release the ribbon cable in the top left of the board as shown.

    • Carefully pull out the ribbon cable from the port by the blue tape.

  8. Acer Chromebook CB5-312T-K 8Z9 Motherboard Replacement: шаг 8, изображение 1 из 3 Acer Chromebook CB5-312T-K 8Z9 Motherboard Replacement: шаг 8, изображение 2 из 3 Acer Chromebook CB5-312T-K 8Z9 Motherboard Replacement: шаг 8, изображение 3 из 3
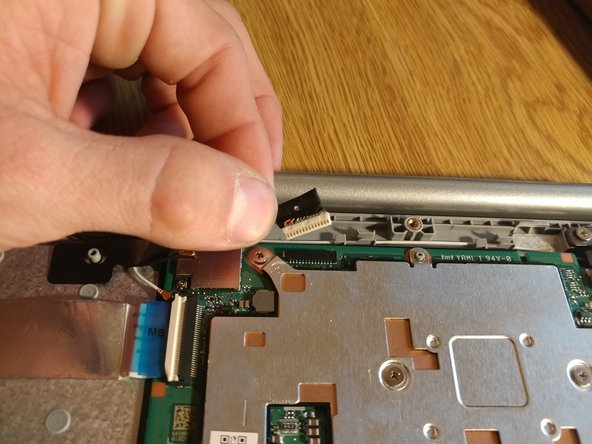
    • Fold up the grey cover to release the cable on the top right of the board as shown

    • Carefully pull out the cable from the port.

  9. Acer Chromebook CB5-312T-K 8Z9 Motherboard Replacement: шаг 9, изображение 1 из 2 Acer Chromebook CB5-312T-K 8Z9 Motherboard Replacement: шаг 9, изображение 2 из 2
    • Remove the cable with tweezers as shown along the top of the board.

  10. Acer Chromebook CB5-312T-K 8Z9 Motherboard Replacement: шаг 10, изображение 1 из 2 Acer Chromebook CB5-312T-K 8Z9 Motherboard Replacement: шаг 10, изображение 2 из 2
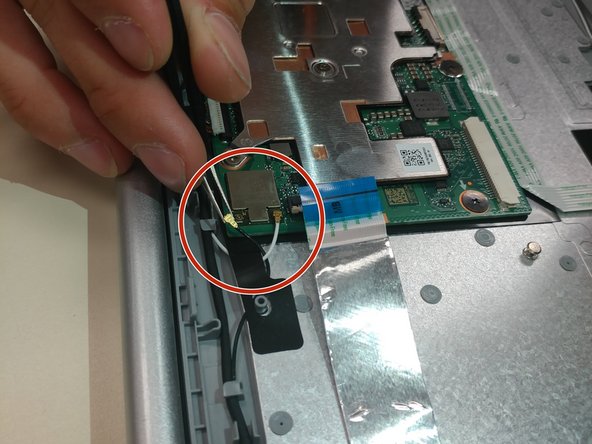
    • Carefully pull off both brass connectors from the top left of the board with tweezers as shown.

  11. Acer Chromebook CB5-312T-K 8Z9 Motherboard Replacement: шаг 11, изображение 1 из 3 Acer Chromebook CB5-312T-K 8Z9 Motherboard Replacement: шаг 11, изображение 2 из 3 Acer Chromebook CB5-312T-K 8Z9 Motherboard Replacement: шаг 11, изображение 3 из 3
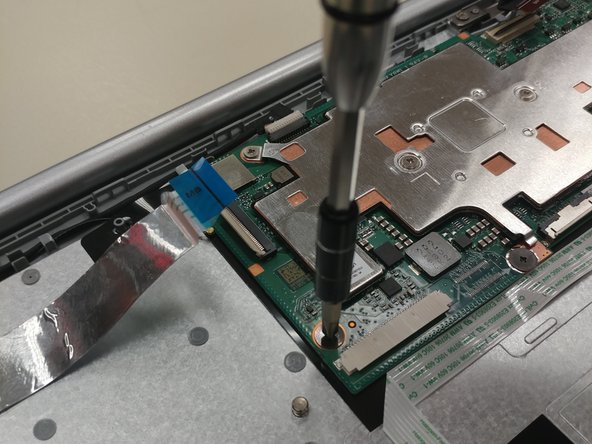
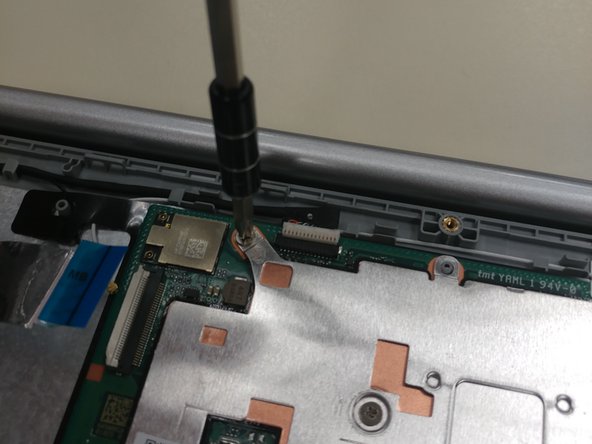
    • Remove the six screws from the board as shown. There are two types of screws here, so be careful to keep them separate for reassembly.

Заключение

To reassemble your device, follow these instructions in reverse order.

2 участников успешно повторили данное руководство.

Robert McCullough

Участник с: 09/25/17

128 Репутация

1 руководство автора

Команда

University of North Texas, Team S1-G4, Thompson Fall 2017 Участник University of North Texas, Team S1-G4, Thompson Fall 2017

UNT-THOMPSON-F17S1G4

4 членов

Автор 10 руководств

7 Комментариев

thanks for the write up! do you know where the bluetooth is on the motherboard? I presume step 10 are the connections to the wifi antennae?

leerandmcnally - Ответить

This Chromebook likely uses a dual chip which can be seen in step 10. I’m guessing the chip is a 802.11AC 2x2 MIMO WLAN + Bluetooth 4.0 from looking at the specs.

Blake Klein -

wich is the firmware write protect screw on the motherboard to cheng the os to win10 ??

loudikov - Ответить

This is an ARM MT8173 machine, no Windows 10 for this hardware… Win10 for ARM is still on ARM based Surface, and gives poor experience.

Roberto Giuffrè -

Bonjour,

J ai un chromebook CB5-312T quelle carte mère je dois acheter et où mon chromebook ne s allume plus.

Merci

Celine Gaidot - Ответить

Добавить комментарий

Просмотр статистики:

За последние 24часов: 0

За последние 7 дней: 3

За последние 30 дней: 10

За всё время: 2,172