Перейти к основному содержанию

Acer Chromebook R11 C738T-C44Z Speakers Replacement

Выберете то, что вам нужно

  1. Acer Chromebook R11 C738T-C44Z Speakers Replacement, Back Cover: шаг 1, изображение 1 из 3 Acer Chromebook R11 C738T-C44Z Speakers Replacement, Back Cover: шаг 1, изображение 2 из 3 Acer Chromebook R11 C738T-C44Z Speakers Replacement, Back Cover: шаг 1, изображение 3 из 3
    • Lay the laptop with the back side up.

    • Use a Phillips #1 screwdriver to remove eleven 3 mm screws.

    • Use the opening tool to pry the back cover off gently by placing it in the seam and working your way around the perimeter.

  2. Acer Chromebook R11 C738T-C44Z Speakers Replacement, Battery: шаг 2, изображение 1 из 2 Acer Chromebook R11 C738T-C44Z Speakers Replacement, Battery: шаг 2, изображение 2 из 2
    • Unplug the battery connector from the motherboard. (The motherboard is a group of wires in rainbow colors)

    • Use a Phillips #1 screwdriver to remove the two 3 mm screws, (one on each side of the battery), that secure it in place.

  3. Acer Chromebook R11 C738T-C44Z Speakers Replacement: шаг 3, изображение 1 из 1
    • Remove battery from its holder by pulling it upwards from the device

    • Attempt to remove it as gently as possible to avoid damaging the Motherboard

  4. Acer Chromebook R11 C738T-C44Z Speakers Replacement: шаг 4, изображение 1 из 1
    • Install the new battery and again use a Phillips #1 screwdriver to remove the two 3 mm screws

  5. Acer Chromebook R11 C738T-C44Z Speakers Replacement, Speakers: шаг 5, изображение 1 из 2 Acer Chromebook R11 C738T-C44Z Speakers Replacement, Speakers: шаг 5, изображение 2 из 2
    • Gently remove the LED Board Ribbon connected to the mother board.

  6. Acer Chromebook R11 C738T-C44Z Speakers Replacement: шаг 6, изображение 1 из 3 Acer Chromebook R11 C738T-C44Z Speakers Replacement: шаг 6, изображение 2 из 3 Acer Chromebook R11 C738T-C44Z Speakers Replacement: шаг 6, изображение 3 из 3
    • Gently pry up speaker up using a spudger or opening tool to remove it.

    • It has an adhesive, so you might have to use some force.

    • Screwdrivers should not be used as prying tools and could cause damage to delicate components.

    • Repeat the same process for the other speaker.

  7. Acer Chromebook R11 C738T-C44Z Speakers Replacement: шаг 7, изображение 1 из 3 Acer Chromebook R11 C738T-C44Z Speakers Replacement: шаг 7, изображение 2 из 3 Acer Chromebook R11 C738T-C44Z Speakers Replacement: шаг 7, изображение 3 из 3
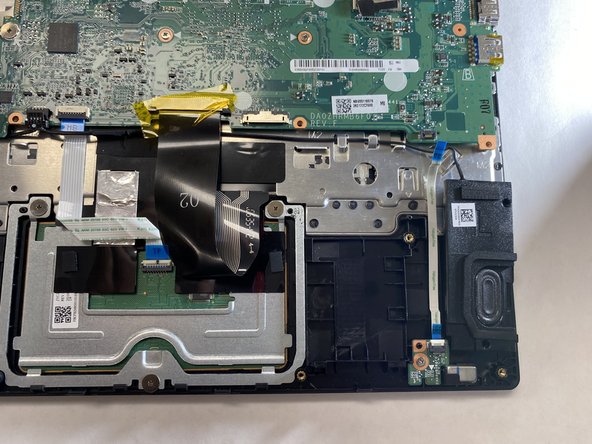
    • Use the opening tool to unplug the speaker cable from the motherboard.

    • Disconnect the keyboard ribbon cable from the motherboard.

  8. Acer Chromebook R11 C738T-C44Z Speakers Replacement: шаг 8, изображение 1 из 1
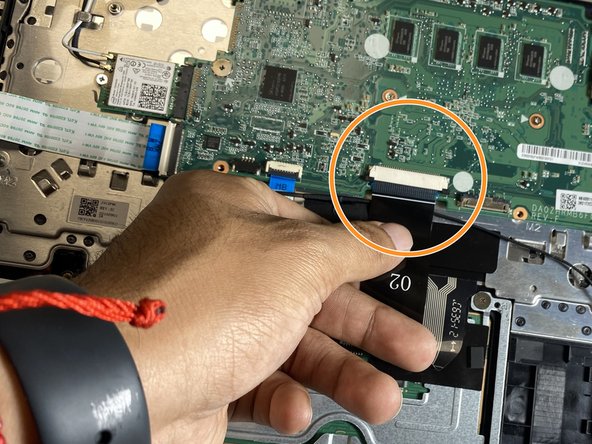
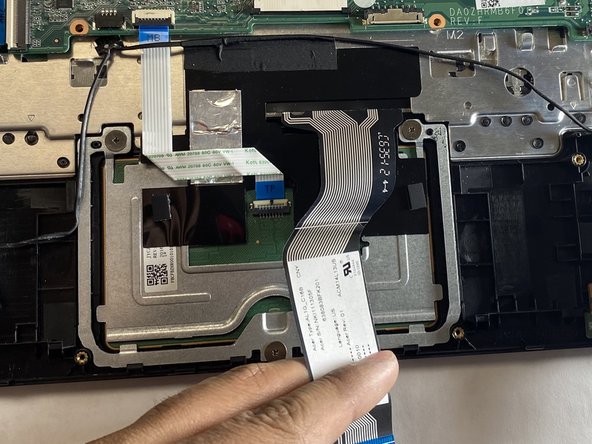
    • Using the opening tool to unlock and disconnect the touchpad cable.

  9. Acer Chromebook R11 C738T-C44Z Speakers Replacement: шаг 9, изображение 1 из 3 Acer Chromebook R11 C738T-C44Z Speakers Replacement: шаг 9, изображение 2 из 3 Acer Chromebook R11 C738T-C44Z Speakers Replacement: шаг 9, изображение 3 из 3
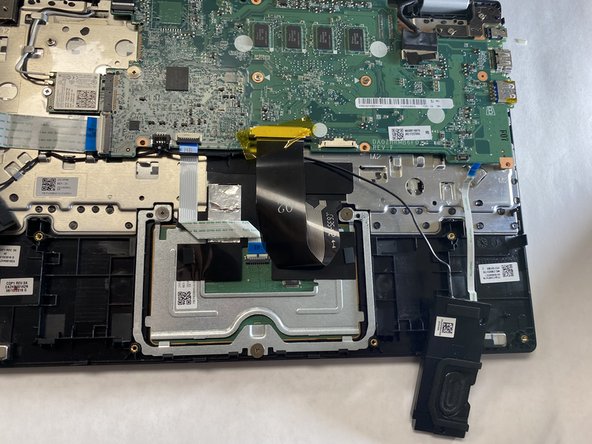
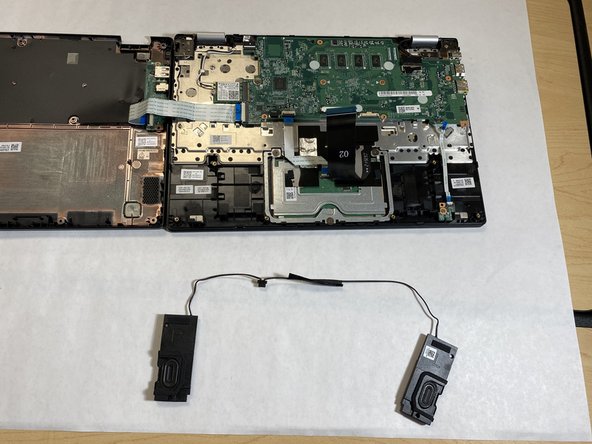
    • Gently lift the speakers up and remove the cable from the system.

Заключение

To reassemble your device, follow these instructions in reverse order.

Еще один человек закончил это руководство.

Connie Hernandez

Участник с: 09/01/21

517 Репутация

Автор 4 руководств

Команда

Gateway, Team 1-4, Saknee Fall 2021 Участник Gateway, Team 1-4, Saknee Fall 2021

GCC-SAKNEE-F21S1G4

4 членов

Автор 6 руководств

0 Комментариев

Добавить комментарий

Просмотр статистики:

За последние 24часов: 0

За последние 7 дней: 1

За последние 30 дней: 3

За всё время: 99