Перейти к основному содержанию

Acer Iconia A1-810 Screen Replacement

Выберете то, что вам нужно

  1. Acer Iconia A1-810 Screen Replacement, Battery: шаг 1, изображение 1 из 1
    • Remove the back cover by lifting with a plastic opening tool, below the camera button slot.

  2. Acer Iconia A1-810 Screen Replacement: шаг 2, изображение 1 из 1
    • Remove the black tape connecting the battery to the motherboard.

  3. Acer Iconia A1-810 Screen Replacement: шаг 3, изображение 1 из 1
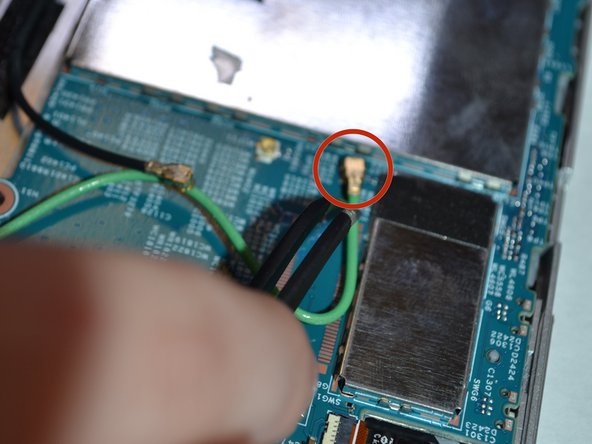
    • Pinch the sides of the white resistor to safely remove it without damaging it or yourself.

  4. Acer Iconia A1-810 Screen Replacement: шаг 4, изображение 1 из 2 Acer Iconia A1-810 Screen Replacement: шаг 4, изображение 2 из 2
    • Remove battery from adhesive.

  5. Acer Iconia A1-810 Screen Replacement, Motherboard: шаг 5, изображение 1 из 1
    • Use a Phillips #000 screwdriver to remove the screws around the perimeter of the motherboard.

  6. Acer Iconia A1-810 Screen Replacement: шаг 6, изображение 1 из 2 Acer Iconia A1-810 Screen Replacement: шаг 6, изображение 2 из 2
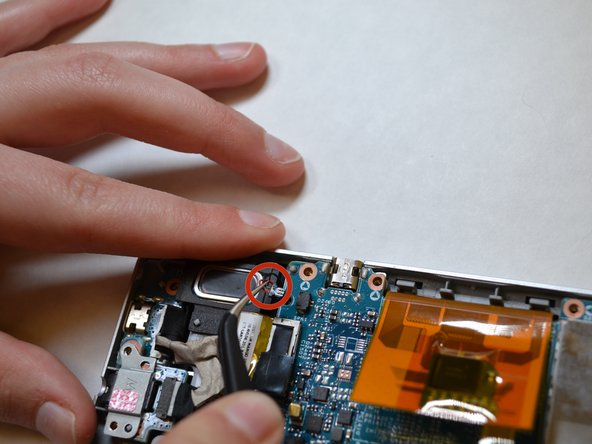
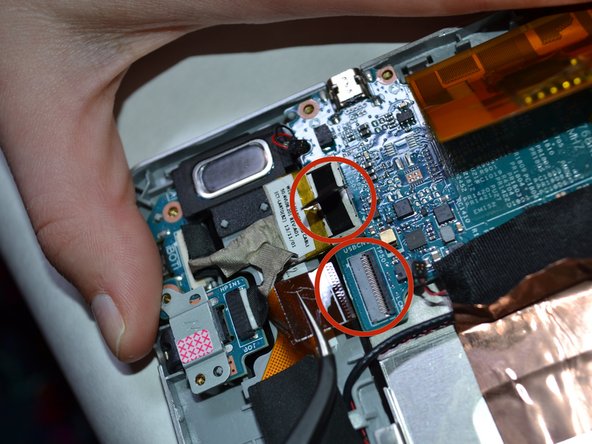
    • Disconnect the resistor attached to the orange tab by sliding the tail out.

    • Pry open the orange tab near the top left corner.

  7. Acer Iconia A1-810 Screen Replacement: шаг 7, изображение 1 из 3 Acer Iconia A1-810 Screen Replacement: шаг 7, изображение 2 из 3 Acer Iconia A1-810 Screen Replacement: шаг 7, изображение 3 из 3
    • Disconnect all cords, wires, and resistors from the motherboard using tweezers.

  8. Acer Iconia A1-810 Screen Replacement: шаг 8, изображение 1 из 3 Acer Iconia A1-810 Screen Replacement: шаг 8, изображение 2 из 3 Acer Iconia A1-810 Screen Replacement: шаг 8, изображение 3 из 3
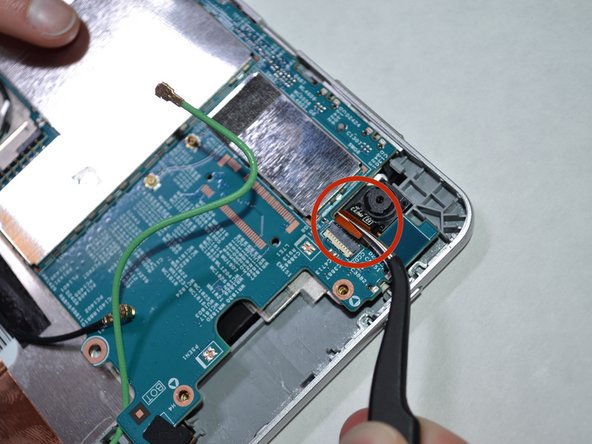
    • Continue to disconnect all resistors attached from the motherboard, using tweezers.

  9. Acer Iconia A1-810 Screen Replacement: шаг 9, изображение 1 из 1
    • Gently lift motherboard out.

    • The edges may be sharp.

  10. Acer Iconia A1-810 Screen Replacement, Screen: шаг 10, изображение 1 из 3 Acer Iconia A1-810 Screen Replacement, Screen: шаг 10, изображение 2 из 3 Acer Iconia A1-810 Screen Replacement, Screen: шаг 10, изображение 3 из 3
    • Lift the three copper foils from the plate.

  11. Acer Iconia A1-810 Screen Replacement: шаг 11, изображение 1 из 1
    • Add strips of tape to the sides of the device.

  12. Acer Iconia A1-810 Screen Replacement: шаг 12, изображение 1 из 2 Acer Iconia A1-810 Screen Replacement: шаг 12, изображение 2 из 2
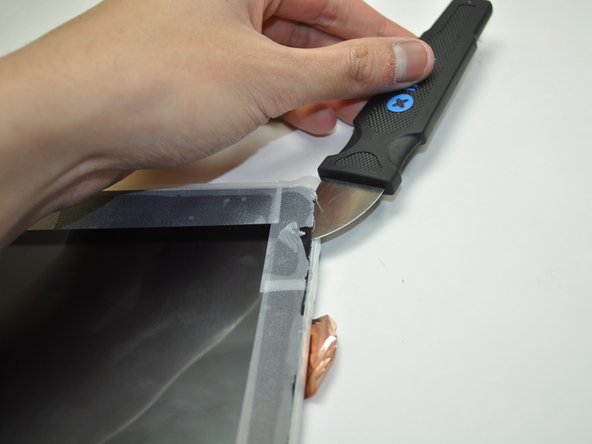
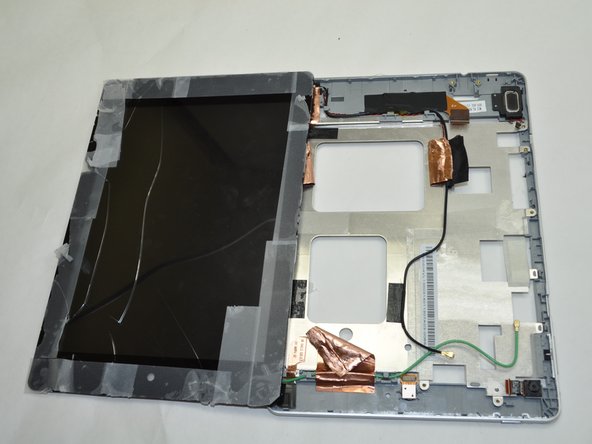
    • Wedge the Jimmy between the screen and body of the device and ease around the whole edge of the device.

    • A reasonable amount of force is necessary to wedge deep into the screen.

    • The screen will possibly crack more and the debris will be scattered.

  13. Acer Iconia A1-810 Screen Replacement: шаг 13, изображение 1 из 3 Acer Iconia A1-810 Screen Replacement: шаг 13, изображение 2 из 3 Acer Iconia A1-810 Screen Replacement: шаг 13, изображение 3 из 3
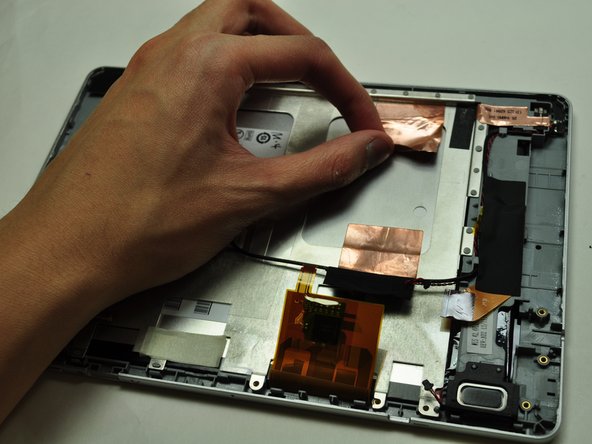
    • While holding the side of the screen, press the metal plates behind the device to pop the screen out.

Заключение

To reassemble your device, follow these instructions in reverse order.

15 участников успешно повторили данное руководство.

John

Участник с: 01/29/15

623 Репутация

Автор 3 руководств

Команда

UWT Liner: Group 3 Участник UWT Liner: Group 3

Community

5 членов

Автор 3 руководств

Один комментарий

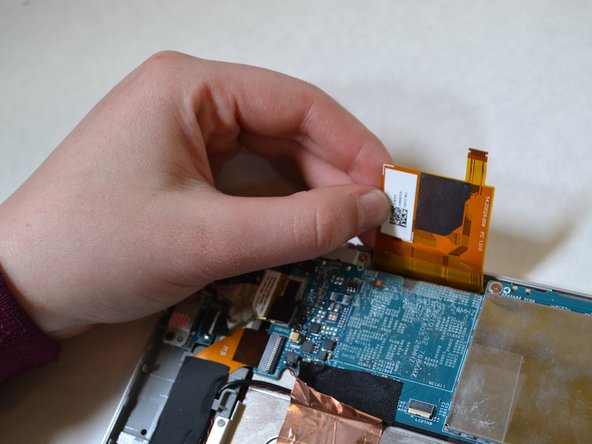
Before starting to remove the screen, remove the strip of black tape stuck over the screen ribbon cable (right hand end in the last picture) carefully lift the connector lock on the old screen connector and remove the ribbon cable completely.

Fit this ribbon cable to the new display before fitting the screen and the feed it through the slot provided as you install.

Michael - Ответить

Добавить комментарий

Просмотр статистики:

За последние 24часов: 0

За последние 7 дней: 5

За последние 30 дней: 9

За всё время: 10,195