Перейти к основному содержанию

Acer Iconia B1-711 Camera Replacement

Выберете то, что вам нужно

Видео обзор

  1. Acer Iconia B1-711 Camera Replacement, Back Cover: шаг 1, изображение 1 из 3 Acer Iconia B1-711 Camera Replacement, Back Cover: шаг 1, изображение 2 из 3 Acer Iconia B1-711 Camera Replacement, Back Cover: шаг 1, изображение 3 из 3
    • Switch-off the tablet.

    • Remove any SIM and/or Memory Card.

    • Start opening near to the Volume Up/Down buttons. It's more well to use a plastic opening tool to avoid damaging the cover.

    • When lifting the cover, be careful not to tear the Loudspeaker cable at the bottom right side.

    • Disconnect the Loudspeaker cable from the Logic board.

  2. Acer Iconia B1-711 Camera Replacement: шаг 2, изображение 1 из 2 Acer Iconia B1-711 Camera Replacement: шаг 2, изображение 2 из 2
    • Before doing anything, disconnect the battery.

  3. Acer Iconia B1-711 Camera Replacement, Camera: шаг 3, изображение 1 из 3 Acer Iconia B1-711 Camera Replacement, Camera: шаг 3, изображение 2 из 3 Acer Iconia B1-711 Camera Replacement, Camera: шаг 3, изображение 3 из 3
    • Remove the Audio jack flex cable.

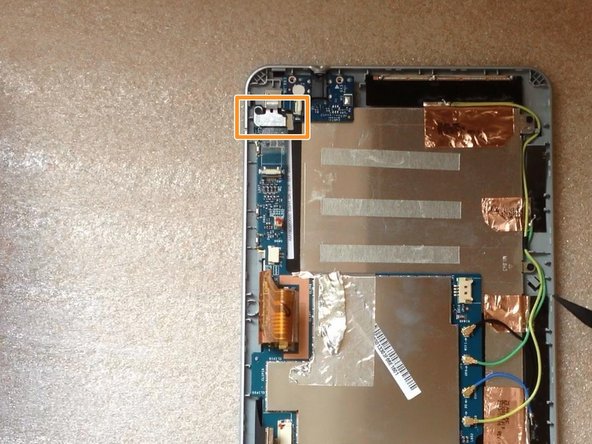
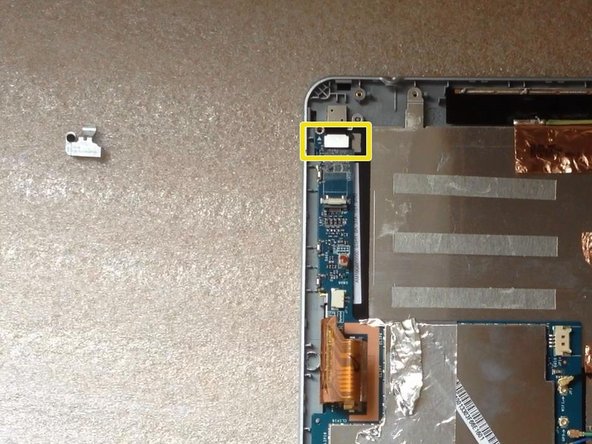
    • Remove the metal plate which is placed on the camera connector.

    • Disconnect the camera flex cable.

  4. Acer Iconia B1-711 Camera Replacement: шаг 4, изображение 1 из 1
    • Remove the camera.

Заключение

To reassemble your device, follow these instructions in reverse order.

ZFix

Участник с: 12/09/13

191 182 Репутация

Автор 330 руководств

Команда

Master Techs Участник Master Techs

Community

322 членов

Автор 2 521 руководств

0 Комментариев

Добавить комментарий

Просмотр статистики:

За последние 24часов: 0

За последние 7 дней: 0

За последние 30 дней: 0

За всё время: 526