Введение
The fans inside the Acer Nitro 5 AN515-55-53AG laptop can occasionally get stuck, dusty, or fail completely. Fans are essential to the operation of a graphics card (GPU) or central processor (CPU). They help keep the graphics card operating at a low temperature. The GPU will quickly overheat and shut down if the fans are removed or malfunction. Fixing this is often a matter of some small handiwork to get inside the computer and check the fans for what might be sticking. Use this guide to access the internal GPU/CPU cooling fan. From here, it is possible to unjam, clean, or replace the fan as needed.
Выберете то, что вам нужно
-
-
Use your Phillips #0 screwdriver to remove the eleven screws holding down the laptop's bottom cover.
-
-
-
Remove the laptop's bottom cover using an opening tool or plastic card.
-
-
-
-
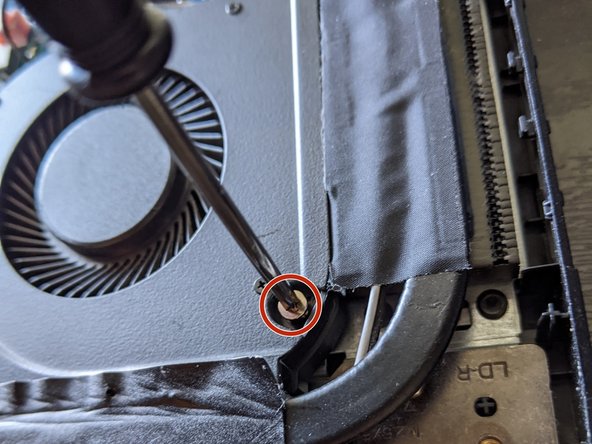
Remove the two screws holding the fan in place using a Phillips #0 screwdriver.
-
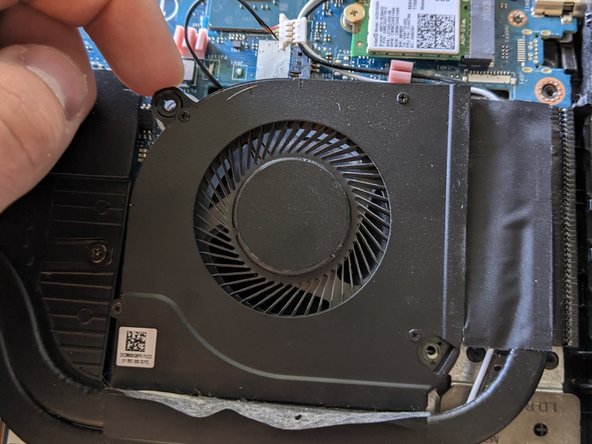
Remove the old fan by pulling it directly up.
-
-
-
While the fan is out, clean the space with a cloth or a can of compressed air. Clean the fan vents and plate of any dust.
-
To reassemble your device, follow these instructions in reverse order.
To reassemble your device, follow these instructions in reverse order.
Отменить: Я не выполнил это руководство.
2 участников успешно повторили данное руководство.
Один комментарий
на an515-55-534c система охлаждения так же разбирается ? или это он и есть ?


