Введение
The touchpad is a quality of life component for laptops. It helps the user to quickly and efficiently operate the cursor. A touchpad does not improve performance of a laptop.
Replacing the Acer Nitro 5 AN517-51-56YW touchpad can be quick and easy. All that is needed is a Phillips head screwdriver (Size: PH1) and a touchpad replacement part. Follow the guide for step-by-step instructions on replacing the touchpad.
Выберете то, что вам нужно
-
-
Place the laptop upside-down so that the fans are facing away from you.
-
Remove the twelve 6.7 mm screws from the bottom cover using a Phillips #1 screwdriver.
-
Pry the bottom cover away from the laptop using a spudger.
-
-
-
Unplug the connection plug that attaches the battery to the motherboard.
-
Remove the two 4.7 mm screws using a Phillips #1 screwdriver.
-
-
-
-
Remove the two 3.7 mm screws from the silver bracing plate using a Phillips #1 screwdriver.
-
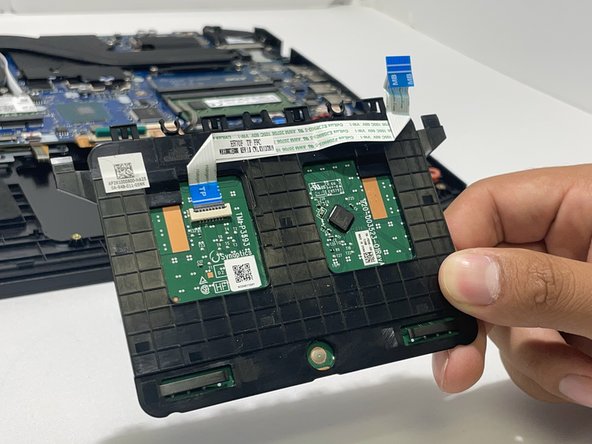
Detach the touch pad connector by lifting the clamp and pulling on the blue tab.
-
Lift the adhesive ribbon to be able to remove the touchpad.
-


To reassemble your device, follow these instructions in reverse order.
To reassemble your device, follow these instructions in reverse order.
Команда

University of Memphis, Team 3-1, Lane Fall 2022 Участник University of Memphis, Team 3-1, Lane Fall 2022
UM-LANE-F22S3G1
5 членов
Автор 4 руководств