Эта версия возможно содержит некорректные исправления. Переключить на последнюю проверенную версию.
Выберете то, что вам нужно
-
Этот шаг не переведен. Помогите перевести
-
Remove all the Phillips 10.0mm and 7.0mm screws on the outside of the case.
-
-
Этот шаг не переведен. Помогите перевести
-
Remove all Phillips 7.5mm, 12.5mm, and 10.5mm screws holding the circuit board to the case.
-
Remove the circuit board from the case.
-
-
-
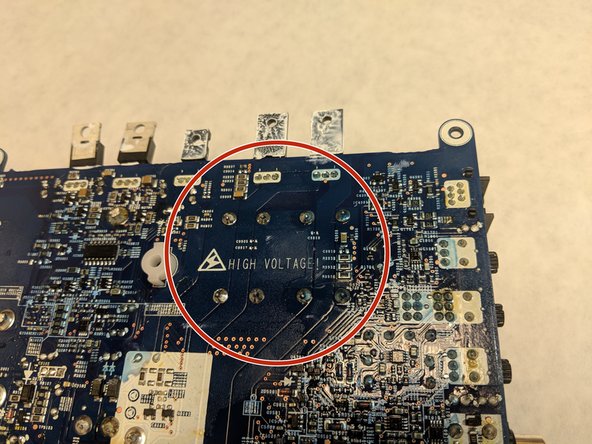
Этот шаг не переведен. Помогите перевести
-
Find the faulty capacitor.
-
Flip the board over and locate the corresponding pins.
-


Отменить: Я не выполнил это руководство.
3 участников успешно повторили данное руководство.
Команда

Washington State, Team S2-G6, Hope Fall 2018 Участник Washington State, Team S2-G6, Hope Fall 2018
WSU-HOPE-F18S2G6
4 членов
Автор 6 руководств