Перейти к основному содержанию

Amana Washing Machine NTW4516FW Clutch (Splutch) Replacement

Выберете то, что вам нужно

  1. Amana Washing Machine NTW4516FW Clutch (Splutch) Replacement, Clutch (Splutch): шаг 1, изображение 1 из 3 Amana Washing Machine NTW4516FW Clutch (Splutch) Replacement, Clutch (Splutch): шаг 1, изображение 2 из 3 Amana Washing Machine NTW4516FW Clutch (Splutch) Replacement, Clutch (Splutch): шаг 1, изображение 3 из 3
    • To work on this replacement, you will need to gain access to the bottom. It is best to place the washer on its front. Place a few old blankets etc. so as not to scratch the front to much. Since I did a total rebuild on this washer, I had also removed the control panel. It was easier for me to place the washer upside down :-)

    • Not shown here is that you need to unplug the washer as well as disconnect the water supply hoses prior to working on it!

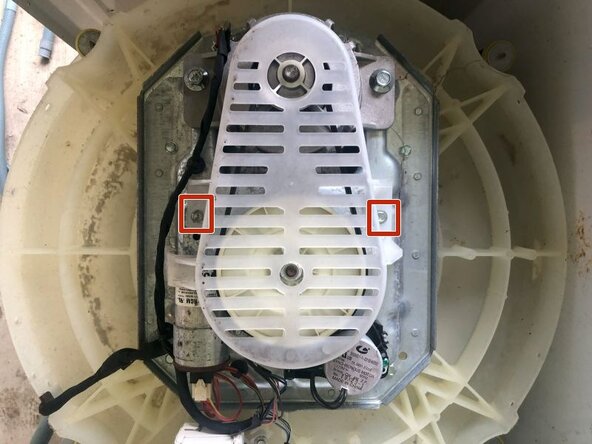
    • First the pulley cover has to be removed. It is attached via two 5/16 bolts

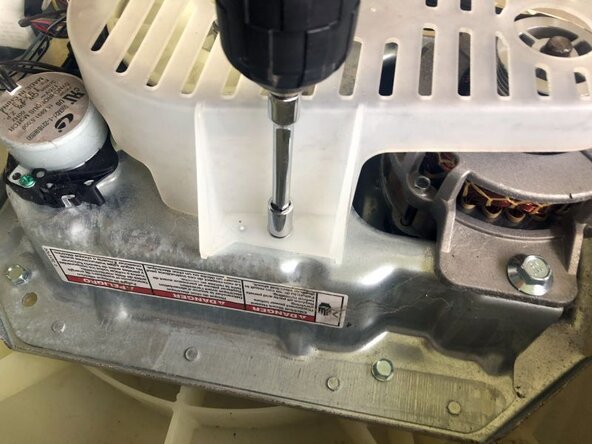
    • Use an electric screwdriver with a short extension and a 5/16 socket to remove the right screw,

  2. Amana Washing Machine NTW4516FW Clutch (Splutch) Replacement: шаг 2, изображение 1 из 3 Amana Washing Machine NTW4516FW Clutch (Splutch) Replacement: шаг 2, изображение 2 из 3 Amana Washing Machine NTW4516FW Clutch (Splutch) Replacement: шаг 2, изображение 3 из 3
    • followed by the left screw, is easiest. A hand ratchet or a nut driver will of course work as well.

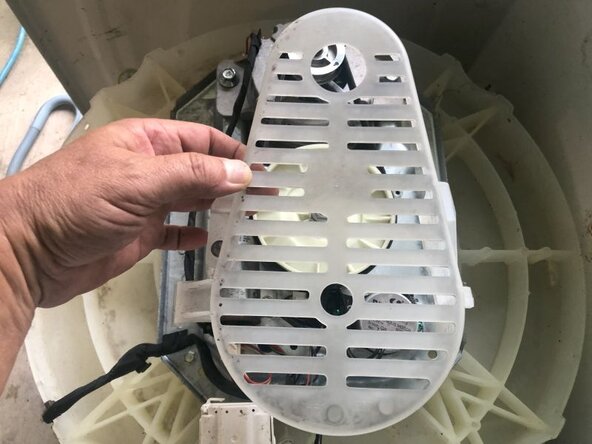
    • Remove the pulley cover

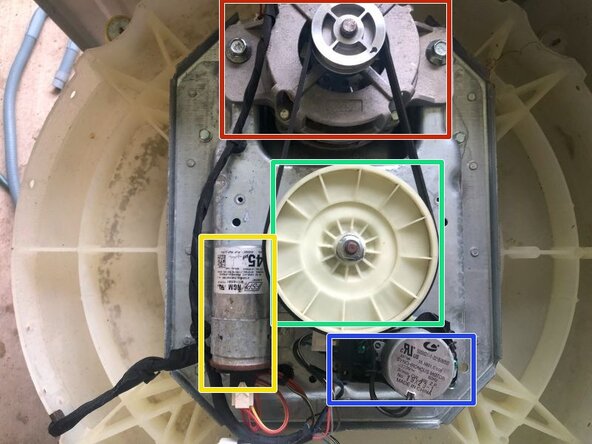
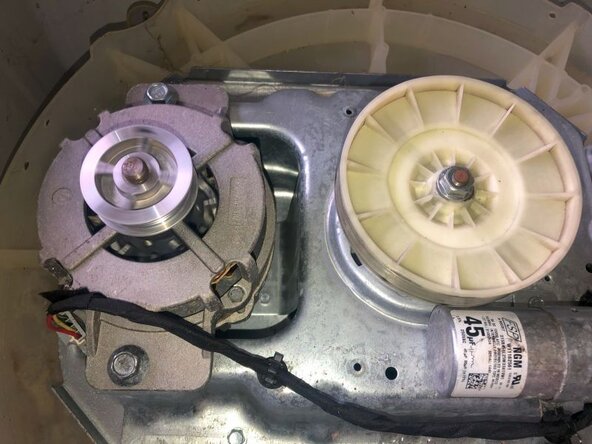
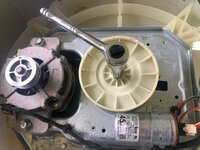
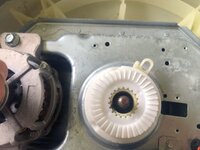
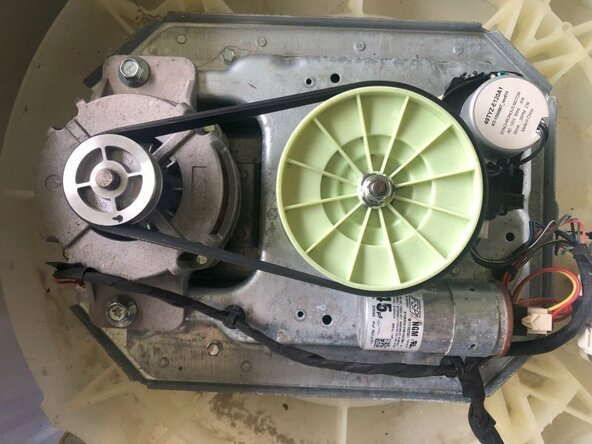
    • Now clearly visible are

    • The motor

    • The drive pulley

    • The shift actuator

    • The start capacitor for the motor

  3. Amana Washing Machine NTW4516FW Clutch (Splutch) Replacement: шаг 3, изображение 1 из 3 Amana Washing Machine NTW4516FW Clutch (Splutch) Replacement: шаг 3, изображение 2 из 3 Amana Washing Machine NTW4516FW Clutch (Splutch) Replacement: шаг 3, изображение 3 из 3
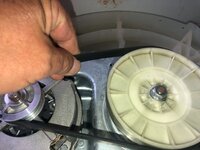
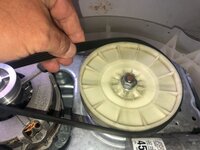
    • To remove the drive belt, lift one side up

    • and then pulling it to the drive pulley while continuing to pull up on it.

    • The belt will eventually run off the pulley

  4. Amana Washing Machine NTW4516FW Clutch (Splutch) Replacement: шаг 4, изображение 1 из 3 Amana Washing Machine NTW4516FW Clutch (Splutch) Replacement: шаг 4, изображение 2 из 3 Amana Washing Machine NTW4516FW Clutch (Splutch) Replacement: шаг 4, изображение 3 из 3
    • The pulley is held in place by a 13mm nut

    • Using a ratchet and socket to remove it.

    • Since the pulley will easily turn when using the ratchet, it is best to tap the ratchet handle by hand instead of trying a continues motion. It is common thread (Lefty Loosey). Of course, an impact wrench would be simpler :-)

    • The nut does come of fairly easy once it is loose.

  5. Amana Washing Machine NTW4516FW Clutch (Splutch) Replacement: шаг 5, изображение 1 из 3 Amana Washing Machine NTW4516FW Clutch (Splutch) Replacement: шаг 5, изображение 2 из 3 Amana Washing Machine NTW4516FW Clutch (Splutch) Replacement: шаг 5, изображение 3 из 3
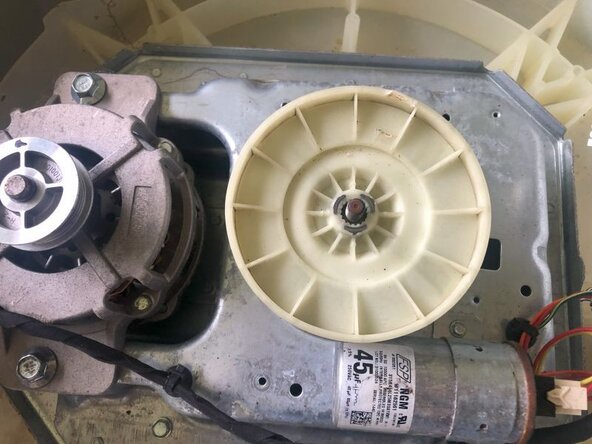
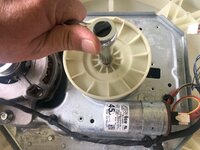
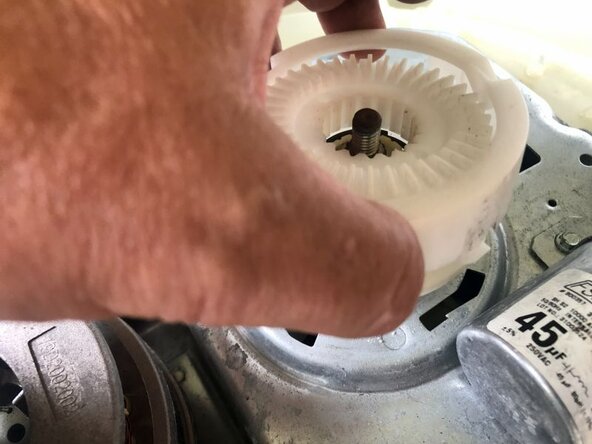
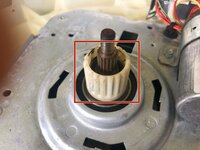
    • Remove the drive pulley from the shaft. Next is the drive basket gear.

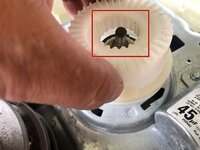
    • The drive basket gear sits on a spline on the drive shaft. Check the spline on the basket drive shaft if the teeth on the basket gear show damage.

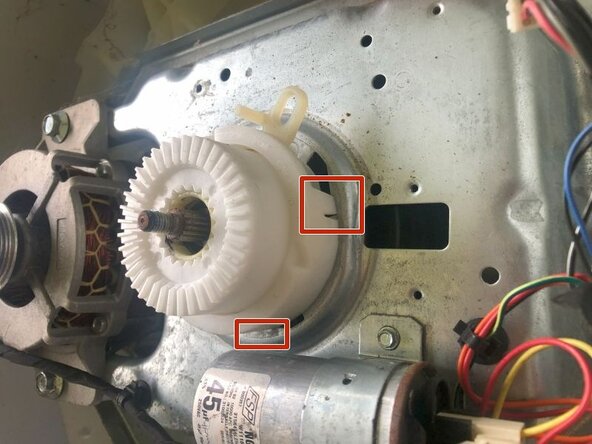
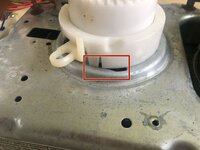
    • There are four tabs that hold the splatch housing to the gearcase

  6. Amana Washing Machine NTW4516FW Clutch (Splutch) Replacement: шаг 6, изображение 1 из 3 Amana Washing Machine NTW4516FW Clutch (Splutch) Replacement: шаг 6, изображение 2 из 3 Amana Washing Machine NTW4516FW Clutch (Splutch) Replacement: шаг 6, изображение 3 из 3
    • more of the latches of the splutch housing.

    • To remove it, simply twist the splutch housing into the direction of the slotted tabs (counter clock wise) until it comes free.

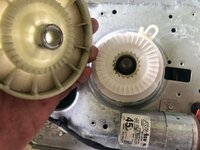
    • One the latches are cleared, lift the locking ring and the splutch housing to remove it from the shaft.

  7. Amana Washing Machine NTW4516FW Clutch (Splutch) Replacement: шаг 7, изображение 1 из 3 Amana Washing Machine NTW4516FW Clutch (Splutch) Replacement: шаг 7, изображение 2 из 3 Amana Washing Machine NTW4516FW Clutch (Splutch) Replacement: шаг 7, изображение 3 из 3
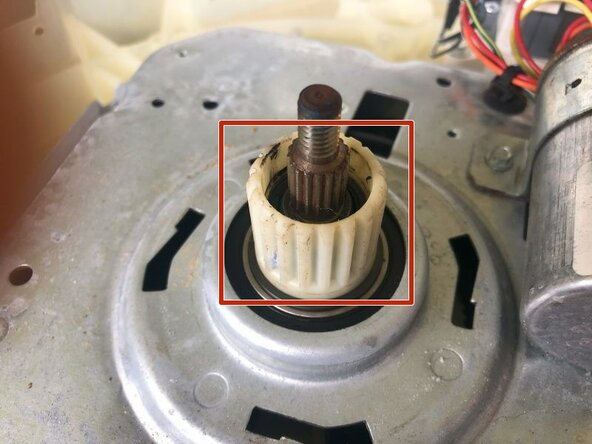
    • It is important to check the splines on the drive gear. If it is severely damaged make sure that the drive shaft is in good working order.

    • Now would be the time where the shift actuator would be removed from the shift actuator. Since this was done previous as shown in this guide on step 4

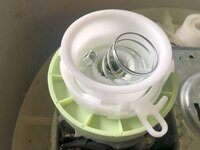
    • Remove the splutch spring.

    • Once more, check the spline on the drum drive for any damage

  8. Amana Washing Machine NTW4516FW Clutch (Splutch) Replacement: шаг 8, изображение 1 из 3 Amana Washing Machine NTW4516FW Clutch (Splutch) Replacement: шаг 8, изображение 2 из 3 Amana Washing Machine NTW4516FW Clutch (Splutch) Replacement: шаг 8, изображение 3 из 3
    • Here is the Splutch Kit that was used for this replacement

    • Reinstall the belt.

    • The Calibration Cycle must be run whenever a main component i.e. main control, motor, pump etc. has been replaced. To run the cycle, use the instructions received from the seller of the actuator. Or you can use the Tech Sheet for this washer and follow the instructions on page 4

Заключение

To reassemble your device, follow these instructions in reverse order.

Еще один человек закончил это руководство.

Прикрепленные документы

oldturkey03

Участник с: 09/29/10

835 879 Репутация

Автор 123 руководств

0 Комментарии к руководству

Добавить комментарий

Статистика просмотров:

За последние 24 часов: 3

За последние 7 дней: 24

За последние 30 дней: 152

За всё время: 686