Эта версия возможно содержит некорректные исправления. Переключить на последнюю проверенную версию.
Выберете то, что вам нужно
-
Этот шаг не переведен. Помогите перевести
-
Remove the rubber layer beneath the device.
-
Look for the crater beneath the rubber layer and place your thumb on it. Hold down and lift off the cover with your other hand.
-
Remove the four 8.0 mm T8 Torx screws on the lid.
-
Remove the lid from the device.
-
-
Этот шаг не переведен. Помогите перевести
-
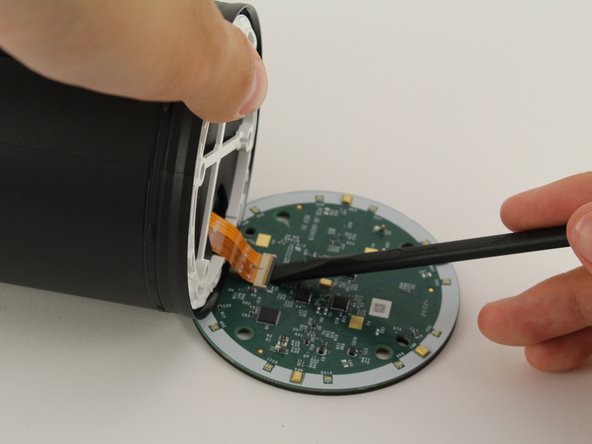
Use a spudger to flip up the small flap on the ZIF connector.
-
Gently pull the ribbon cable out of the ZIF connector.
-
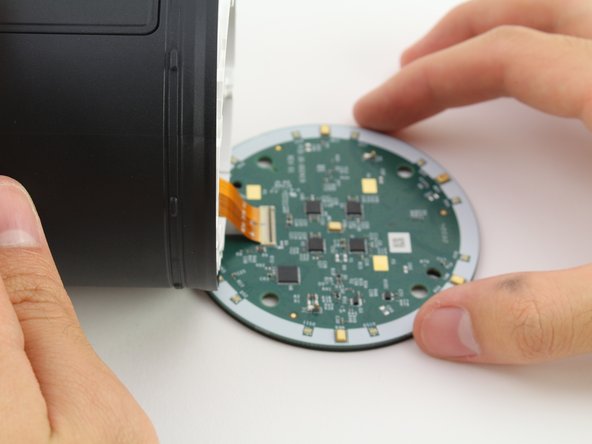
Lift the AMP Board gently while sliding the ribbon cable out through the center hole to reveal another set of wires underneath the board.
-
-
Этот шаг не переведен. Помогите перевести
-
Use a spudger to lift up one of the small flaps on only one side of the female connector.
-
Pull on the wire toward the lifted side until the male connector is disconnected.
-
Remove the AMP Board.
-
-
-
Этот шаг не переведен. Помогите перевести
-
Remove the four 30.0 mm T8 Torx screws in the corners.
-
Remove the large plastic piece on top of the subwoofer while threading the ribbon cable and male connector through the hole.
-
-
Этот шаг не переведен. Помогите перевести
-
Remove the lid on top of the subwoofer.
-
Flip the device over and let the subwoofer fall into your hand.
-
-
Этот шаг не переведен. Помогите перевести
-
Remove the four 16.0 mm T8 Torx screws underneath the speaker.
-
Flip the device over while supporting the front panel side.
-
Remove the front panel cover by lifting it.
-
-
Этот шаг не переведен. Помогите перевести
-
Lift the MIC board over and lay it down against a surface.
-
Use a spudger to flip up the small flap on the ZIF connector.
-
Disconnect the ribbon cable from the MIC board and pull the board away.
-


Отменить: Я не выполнил это руководство.
Еще один человек закончил это руководство.
Команда

Cal Poly, Team S4-G4, White Fall 2018 Участник Cal Poly, Team S4-G4, White Fall 2018
CPSU-WHITE-F18S4G4
3 членов
Автор 5 руководств