Перейти к основному содержанию

Эта версия возможно содержит некорректные исправления. Переключить на последнюю проверенную версию.

Выберете то, что вам нужно

  1. Этот шаг не переведен. Помогите перевести

    : шаг 1, изображение 1 из 1
    • Power off and unplug your Echo before disassembly. Failure to do so could result in injury or damage to the device.

    • Peel off the rubber footing from the bottom of the Echo.

    • Do not pull the rubber footing too hard, as it could stretch out of shape. Use a spudger to help remove the foot if you have any trouble.

  2. Этот шаг не переведен. Помогите перевести

    : шаг 2, изображение 1 из 3 : шаг 2, изображение 2 из 3 : шаг 2, изображение 3 из 3
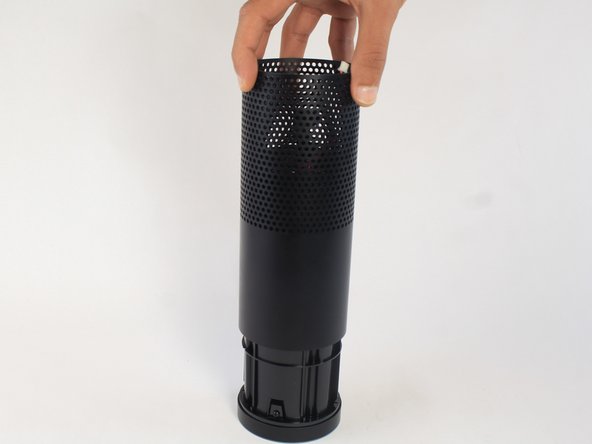
    • Remove the four 42.8 mm T10 Torx screws from the bottom of the Echo.

  3. Этот шаг не переведен. Помогите перевести

    : шаг 3, изображение 1 из 1
    • Slowly lift the plate containing the board. Be careful not to disconnect any of the wires.

  4. Этот шаг не переведен. Помогите перевести

    : шаг 4, изображение 1 из 1
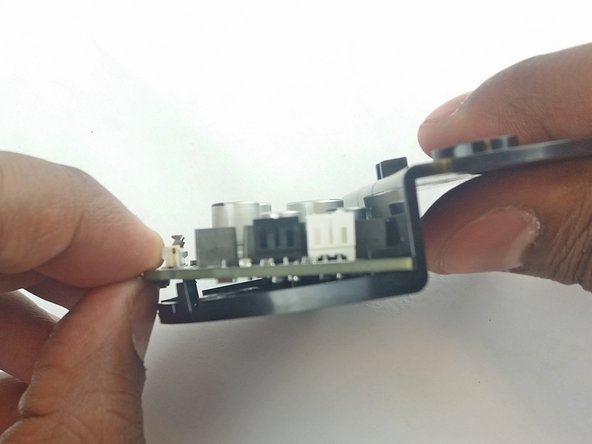
    • Using tweezers, carefully disconnect the two red and black cables from their sockets on the board.

    • Tugging on the wires may damage the device. Pull from the plastic connectors instead.

  5. Этот шаг не переведен. Помогите перевести

    : шаг 5, изображение 1 из 2 : шаг 5, изображение 2 из 2
    • Lift the brown plastic latch on the ZIF connector securing the driver board ribbon cable.

    • Pull the ribbon cable from its connector. The plate and board should now be free from the Echo.

  6. Этот шаг не переведен. Помогите перевести

    : шаг 6, изображение 1 из 3 : шаг 6, изображение 2 из 3 : шаг 6, изображение 3 из 3
    • Using the spudger, pull back the two plastic clips on the plate.

    • Lift the board up and pull it away from the plate.

  7. Этот шаг не переведен. Помогите перевести

    : шаг 7, изображение 1 из 2 : шаг 7, изображение 2 из 2
    • Remove the plastic plate from the bottom of the device. Then remove the plastic shrouding.

  8. Этот шаг не переведен. Помогите перевести

    : шаг 8, изображение 1 из 1
    • Peel off the black fabric wrapped around the device.

    • Be careful not to rip the fabric. Use a spudger to help remove the adhesive if you have any trouble.

  9. Этот шаг не переведен. Помогите перевести

    : шаг 9, изображение 1 из 2 : шаг 9, изображение 2 из 2
    • Remove the four 9.7 mm T10 screws.

  10. Этот шаг не переведен. Помогите перевести

    : шаг 10, изображение 1 из 3 : шаг 10, изображение 2 из 3 : шаг 10, изображение 3 из 3
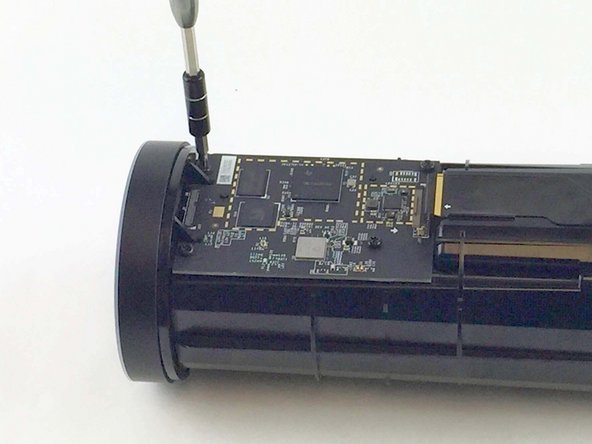
    • Lift the brown and black plastic latches securing the ZIF connectors at each end of the motherboard.

    • Pull the two ribbon cables from their connectors on the motherboard.

  11. Этот шаг не переведен. Помогите перевести

    : шаг 11, изображение 1 из 1
    • Lift the motherboard up from the Echo.

Финишная черта

4 участников успешно повторили данное руководство.

Alexander Albert

Участник с: 02/04/16

1 145 Репутация

Автор 6 руководств

Команда

USF Tampa, Team 3-3, Wollert Spring 2016 Участник USF Tampa, Team 3-3, Wollert Spring 2016

USFT-WOLLERT-S16S3G3

4 членов

Автор 12 руководств

11 Комментариев

Where can you get the mmotherboard

Glen Seay - Ответить

same question. where do i get replacement motherboard?

akn978s - Ответить

This is how to remove the motherboard not how to replace it....geez

adairt - Ответить

There is a reason why people look for information on how to remove it; and that is … TO REPLACE IT! So, where can you get a replacement?

arcsnsparks2000 - Ответить

So no place to buy the motherboard, iv striped it down but can’t buy the board anywhere

mark crewe - Ответить

Добавить комментарий

Просмотр статистики:

За последние 24часов: 2

За последние 7 дней: 27

За последние 30 дней: 73

За всё время: 14,635