Эта версия возможно содержит некорректные исправления. Переключить на последнюю проверенную версию.
Выберете то, что вам нужно
-
Этот шаг не переведен. Помогите перевести
-
Remove the four 42.8 mm T10 Torx screws from the bottom of the Echo.
-
-
Этот шаг не переведен. Помогите перевести
-
Slowly lift the plate containing the board. Be careful not to disconnect any of the wires.
-
-
-
Этот шаг не переведен. Помогите перевести
-
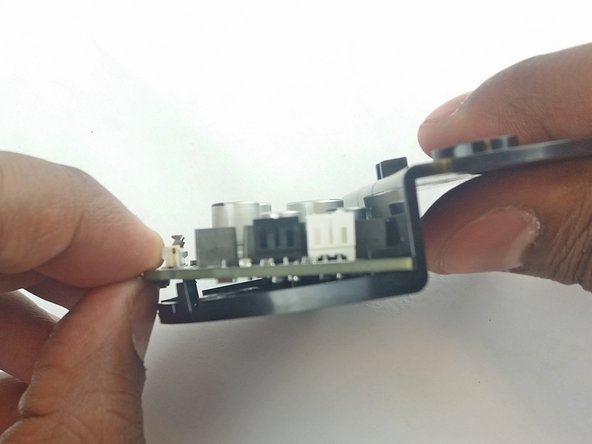
Using tweezers, carefully disconnect the two red and black cables from their sockets on the board.
-
-
Этот шаг не переведен. Помогите перевести
-
Lift the brown plastic latch on the ZIF connector securing the driver board ribbon cable.
-
Pull the ribbon cable from its connector. The plate and board should now be free from the Echo.
-
-
Этот шаг не переведен. Помогите перевести
-
Using the spudger, pull back the two plastic clips on the plate.
-
Lift the board up and pull it away from the plate.
-
-
Этот шаг не переведен. Помогите перевести
-
Remove the plastic plate from the bottom of the device. Then remove the plastic shrouding.
-
-
Этот шаг не переведен. Помогите перевести
-
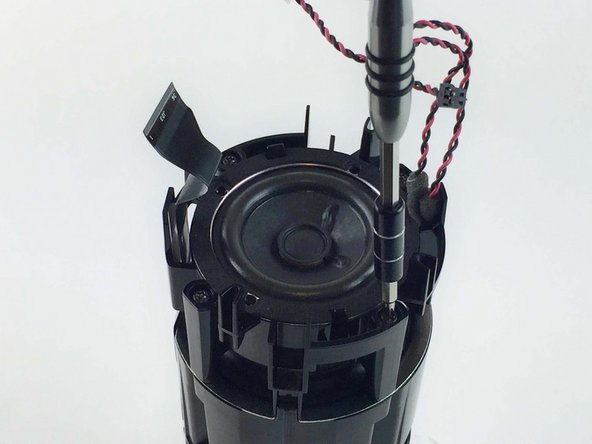
Remove the four 42.8 mm T10 Torx screws around the tweeter.
-
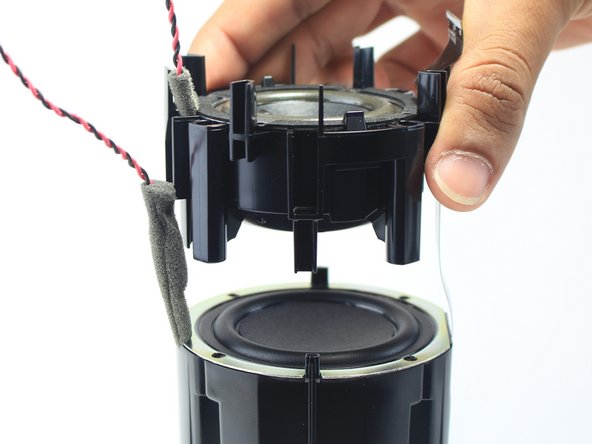
Lift the tweeter and its attached housing from the device.
-


Команда

USF Tampa, Team 3-3, Wollert Spring 2016 Участник USF Tampa, Team 3-3, Wollert Spring 2016
USFT-WOLLERT-S16S3G3
4 членов
Автор 12 руководств
3 Комментариев
Are you saying removing it and replacing the same tweeter is what you have to do? It says no parts.
The primary purpose of this guide is to show you how to remove a failing tweeter so that you can replace it with a new one. The "no parts required" text appears at the top of this guide because the author didn't have a source for the replacement part.