Этот документ имеет более свежие изменения. Перейти к последней непроверенной версии.
Введение
Quite often the screen is the first thing to break on a tablet and the LCD panel is actually what senses the touch of the user as well as displays the images of the screen.
In order to perform this replacement you will need to use heat tools such as either the iOpener or a high heat gun so be aware of how to properly use these tools as well as proper safety gear to prevent injury or damage to the device.
Выберете то, что вам нужно
-
-
While holding the device firmly, wedge the iFixit Opening Tool into the crease along the outer edge of the device (as shown in the image).
-
Slowly, grind the iFixit Opening Tool into the crease along the outer edges of the device until the entire back cover loosens.
-
Then, remove the back cover from the device.
-
-
-
Pry the speaker from the case using the iFixit Opening Tool.
-
Lift the speaker up from the device to remove the speaker wires from their groove in the case.
-
-
-
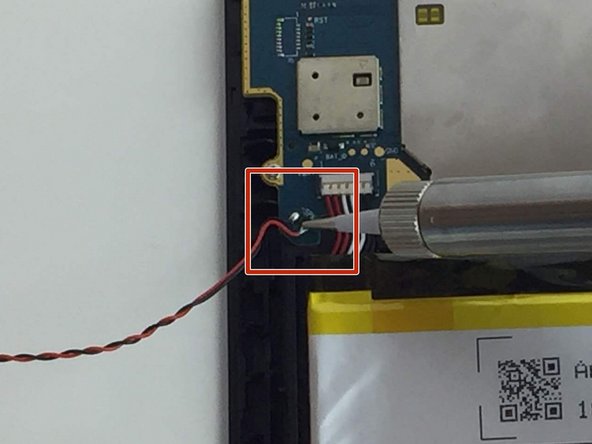
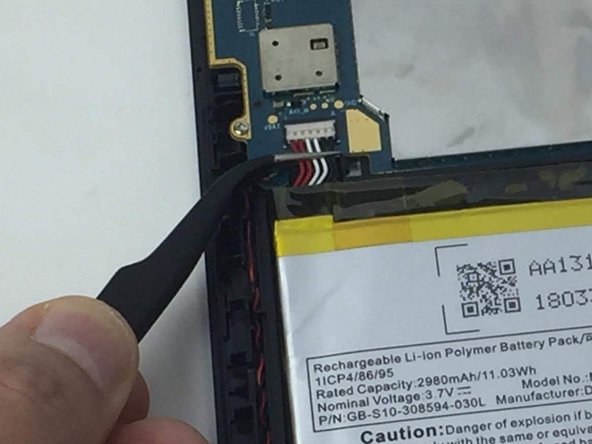
The battery connector is located in the upper left corner of the Amazon Fire battery pack.
-
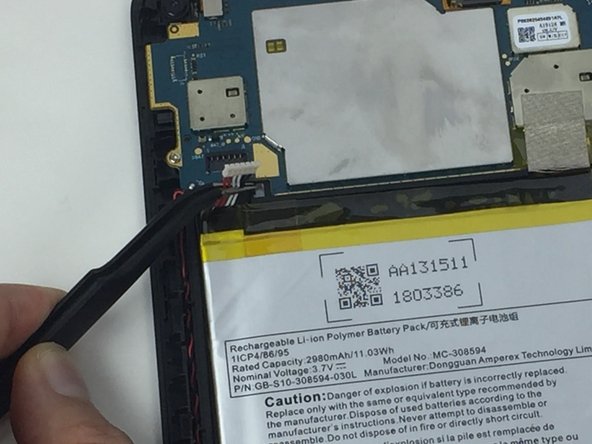
To disconnect the battery connector, use angled ESD precision tweezers to lift the cables up and out of their socket.
-
-
-
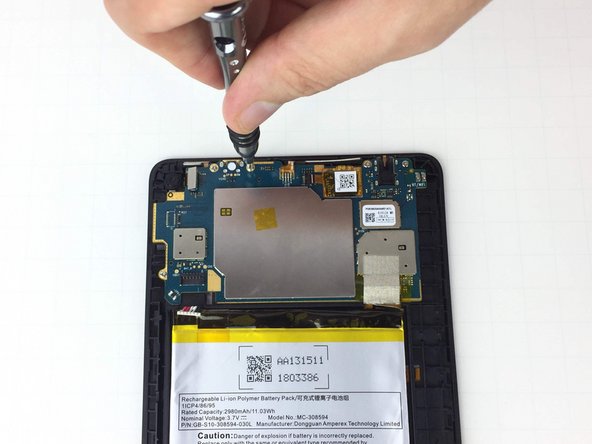
Use a PH0 size Phillips screwdriver head to unscrew the five 2 mm screws on the motherboard. These screws are circled with red in the given image.
-
-
-
-
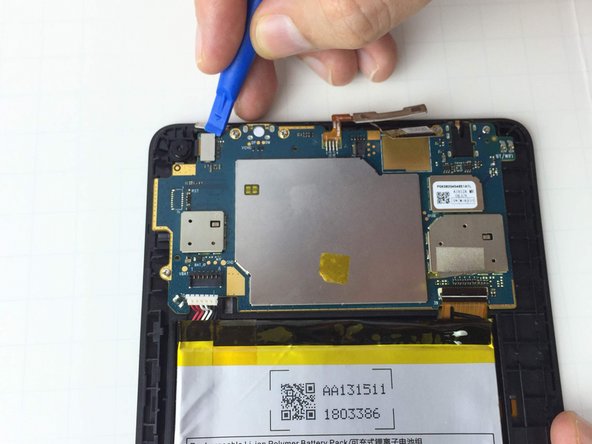
The LCD- Motherboard connector cable has a protective overlay that you must peel back with precision tweezers in order to expose the actual connector.
-
Gently pull down on the connector cable using precision tweezers in order to disconnect the cable.
-
-
-
The LCD Digitizer on the Amazon Fire tablet has a locking cable connector that holds it in place on the motherboard.
-
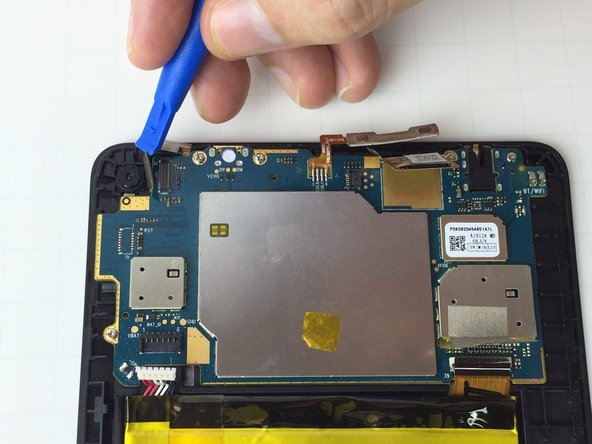
To remove the cable, use the iFixit Opening Tool to unlock the LCD Digitizer cable connector.
-
Once the wire connector is removed, use the iFixit Opening Tool to pry the entire LCD Digitizer away from the motherboard.
-
-
-
The volume and power buttons must both be repositioned in order to remove the motherboard.
-
To reposition the power and volume buttons, use the iFixit Opening Tool to pull the plastic casing upwards. Then, remove the casing completely.
-
-
-
The rear facing camera wire connector must be disconnected in order to remove the motherboard.
-
To remove the rear facing wire connector, insert the iFixit Opening Tool beneath the connector and wedge it upwards.
-
-
-
Position the iFixit Opening Tool beneath the motherboard and pull upwards to remove the motherboard from its case.
-
-
-
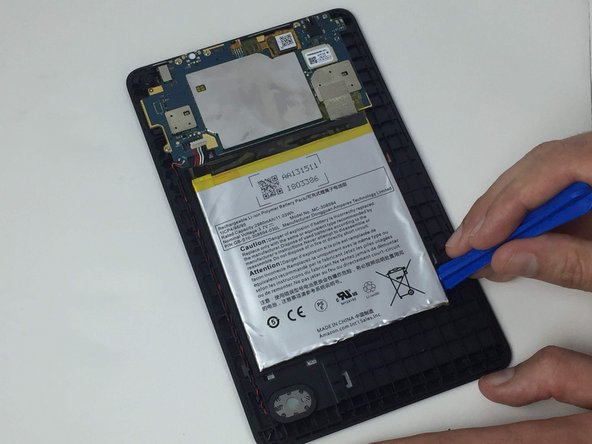
Carefully and slowly work the iFixit Opening Tool down the edge of the battery pack. Angle the tool to pry it up.
-
When you have successfully lifted the battery pack up on one side or corner, carefully wedge the iFixit Opening Tool under the pack about 1/2" and work around the rest of the sides.
-
-
-
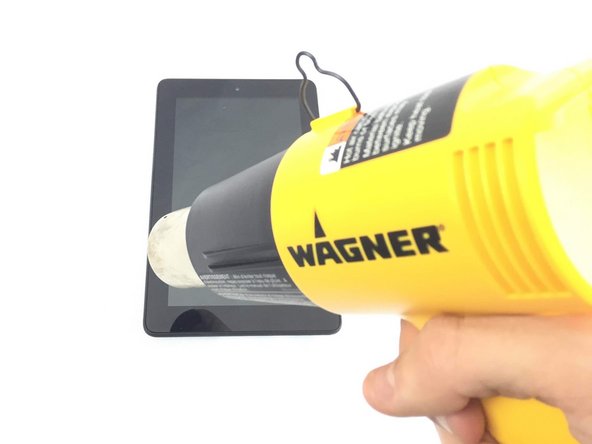
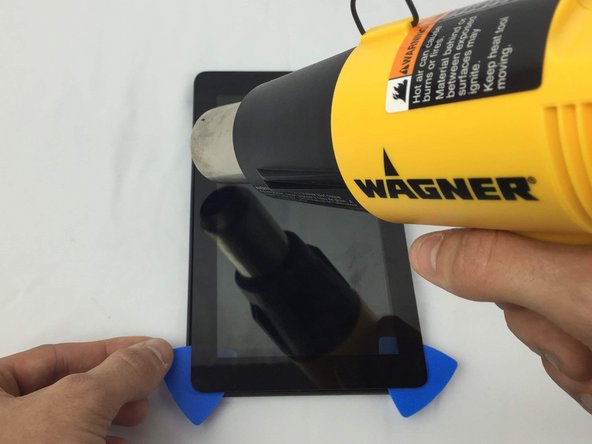
Use a heating tool such as an iOpener or Heat gun around the edges of the Amazon Fire's glass screen. The iOpener may take longer to use. However, a heat gun can warp the plastic if used incorrectly.
-
As you heat the edges, use a separator tool such as a guitar pick to lift the glass panel up and hold it up as you work around the device.
-
-
-
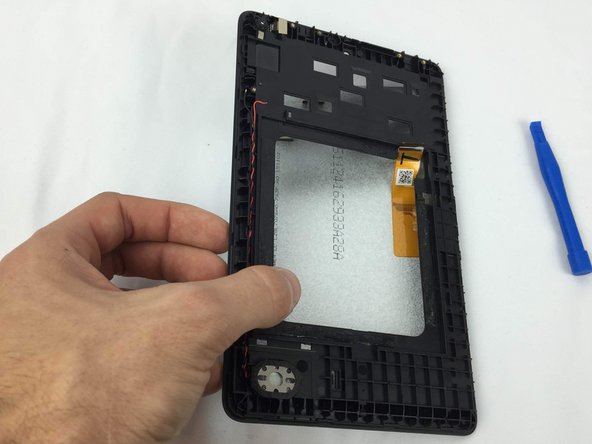
Note the digitizer cable coming through to the back as it may be hard to see! Carefully thread this piece through its slot and separate the glass panel from the device frame.
-
-
-
To remove the LCD panel, flip the device over and detach the LCD digitizer cable from the frame if they have become stuck together.
-
You can use the iFixit Opening Tool to separate the LCD panel from the adhesive and it should come out of place with ease.
-


To reassemble your device, follow these instructions in reverse order.
To reassemble your device, follow these instructions in reverse order.
Отменить: Я не выполнил это руководство.
37 участников успешно повторили данное руководство.
Команда

USF Tampa, Team 1-2, Nance Spring 2016 Участник USF Tampa, Team 1-2, Nance Spring 2016
USFT-NANCE-S16S1G2
3 членов
Автор 13 руководств
46 Комментариев
So....... what's that Glass panel part number?
Where can I get the Digitizer? It appears to me (from your guide) the screens (Digitizer and LCD) DO in fact, separate. It does seem odd to me, from being in the industry for so long, that the digitizer has a polarizer attached to it. That polarizer is usually adhered to the LCD screen and that usually suggests that the repair part would call for a screen assembly.. Not just a digitizer. Can you attach some more pictures of the digitizer and the connector itself to clarify? Also, If you know where to order the part domestically and can you post a link? Thank you! Great guide BTW.
If the speaker and wire (twisted red&white) are removed from the case (step 2 above), then you won't need to desolder the connection to the motherboard (step 3 above). Just leave it soldered and remove with motherboard (step 10 above).
....or desolder connection and leave the speaker & wire in the case, if you like to "play with powertools?" ;-)
Why remove the battery? It was by far the most tricky operation and exposed the battery to damage prying it out with a flat tool. Any puncture of the plastic jacket qoulds mean instant death to the battery and if any metal tool in contact, a fire hazard. BTW where do you get a replacement digitized for the 7inch 5th generation Kindle?