Перейти к основному содержанию

Amazon Fire HD 10 Rear Facing Camera Replacement

Выберете то, что вам нужно

  1. Amazon Fire HD 10 Rear Facing Camera Replacement, Screen: шаг 1, изображение 1 из 3 Amazon Fire HD 10 Rear Facing Camera Replacement, Screen: шаг 1, изображение 2 из 3 Amazon Fire HD 10 Rear Facing Camera Replacement, Screen: шаг 1, изображение 3 из 3
    • Avoid prying near bottom right hand side due to LCD Connector

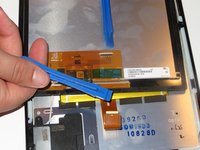
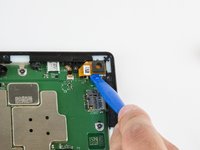
    • Use a plastic opening tool to pry the screen up in the right hand corner.

  2. Amazon Fire HD 10 Rear Facing Camera Replacement: шаг 2, изображение 1 из 1
    • Do not completely remove the screen yet as there is a ZIF connector connected.

    • Lift the screen and digitizer from the case.

    • You may need to use some force due to the glue.

  3. Amazon Fire HD 10 Rear Facing Camera Replacement: шаг 3, изображение 1 из 2 Amazon Fire HD 10 Rear Facing Camera Replacement: шаг 3, изображение 2 из 2
    • Be mindful of the ZIF connector.

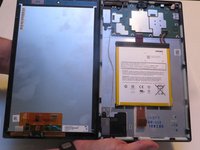
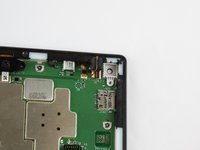
    • Disconnect the ribbon connector from the digitizer side using your hands or the plastic opening tool.

  4. Amazon Fire HD 10 Rear Facing Camera Replacement: шаг 4, изображение 1 из 1
    • Remove the screen and digitizer from the case completely.

  5. Amazon Fire HD 10 Rear Facing Camera Replacement, Rear Facing Camera: шаг 5, изображение 1 из 2 Amazon Fire HD 10 Rear Facing Camera Replacement, Rear Facing Camera: шаг 5, изображение 2 из 2
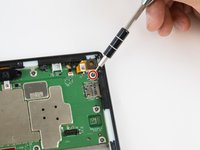
    • Remove the single T5 Torx screw at the base of the camera.

    • Once removed, place the screw aside in a safe location.

  6. Amazon Fire HD 10 Rear Facing Camera Replacement: шаг 6, изображение 1 из 2 Amazon Fire HD 10 Rear Facing Camera Replacement: шаг 6, изображение 2 из 2
    • Lift the camera from the case using the plastic opening tool.

    • The camera is still connected to the motherboard via the ZIF connector.

  7. Amazon Fire HD 10 Rear Facing Camera Replacement: шаг 7, изображение 1 из 2 Amazon Fire HD 10 Rear Facing Camera Replacement: шаг 7, изображение 2 из 2
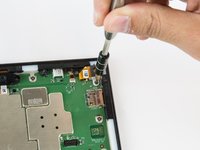
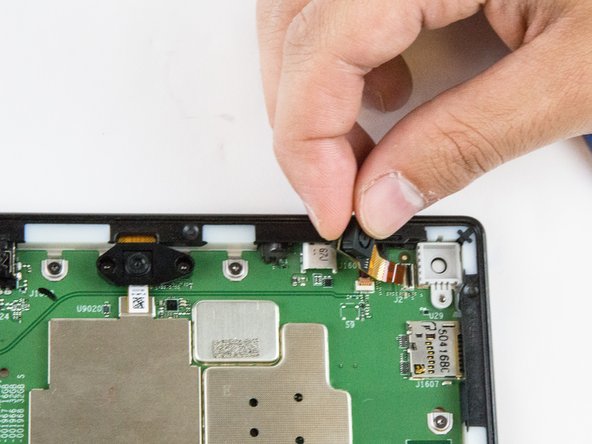
    • Gently grab the camera and pull to remove.

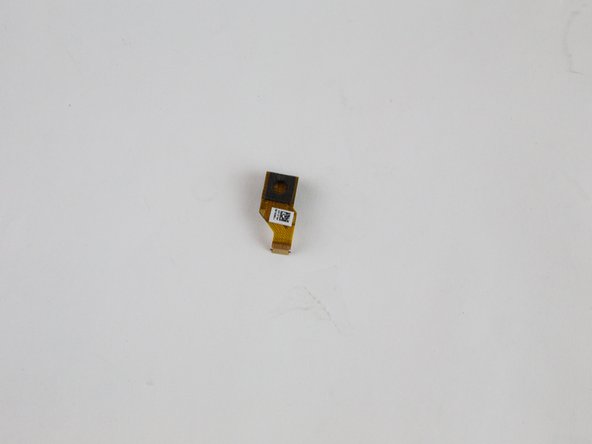
    • The camera is now free from the motherboard.

Заключение

To reassemble your device, follow these instructions in reverse order.

2 участников успешно повторили данное руководство.

Jaie Hillery

Участник с: 10/07/14

1 718 Репутация

Автор 10 руководств

Команда

USF Tampa, Team 16-6, Blackwell Winter 2016 Участник USF Tampa, Team 16-6, Blackwell Winter 2016

USFT-BLACKWELL-W16S16G6

3 членов

Автор 22 руководств

0 Комментариев

Добавить комментарий

Просмотр статистики:

За последние 24часов: 0

За последние 7 дней: 5

За последние 30 дней: 11

За всё время: 874