Перейти к основному содержанию

Amazon Fire HD 7 (4th Generation) Speaker

Выберете то, что вам нужно

  1. Amazon Fire HD 7 (4th Generation) Speaker, Motherboard: шаг 1, изображение 1 из 3 Amazon Fire HD 7 (4th Generation) Speaker, Motherboard: шаг 1, изображение 2 из 3 Amazon Fire HD 7 (4th Generation) Speaker, Motherboard: шаг 1, изображение 3 из 3
    • Insert the plastic opening tool behind the rear case to free the clips holding the case together.

    • Work your way around the device to free all the clips.

  2. Amazon Fire HD 7 (4th Generation) Speaker: шаг 2, изображение 1 из 1
    • Once all clips have been released, remove the back case to reveal the inside of the device.

  3. Amazon Fire HD 7 (4th Generation) Speaker: шаг 3, изображение 1 из 3 Amazon Fire HD 7 (4th Generation) Speaker: шаг 3, изображение 2 из 3 Amazon Fire HD 7 (4th Generation) Speaker: шаг 3, изображение 3 из 3
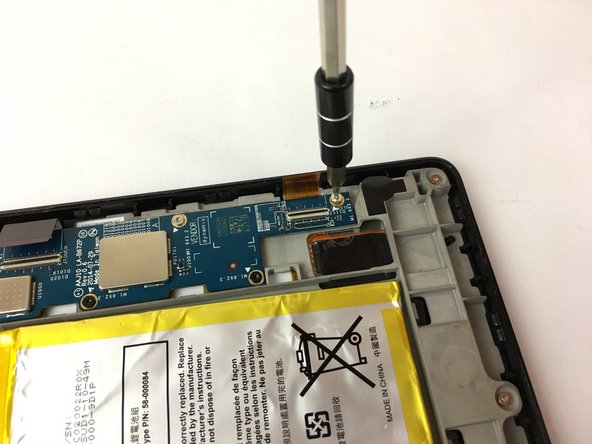
    • Remove the nine silver screws located around the motherboard with the T5 Torx screwdriver.

  4. Amazon Fire HD 7 (4th Generation) Speaker: шаг 4, изображение 1 из 3 Amazon Fire HD 7 (4th Generation) Speaker: шаг 4, изображение 2 из 3 Amazon Fire HD 7 (4th Generation) Speaker: шаг 4, изображение 3 из 3
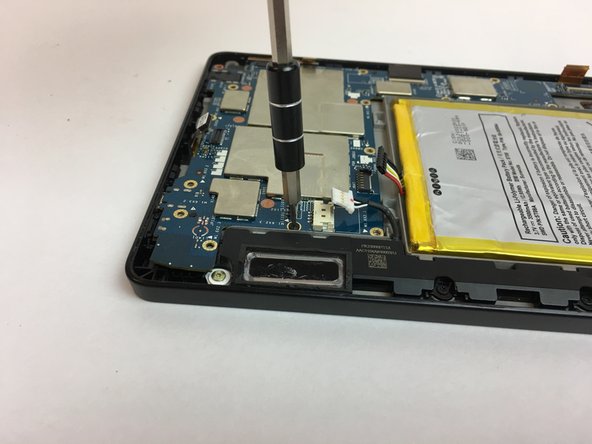
    • Remove the six black screws located around the battery and the speaker with the T5 Torx screwdriver.

    • Make your way around the battery and speaker to remove all of them.

  5. Amazon Fire HD 7 (4th Generation) Speaker: шаг 5, изображение 1 из 3 Amazon Fire HD 7 (4th Generation) Speaker: шаг 5, изображение 2 из 3 Amazon Fire HD 7 (4th Generation) Speaker: шаг 5, изображение 3 из 3
    • Carefully unplug the three wire connections by placing a plastic spudger under the connections and lifting up.

    • Disconnect the battery and speaker connections by placing the round handle spudger under the wires and lifting up and out.

    • Disconnect the display connections from the motherboard by using the plastic spudger to lift the clamp holding the ribbon cable. Then, using the tweezers, grab the ribbon wire and pull away from the motherboard.

  6. Amazon Fire HD 7 (4th Generation) Speaker: шаг 6, изображение 1 из 2 Amazon Fire HD 7 (4th Generation) Speaker: шаг 6, изображение 2 из 2
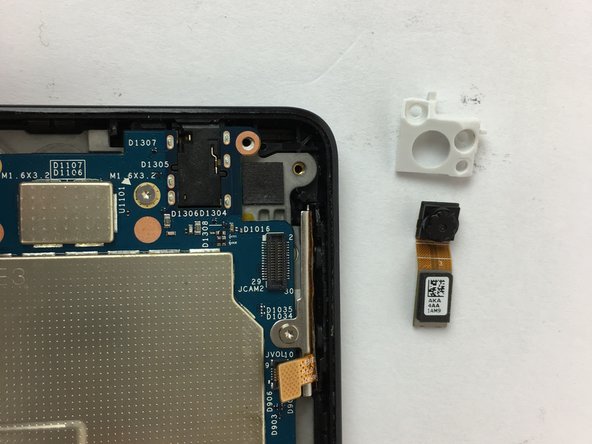
    • Remove the two screws holding the rear camera in place using the T5 Torx screwdriver.

    • Once freed from the screws, gently lift and remove the rear camera.

    • The camera lens is sensitive. Be careful when removing and handling the rear camera.

  7. Amazon Fire HD 7 (4th Generation) Speaker: шаг 7, изображение 1 из 2 Amazon Fire HD 7 (4th Generation) Speaker: шаг 7, изображение 2 из 2
    • Now the motherboard is free to be removed.

    • Lift the motherboard up to remove it as shown in the picture.

  8. Amazon Fire HD 7 (4th Generation) Speaker, Speaker: шаг 8, изображение 1 из 1
    • Remove the single silver screw with the T5 Torx screwdriver.

  9. Amazon Fire HD 7 (4th Generation) Speaker: шаг 9, изображение 1 из 1
    • Remove the two black screws using the T5 Torx screwdriver.

  10. Amazon Fire HD 7 (4th Generation) Speaker: шаг 10, изображение 1 из 3 Amazon Fire HD 7 (4th Generation) Speaker: шаг 10, изображение 2 из 3 Amazon Fire HD 7 (4th Generation) Speaker: шаг 10, изображение 3 из 3
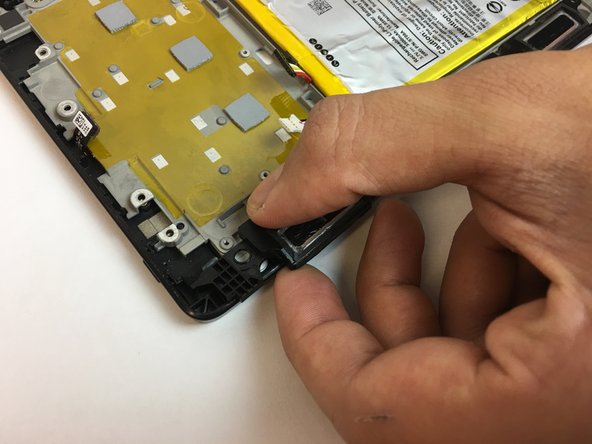
    • Gently pry the speaker from the device with the iFixit opening tool.

    • If the speaker does not immediately pop out, grab it by the top and slide it out sideways away from the device, while applying a slight upward force.

    • Remove the speaker.

Финишная черта

Omir Rosado

Участник с: 09/30/16

725 Репутация

Автор 5 руководств

Команда

USF Tampa, Team 4-4, Passmore Fall 2016 Участник USF Tampa, Team 4-4, Passmore Fall 2016

USFT-PASSMORE-F16S4G4

4 членов

Автор 10 руководств

0 Комментариев

Добавить комментарий

Просмотр статистики:

За последние 24часов: 1

За последние 7 дней: 8

За последние 30 дней: 10

За всё время: 1,284