Эта версия возможно содержит некорректные исправления. Переключить на последнюю проверенную версию.
Выберете то, что вам нужно
-
Этот шаг не переведен. Помогите перевести
-
Heat the edges of the screen with a heat gun on the lowest setting by using sweeping motions from about 8-10 inches away.
-
-
Этот шаг не переведен. Помогите перевести
-
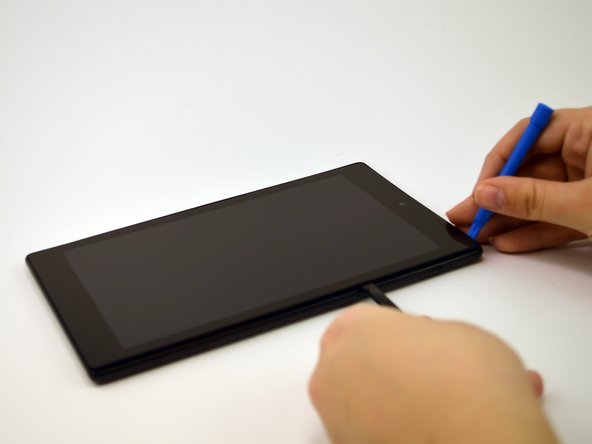
After 1-2 minutes, use a plastic opening tool to pry the screen loose. Start at the top right corner and gently pry the screen from the device.
-
-
Этот шаг не переведен. Помогите перевести
-
Slide a plastic opening tool and spudger along the underside of the screen using enough force to peel the screen and the adhesive strip from the other half of the device.
-
-
-
Этот шаг не переведен. Помогите перевести
-
To remove the screen from the device, use tweezers to gently pull the orange cable from its connection to the screen.
-
-
Этот шаг не переведен. Помогите перевести
-
Using tweezers, carefully lift the copper strip from the right side of the speaker.
-
-
Этот шаг не переведен. Помогите перевести
-
Remove the two screws located on the top left and bottom right of the speaker using a T4 screwdriver.
-
-
Этот шаг не переведен. Помогите перевести
-
Lift the right side of the speaker and carefully unhook and remove it from the device.
-
-
Этот шаг не переведен. Помогите перевести
-
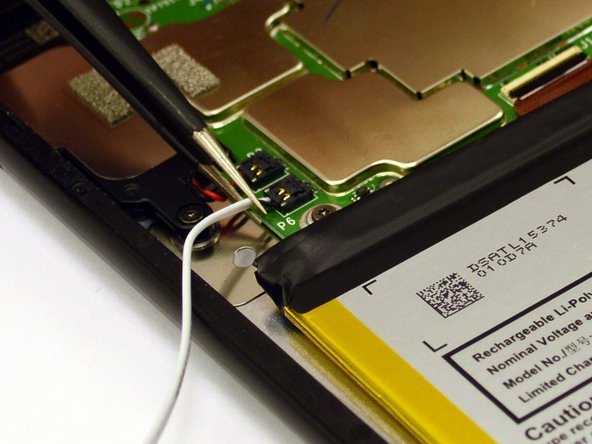
Set aside the black speaker and follow the white wire to its connection on the upper left side of the motherboard.
-
Using tweezers, gently pry the black clip upward from the board.
-


Отменить: Я не выполнил это руководство.
Еще один человек закончил это руководство.
Команда

USF Tampa, Team 1-3, Leahy Spring 2016 Участник USF Tampa, Team 1-3, Leahy Spring 2016
USFT-LEAHY-S16S1G3
4 членов
Автор 17 руководств
Один комментарий
I would like to ask if you happen to know the part number of the speaker and where I could acquire said device?
Thank you a very helpful walk-through guide