Перейти к основному содержанию

Этот документ имеет более свежие изменения. Перейти к последней непроверенной версии.

American Sanders EZSand Orbital Sander 07163A 2012 Sanding Disc Assembly Replacement

Абсолютно необходимое руководство
Это руководство предназначено только для использования в качестве обязательного условия для других руководств. Оно не полностью само по себе.

Выберете то, что вам нужно

  1. American Sanders EZSand Orbital Sander 07163A 2012 Sanding Disc Assembly Replacement, Remove the sanding disc: шаг 1, изображение 1 из 3 American Sanders EZSand Orbital Sander 07163A 2012 Sanding Disc Assembly Replacement, Remove the sanding disc: шаг 1, изображение 2 из 3 American Sanders EZSand Orbital Sander 07163A 2012 Sanding Disc Assembly Replacement, Remove the sanding disc: шаг 1, изображение 3 из 3
    • Use a flathead screwdriver to pry off and remove the rubber plug in the center of the sanding disc.

  2. American Sanders EZSand Orbital Sander 07163A 2012 Sanding Disc Assembly Replacement: шаг 2, изображение 1 из 2 American Sanders EZSand Orbital Sander 07163A 2012 Sanding Disc Assembly Replacement: шаг 2, изображение 2 из 2
    • Slide a thin 22 mm wrench underneath the sanding disc and clasp it onto the flat part of the motor driveshaft to keep the driveshaft from turning.

  3. American Sanders EZSand Orbital Sander 07163A 2012 Sanding Disc Assembly Replacement: шаг 3, изображение 1 из 2 American Sanders EZSand Orbital Sander 07163A 2012 Sanding Disc Assembly Replacement: шаг 3, изображение 2 из 2
    • Use an 11 mm socket and socket wrench to remove the 16.5 mm-long bolt securing the sanding disc to the motor driveshaft.

    • Apply counter torque to the driveshaft wrench as you loosen the bolt to keep the sanding disc from spinning.

  4. American Sanders EZSand Orbital Sander 07163A 2012 Sanding Disc Assembly Replacement: шаг 4, изображение 1 из 3 American Sanders EZSand Orbital Sander 07163A 2012 Sanding Disc Assembly Replacement: шаг 4, изображение 2 из 3 American Sanders EZSand Orbital Sander 07163A 2012 Sanding Disc Assembly Replacement: шаг 4, изображение 3 из 3
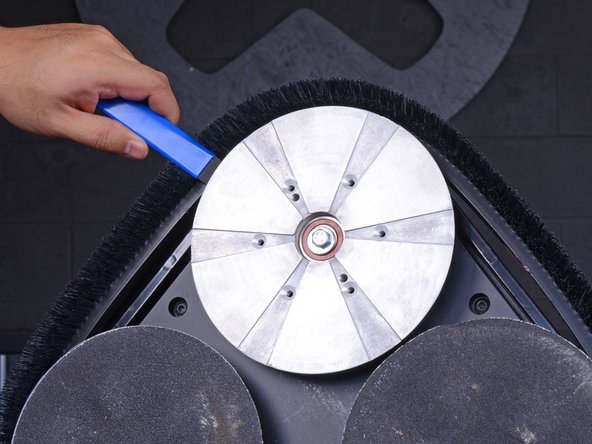
    • Take two pry bars and insert them underneath the sanding disc as close to the driveshaft as possible.

    • Apply pressure to the pry bars in opposite directions to carefully pry the sanding disc off of the driveshaft.

    • Remove the sanding disc from the floor sander.

Заключение

To reassemble your device, follow these instructions in reverse order.

Adam O'Camb

Участник с: 04/11/15

196 194 Репутация

Автор 416 руководств

0 Комментариев

Добавить комментарий

Просмотр статистики:

За последние 24часов: 0

За последние 7 дней: 0

За последние 30 дней: 0

За всё время: 18