Эта версия возможно содержит некорректные исправления. Переключить на последнюю проверенную версию.
Выберете то, что вам нужно
-
Этот шаг не переведен. Помогите перевести
-
Carefully tilt the sander back and lay it down on its side, exposing the three sanding pads on the bottom.
-
-
Этот шаг не переведен. Помогите перевести
-
Peel the hook-and-loop sandpaper disc off of the driver assembly.
-
-
Этот шаг не переведен. Помогите перевести
-
Use a 3 mm hex key or driver bit to remove the six 11.9 mm-long screws securing the driver pad.
-
Remove the driver pad from the sanding disc.
-
-
-
Этот шаг не переведен. Помогите перевести
-
Use a flathead screwdriver to pry off and remove the rubber plug in the center of the sanding disc.
-
-
Этот шаг не переведен. Помогите перевести
-
Slide a thin 22 mm wrench underneath the sanding disc and clasp it onto the flat part of the motor driveshaft to keep the driveshaft from turning.
-
-
Этот шаг не переведен. Помогите перевести
-
Use an 11 mm socket and socket wrench to remove the 16.5 mm-long bolt securing the sanding disc to the motor driveshaft.
-
Apply counter torque to the driveshaft wrench as you loosen the bolt to keep the sanding disc from spinning.
-
-
Этот шаг не переведен. Помогите перевести
-
Take two pry bars and insert them underneath the sanding disc as close to the driveshaft as possible.
-
Apply pressure to the pry bars in opposite directions to carefully pry the sanding disc off of the driveshaft.
-
Remove the sanding disc from the floor sander.
-
-
Этот шаг не переведен. Помогите перевести
-
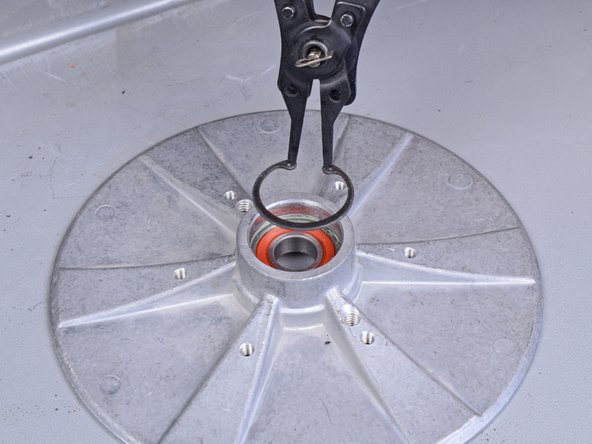
Use a pair of snap ring pliers to compress the retaining ring inside the driver and remove it from the sanding disc.
-
-
Этот шаг не переведен. Помогите перевести
-
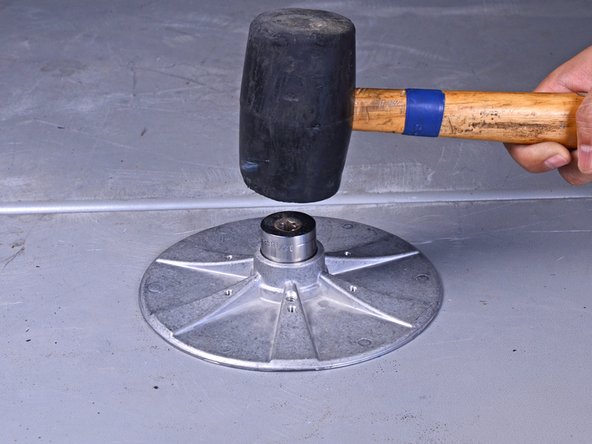
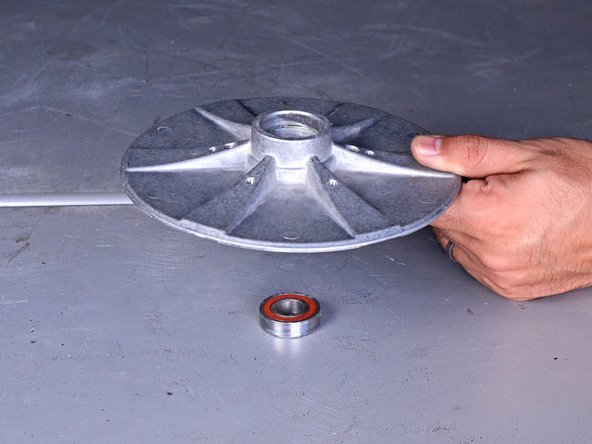
Place a 15/16" socket inside the center of the sanding disc and use a mallet to tap the bearing out of the disc.
-


Отменить: Я не выполнил это руководство.
2 участников успешно повторили данное руководство.
