Перейти к основному содержанию

Anne Pro 2 Case/Housing Replacement

Выберете то, что вам нужно

  1. Anne Pro 2 Case/Housing Replacement, Case/Housing: шаг 1, изображение 1 из 3 Anne Pro 2 Case/Housing Replacement, Case/Housing: шаг 1, изображение 2 из 3 Anne Pro 2 Case/Housing Replacement, Case/Housing: шаг 1, изображение 3 из 3
    • Unplug the Anne Pro 2 Keyboard.

    • Turn off the Anne Pro 2 Keyboard using the switch on the bottom.

  2. Anne Pro 2 Case/Housing Replacement: шаг 2, изображение 1 из 2 Anne Pro 2 Case/Housing Replacement: шаг 2, изображение 2 из 2
    • Using a keycap remover, remove the the following keycaps: Left Alt, Space Bar, Right Shift, Backslash, Y, H, and the Tab key.

  3. Anne Pro 2 Case/Housing Replacement: шаг 3, изображение 1 из 2 Anne Pro 2 Case/Housing Replacement: шаг 3, изображение 2 из 2
    • Using a Torx T5 bit, remove the five screws from the keyboard.

  4. Anne Pro 2 Case/Housing Replacement: шаг 4, изображение 1 из 2 Anne Pro 2 Case/Housing Replacement: шаг 4, изображение 2 из 2
    • Lift the keyboard slowly from the bottom side.

    • Do not fully lift the PCB because the battery is still plugged in.

  5. Anne Pro 2 Case/Housing Replacement: шаг 5, изображение 1 из 2 Anne Pro 2 Case/Housing Replacement: шаг 5, изображение 2 из 2
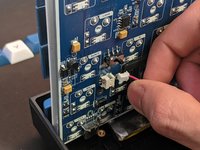
    • Gently unplug the battery connector by wiggling it back and forth.

  6. Anne Pro 2 Case/Housing Replacement: шаг 6, изображение 1 из 2 Anne Pro 2 Case/Housing Replacement: шаг 6, изображение 2 из 2
    • Remove the PCB from the main case.

    • Gently lower the PCB into the Zero-Degree housing from the top side first.

    • Firmly press it in once you have lowered it.

  7. Anne Pro 2 Case/Housing Replacement: шаг 7, изображение 1 из 2 Anne Pro 2 Case/Housing Replacement: шаг 7, изображение 2 из 2
    • Screw the five T5 Torx screws back into place.

  8. Anne Pro 2 Case/Housing Replacement: шаг 8, изображение 1 из 2 Anne Pro 2 Case/Housing Replacement: шаг 8, изображение 2 из 2
    • Take the seven keycaps you removed and gently place them in their intended spots on the keyboard.

    • Firmly press them in, ensuring they are flush with the rest of the keys.

Заключение

To reassemble your device, follow these instructions in reverse order.

2 участников успешно повторили данное руководство.

Mohamed

Участник с: 09/15/20

205 Репутация

1 руководство автора

Команда

York University, Team S2-G3, Melo-Thaiss Fall 2020 Участник York University, Team S2-G3, Melo-Thaiss Fall 2020

YORK-MELO-THAISS-F20S2G3

1 член

Автор 2 руководств

Один комментарий

Anne Pro 2 Software manage the illumination, open the mobile App and choose a pre-programmed scheme or design your own pattern, with a distinct colour for each key if desired. The programmes are easy to use and work on both Mac and PC.

Visit Here-   https://www.techtoreview.com/top-picks/a...

Abhinav Pal - Ответить

Добавить комментарий

Просмотр статистики:

За последние 24часов: 6

За последние 7 дней: 28

За последние 30 дней: 116

За всё время: 9,911