Введение
The internal power supply is critical for your device to turn on. Follow our troubleshooting page to identify if the internal power supply is broken or if it is the external power cord. The power cord will be a much easier replacement if so.
Выберете то, что вам нужно
-
-
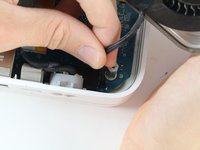
Turn the device upside down to reveal the rubber section of the back plate. Using a metal spudger, carefully wedge the blunt tip into the space between the aluminum back plate and the rubber, separating the two pieces.
-
Depending on air temperature and how set the adhesive is, you may need to spend some time warming the back plate with a hot plate (on low) or hair dryer.
-
-
-
-
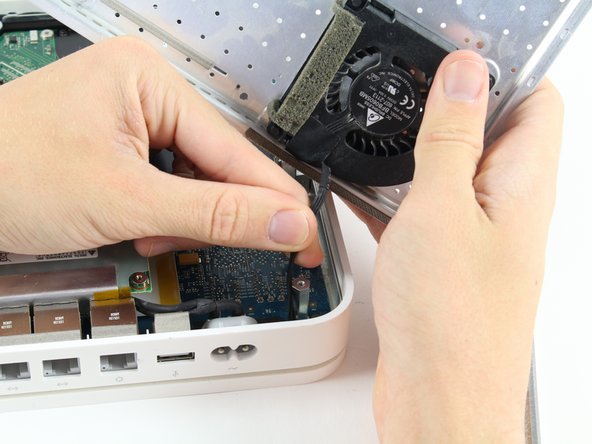
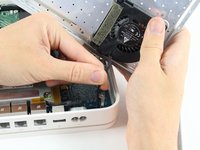
The fan affixed to the back plate is connected to the logic board. A small wire must be detached to fully remove the back plate.
-
Pull the base of the wire close to the logic board and the connector will pop off.
-
-
-
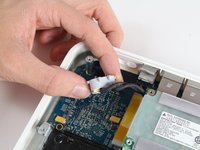
Remove the external connector from its housing by lifting it up, then out.
-
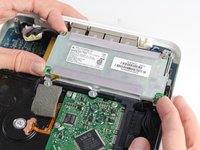
Lift the internal power supply brick out of the device.
-


To reassemble your device, follow these instructions in reverse order.
Отменить: Я не выполнил это руководство.
15 человек успешно провели ремонт по этому руководству.
Команда

Cal Poly, Team 4-2, Livingston Fall 2016 Участник Cal Poly, Team 4-2, Livingston Fall 2016
CPSU-LIVINGSTON-F16S4G2
4 членов
Автор 17 руководств
5 Комментарии к руководству
My time capsule stopped working. I tried everything but it was completely dead so I bought a new power supply on eBay but now the amber light is solid and won't turn green. I've tested the hard drive and it's fine. I've got another new power supply today and still a solid amber light. Any ideas please?
After the Apple Reseller said the device was not covered by service anymore and data rescue would cost 70 bucks I decided to go for it myself. Went very well. Except the grey rubber backplate was ripping apart on removal. Must be because of the device getting so hot. Will fix it with some self-adhesive rubber mat from the crafts store.
Thanks for the guide!
Hello is HOT I took the rubber mat off and rise it with rubber foot for better circulation of air, it helps alot.
After the new power supply the TC does not connect to hard drive. Have a green light.
I think my TC finally died, and this looks to be the problem. Is the only source for replacement power supplies finding salvaged ones on eBay, or does anybody know of a more reliable source?