Введение
This guide will show how to remove a broken arrow vane and replace it with a new one.
Выберете то, что вам нужно
-
-
Gather all supplies needed to refletch the arrow.
-
Be sure the fletching jig is the correct jig for the amount of vanes on the arrow. The fletching jig in the following images is a three vane fletching jig.
-
Lay down one of your paper towels where you plan to work.
-
-
-
Identify which vane is broken.
-
If you can gently pull off the broken vane, do so, then proceed to step two. If not proceed to step two.
-
-
-
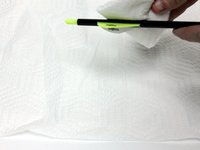
Use a pocket knife to scrape off the broken vane and glue.
-
Be sure to hold the blade away from you, at a 45 degree angle from the arrow.
-
Periodically check the arrow, by rubbing your finger on the surface of the arrow, to see if all the glue has been removed.
-
If all the glue has been removed the arrow will be smooth. If the glue hasn't been removed completely, your finger will feel small raises on the arrow.
-
-
-
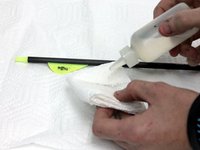
Apply acetone to a paper towel and rub it on the area where the vane was removed.
-
Be sure the paper towel is sufficiently soaked with acetone. If the acetone isn't rubbed on enough, the grease from your finger will cause the new vane to fall off.
-
Be sure not to touch that part of the arrow you just cleaned for the rest of the process.
-
-
-
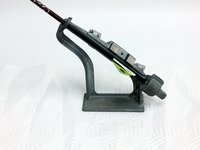
Put the arrow, nock first, into the fletching jig.
-
Twist the nob on the fletching jig so that the missing vane is on top.
-
If twisting the nob properly, the arrow will turn with you as you twist.
-
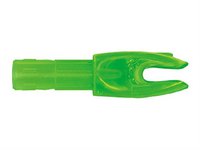
The second picture is an example of what a nock looks like.
-
-
-
-
The supplies needed for this step are the following. The clamp, new vane, acetone, paper towel, q-tip, and fletching glue.
-
Be sure to have all supplies close at hand.
-
Glue dries fast, so you need to work at a quicker than normal pace. Don't work so fast that you mess up, but try to work swiftly when working with the fletching glue.
-
-
-
Put the vane in the clamp, lined with the correct line on the clamp.
-
With a three vaned arrow, the proper placement is usually the 3rd or 4th line on the clamp.
-
-
-
Put the fletching jig clamp onto the fletching jig and slide it down evenly onto the arrow.
-
Make sure the vane is even with the other vanes.
-
If all vanes are even, continue to Step 9. If not, be sure to line up the new vane with the existing vanes.
-
-
-
Remove the clamp from the fletching jig; without taking the new vane out of the clamp.
-
Be sure your paper towel is under you. Take a q-tip and pour acetone on the cotton part.
-
-
-
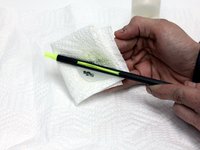
Wipe off the bottom of the vane with the acetone soaked q-tip.
-
Let dry for 1 minute.
-
-
-
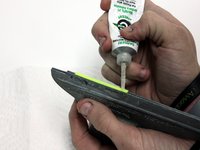
Apply a thin amount of fletching glue to the arrow vane.
-
Be sure to not use too much. If there is too much glue, the vane will have a hard time staying in place.
-
-
-
Put the fletching jig clamp back onto the fletching jig and slide it down evenly onto the arrow.
-
Let dry for 10 minutes.
-
-
-
When dry, remove clamp from fletching jig by holding the clamp open and lifting upward.
-
Remove arrow from the fletching jig and place a small drop of glue at the top and the bottom of the new arrow vane.
-
-
-
Place arrow in a vertical position with the vanes at the top for maximum drying effect.
-
Let dry for 3-5 minutes.
-
-
-
After the vane has finished drying; check to see if the vane is on correctly and straight. If so, the vane was properly replaced. If not, refer back to step 1 and start over.
-
If the vane is fixed, you may apply a small amount of acetone onto another q-tip and wipe off any excessive glue. Be sure not to wipe the new arrow vane.
-


To reassemble your device, you must finish the instructions.
Отменить: Я не выполнил это руководство.
Еще один человек закончил это руководство.
Команда

Missouri Western, Team S1-G10, Adkins Fall 2017 Участник Missouri Western, Team S1-G10, Adkins Fall 2017
MWSU-ADKINS-F17S1G10
3 членов
Автор 1 руководств