Введение
The touch screen on the ASUS Chromebook C101P is great for work as a tablet or as a simple screen. Like other laptop screens, this one is equally susceptible to breaking or not responding. Replacing it is a little tricky, requiring not only the screen, but the hinge to be removed as well. It is advised to turn off the Chromebook before taking apart the screen.
Выберете то, что вам нужно
-
-
Flip the Chromebook so that the bottom is facing up.
-
Remove the nine T5 Torx screws.
-
-
-
Remove the four rubber grips on the bottom side of the Chromebook using an opening tool.
-
-
-
Reorient the Chromebook so the right side is facing upwards.
-
Wedge an opening tool or spudger between the keyboard (upper case) and the lower case of the bottom portion of the Chromebook.
-
-
-
-
Pull back the black lever on the base of the cable. While pulling back, take your tweezers and pull back on the large ribbon cable.
-
Pull back the black lever on the base of the cable. While pulling back, take your tweezers and pull back on the small ribbon cable.
-
Separate the keyboard from the rest of the laptop.
-
-
-
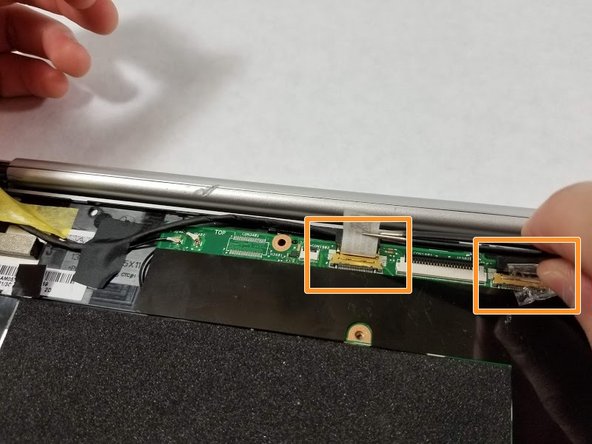
Detach the the screen cables from the motherboard using a pair of tweezers.
-
Peel off the tape or seal to easily remove the screen cables.
-
-
-
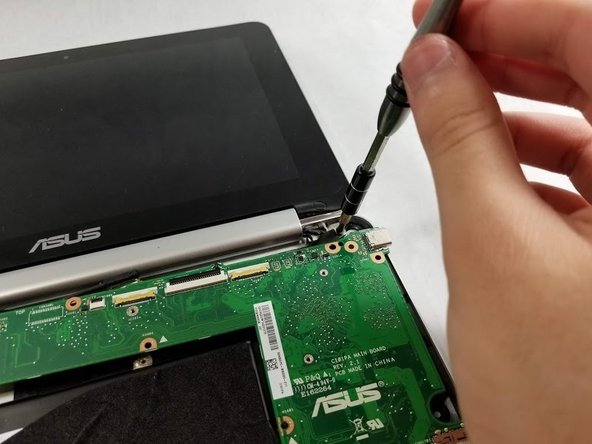
Angle the hinge as shown and use a T5 Torx screwdriver to remove the hinge screws.
-
-
-
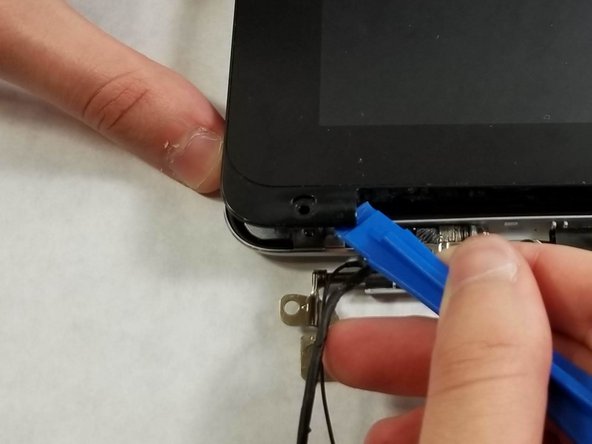
Use the iFixit opening tool to pop out the black rubber grips near the bottom of the screen.
-
Use a Phillips 00 screwdriver to remove the screws beneath the rubber grips.
-
-
-
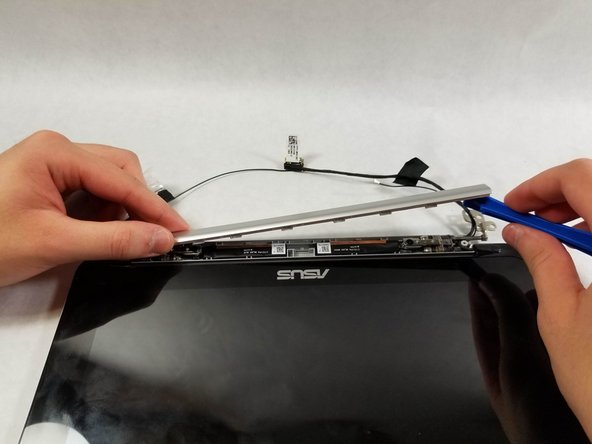
Use the iFixit opening tool to pry around the screen.
-
Once open, slide the wires that are in the hinge out. The screen should now be fully detached from the case.
-
To reassemble your device, follow these instructions in reverse order.
To reassemble your device, follow these instructions in reverse order.


