Введение
The motherboard is the most important part of your devise. It is responsible of everything ranging from basic processing to complex programs.
Выберете то, что вам нужно
-
-
Flip the Chromebook over so that the underside is facing up.
-
Using the Phillips PH #000 screwdriver, remove the 11 "4mm" screws on the back of the device.
-
-
-
Wedge the plastic opening tool between the bottom cover of the laptop and the keyboard panel.
-
Apply pressure and move the plastic opening tool around the border of the laptop until it pops out.
-
-
-
Once the keyboard panel pops out, slowly move it upwards so that the keyboard connection is visible.
-
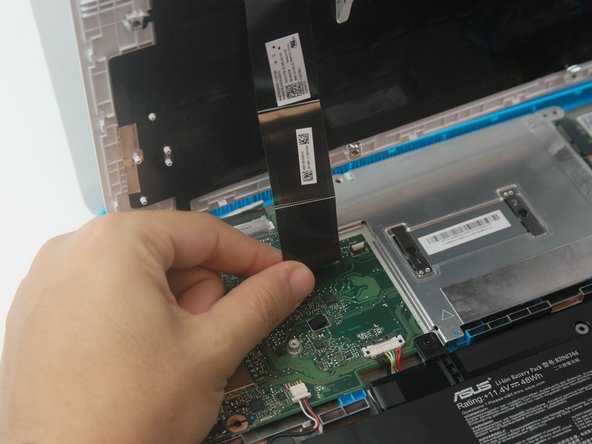
Remove the keyboard connection from the motherboard by pulling it outwards from the connector.
-
-
-
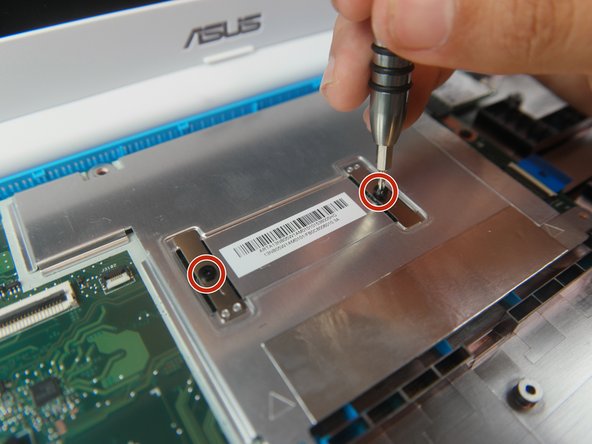
Remove the 4 "4mm" screws on the silver motherboard cover with the Phillips #000 Screwdriver.
-
Remove the motherboard silver mount.
-
-
-
-
Use a plastic opening tool to remove the connection from sound driver on the bottom left of the motherboard.
-
-
-
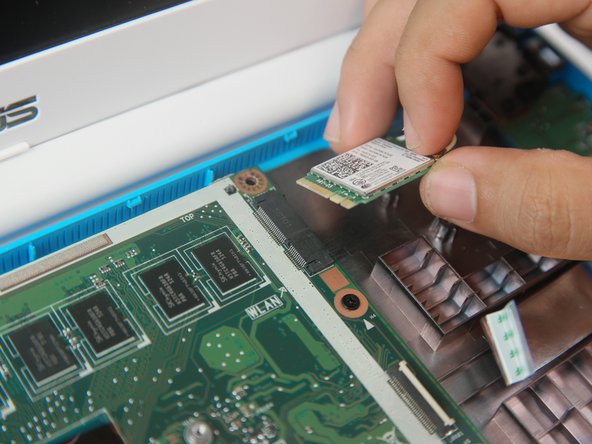
Use the Phillips #000 Screwdriver to remove the screw on right side of wireless card.
-
Remove the wireless card.
-
-
-
Start by lifting tape up off of the connection. Remove the connection to display.
-
-
-
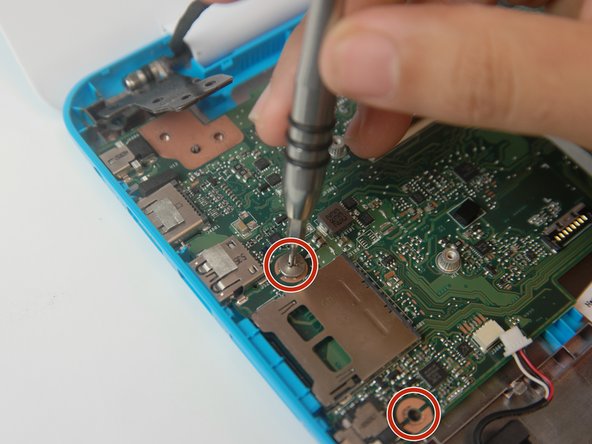
Remove (3) three "4mm" screws that connect the hinge to the motherboard using the Phillips #000 Screwdriver.
-
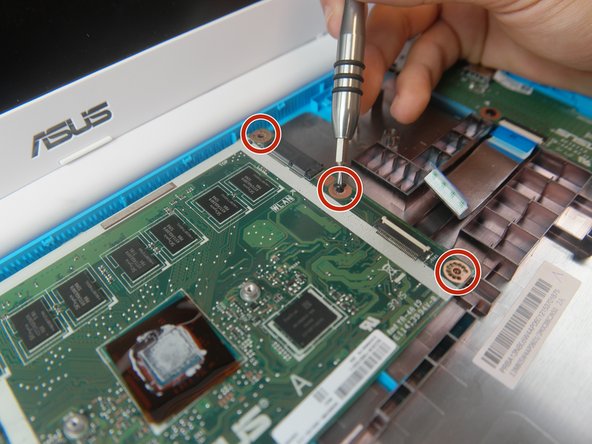
Remove (5) five "4mm" screws around two sides of motherboard using the Phillips #000 Screwdriver.
-


To reassemble your device, follow these instructions in reverse order.
To reassemble your device, follow these instructions in reverse order.
Отменить: Я не выполнил это руководство.
2 участников успешно повторили данное руководство.

Команда

USF Tampa, Team S6-G4, Remmell Fall 2017 Участник USF Tampa, Team S6-G4, Remmell Fall 2017
USFT-REMMELL-F17S6G4
4 членов
Автор 12 руководств