Введение
In this replacement guide, you will be instructed on the process of removing the back plate, making sure the laptop is turned off and not connected to a power source and removing the necessary components are removed so that the charging port can be removed and eventually replaced.
Выберете то, что вам нужно
-
-
Remove three of the rubber feet on the bottom cover with a plastic or metal spudger.
-
-
-
Remove the five screws from beneath the rubber feet using a Phillips #0 screwdriver.
-
-
-
Remove the nine bottom cover screws using a T5 screwdriver.
-
Set apart the 6mm screw in the rear middle of the bottom cover from the the other eight 3mm screws, as it is longer than them.
-
-
-
-
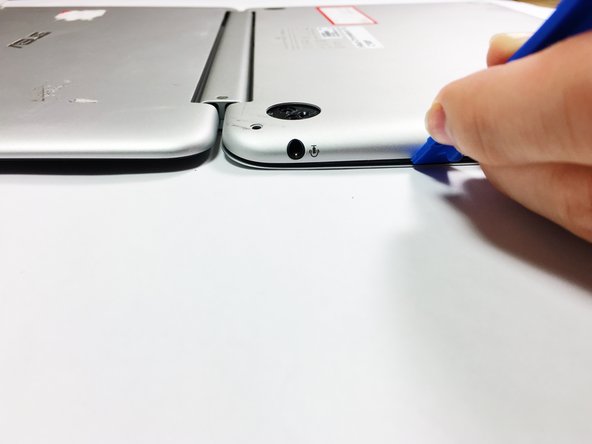
Pry the palm rest assembly apart from the bottom cover using a spudger. This step may require extra power.
-
Once the palm rest has been separated from the bottom cover, pull it away from the screen, rather than away from yourself.
-
-
-
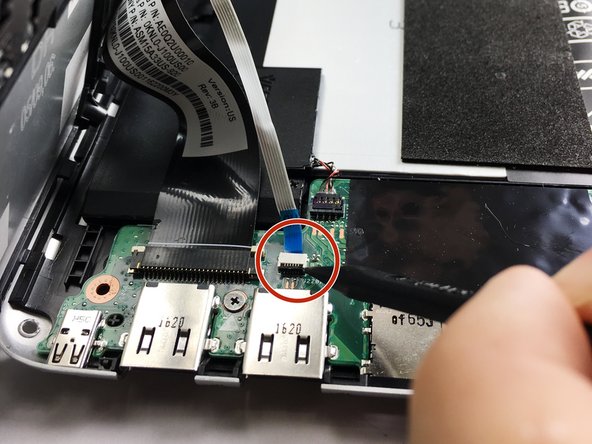
Disconnect the touchpad cable and the keyboard cable on the palm rest assembly from the motherboard using the pointed end of a plastic spudger.
-
-
-
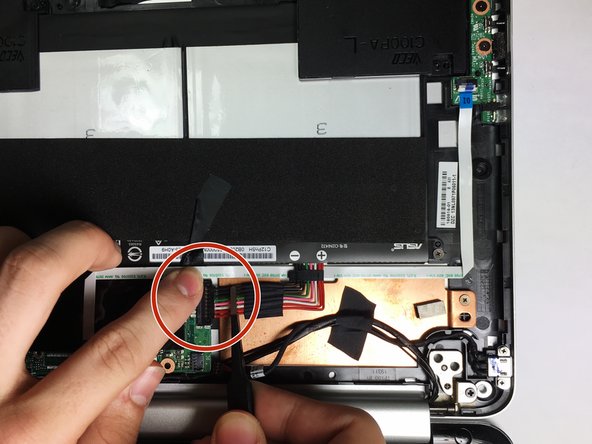
Disconnect the DC jack cable and the battery cable from the motherboard using tweezers, the pointed end of a plastic spudger, or by simply pulling the cables apart from the motherboard with your fingers.
-
-
-
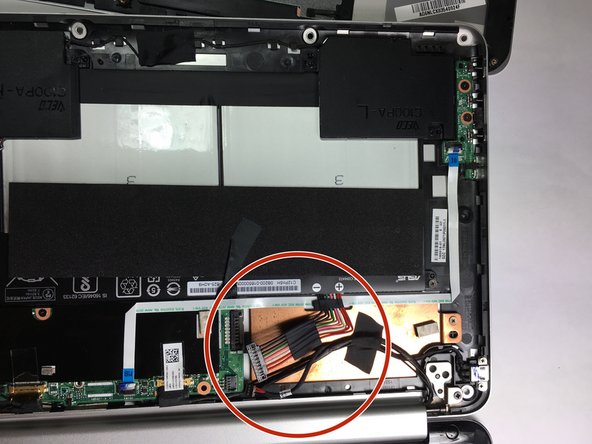
Using a pair of tweezers or your fingers, lift up the charging cable and remove the charging port.
-


To reassemble your device, follow these instructions in reverse order.
To reassemble your device, follow these instructions in reverse order.
Отменить: Я не выполнил это руководство.
10 участников успешно повторили данное руководство.
Команда

Baylor, Team S5-G2, Williams Spring 2018 Участник Baylor, Team S5-G2, Williams Spring 2018
BU-WILLIAMS-S18S5G2
3 членов
Автор 8 руководств
Один комментарий
I just did this but now when I turn it on there is no picture on the computer. I had to change the charging port because my cats knocked over a water glass. The charging port was successful because the light was on. Amy troubleshooting?