Эта версия возможно содержит некорректные исправления. Переключить на последнюю проверенную версию.
Выберете то, что вам нужно
-
Этот шаг не переведен. Помогите перевести
-
Remove three of the rubber feet on the bottom cover with a plastic or metal spudger.
-
-
Этот шаг не переведен. Помогите перевести
-
Remove the five screws from beneath the rubber feet using a Phillips #0 screwdriver.
-
-
Этот шаг не переведен. Помогите перевести
-
Remove the nine bottom cover screws using a T5 screwdriver. Set apart the 6mm screw in the rear middle of the bottom cover from the the other eight 3mm screws, as it is longer than them.
-
Set apart the 6mm screw in the rear middle of the bottom cover from the the other eight 3mm screws, as it is longer than them
-
-
Этот шаг не переведен. Помогите перевести
-
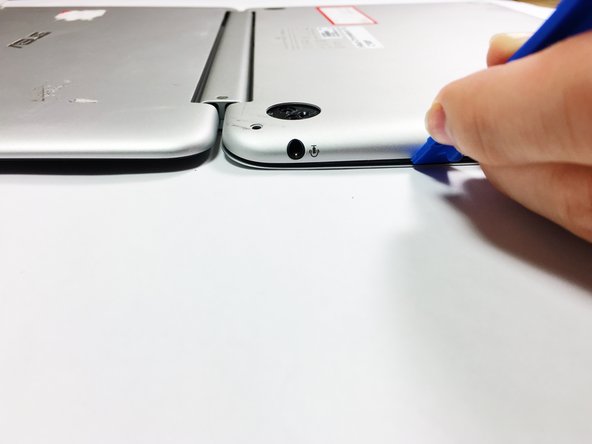
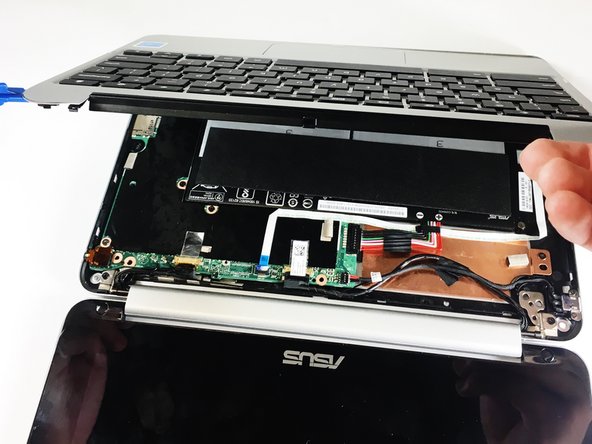
Pry the palm rest assembly apart from the bottom cover using a spudger. This step may require extra power. Once the palm rest has been separated from the bottom cover, pull it away from the screen, rather than away from yourself.
-
-
Этот шаг не переведен. Помогите перевести
-
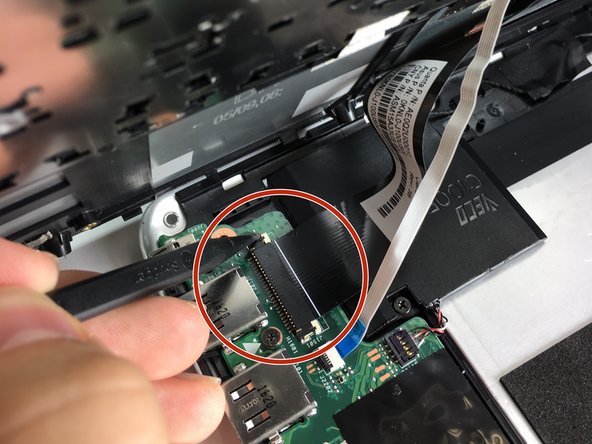
Disconnect the touchpad cable and the keyboard cable on the palm rest assembly from the motherboard using the pointed end of a plastic spudger.
-
-
-
Этот шаг не переведен. Помогите перевести
-
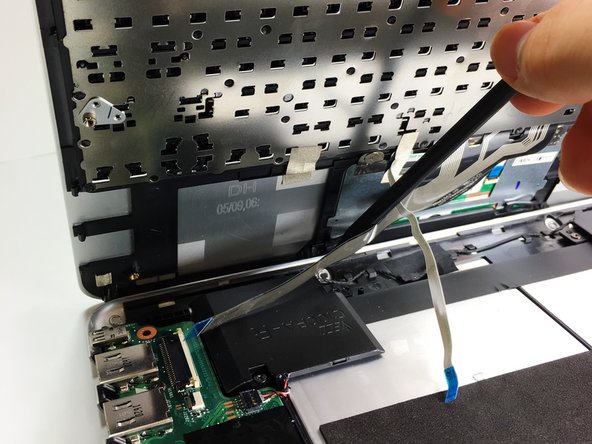
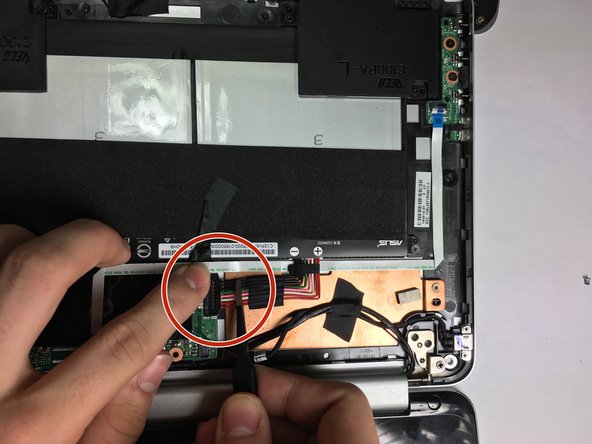
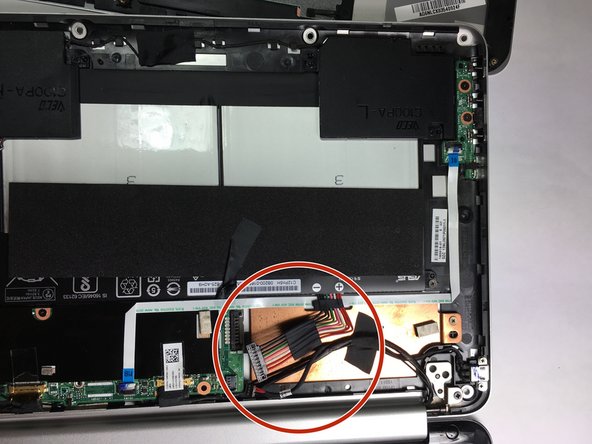
Disconnect the DC jack cable and the battery cable from the motherboard using tweezers, the pointed end of a plastic spudger, or by simply pulling the cables apart from the motherboard with your fingers.
-
-
Этот шаг не переведен. Помогите перевести
-
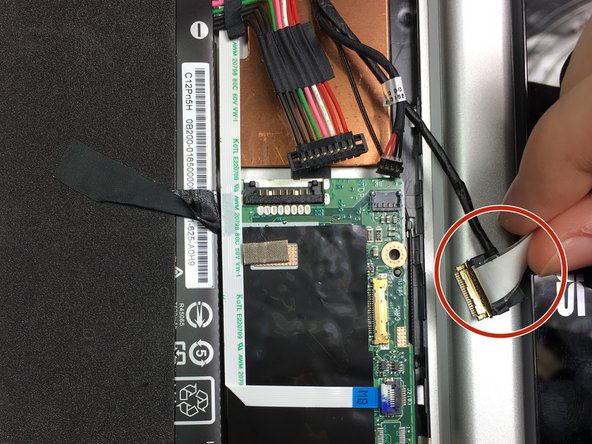
Disconnect the LCD cable from the motherboard using the pointed end of a plastic spudger.
-
-
Этот шаг не переведен. Помогите перевести
-
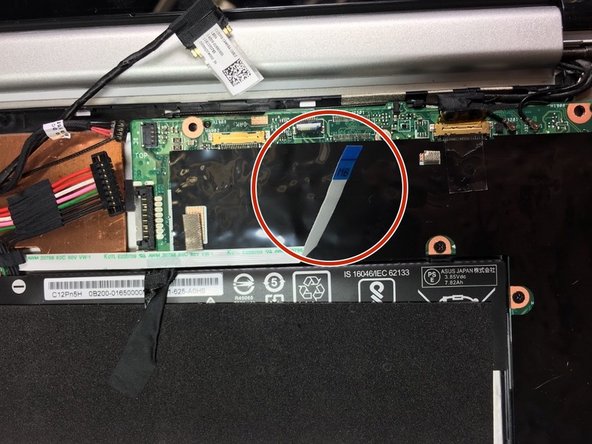
Disconnect the motherboard to powerboard cable from the motherboard using the pointed end of a plastic spudger.
-
-
Этот шаг не переведен. Помогите перевести
-
Disconnect the digitizer board cable from the motherboard using the pointed end of a plastic spudger.
-
-
Этот шаг не переведен. Помогите перевести
-
Disconnect the two WiFi antenna cables from the motherboard using the pointed end of a plastic spudger or simply by pulling the cables apart from the motherboard with your fingers.
-
-
Этот шаг не переведен. Помогите перевести
-
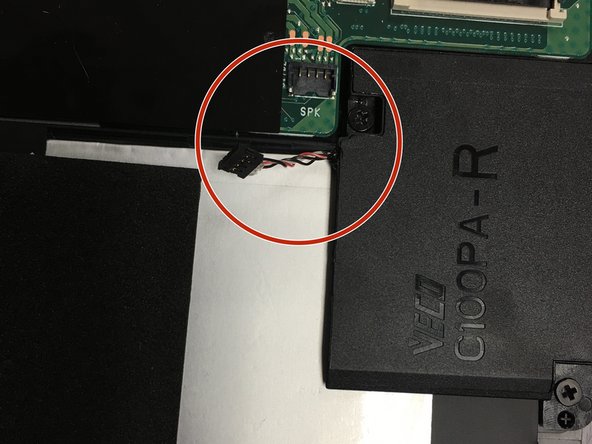
Disconnect the speaker cable from the motherboard using the pointed end of a plastic spudger.
-
-
Этот шаг не переведен. Помогите перевести
-
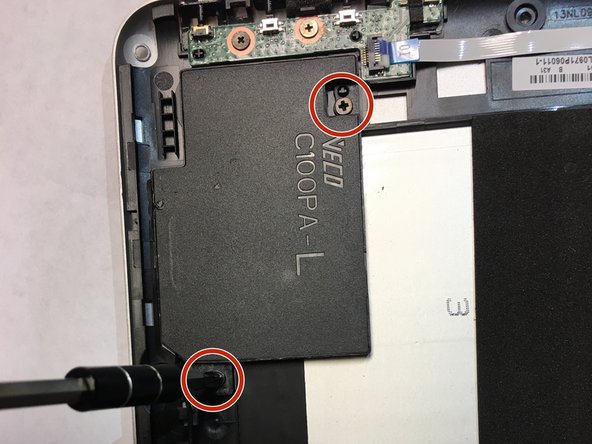
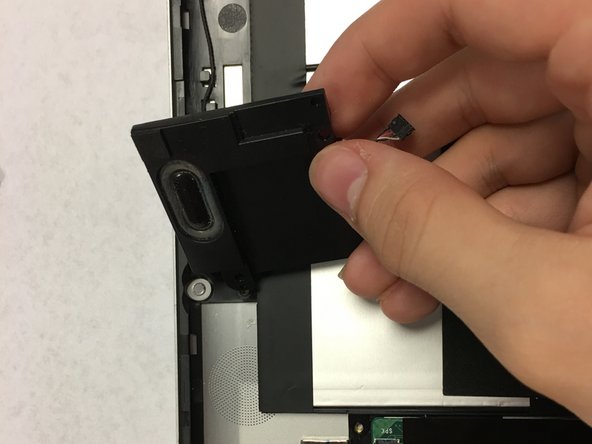
Remove the four 4.2mm speaker screws, then remove the two speakers using a philips head screwdriver.
-
-
Этот шаг не переведен. Помогите перевести
-
Remove the five 2.7mm motherboard screws with a T5 screwdriver.
-
-
Этот шаг не переведен. Помогите перевести
-
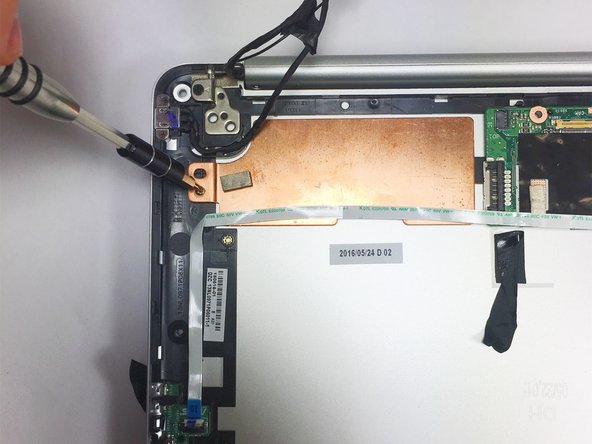
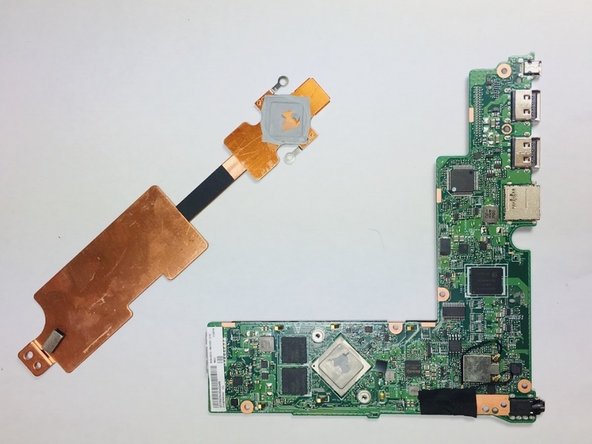
Remove the two 2.7mm heat sink screws with a T5 screwdriver, then remove the heat sink from the motherboard.
-


Отменить: Я не выполнил это руководство.
2 участников успешно повторили данное руководство.

