Введение
A guide on how to replace the keyboard on your Asus Eee PC 1005PXD-BLK024S. either because of a faulty one or to change the computer’s keyboard layout.
Выберете то, что вам нужно
-
-
The first thing you should do when disassembling electronic devices in general is to disconnect it from any power source. Make sure the AC adapter isn't connected to the laptop before you start.
-
Turn the laptop upside down, with the battery side closest to you. Unlock the left slider by pressing it to the left. It will stay in this position.
-
Now slide the right slider to the right. This one won't lock in position, so you must slide the battery towards you while pressing this slider to the right to remove it.
-
-
-
-
Turn the laptop upside up and open the lid. You should see 4 small pins located next to the top of the keyboard.
-
Use an opening pick to press the pins away from the keyboard. A small flat head screwdriver should also do the trick. It's easier to start with the middle clips.
-
In order to maintain the clips from locking the keyboard again, it's advised to do this with the keyboard in a vertical position or to use another opening pick to lift the keyboard after pressing the first clip.
-
-
-
Slightly lift the top of the keyboard from the laptop.
-
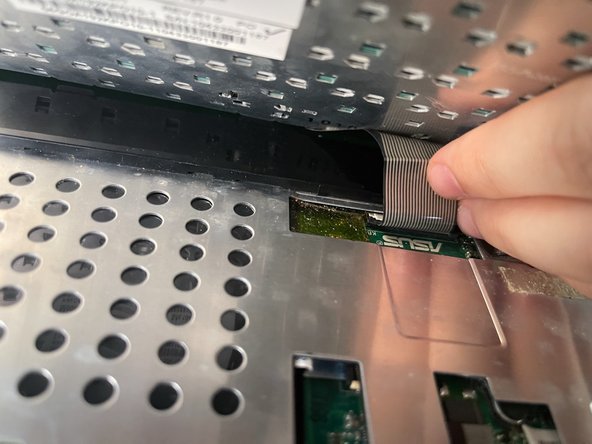
Reach around the keyboard and remove the ribbon cable from the motherboard. To do so, just gently pull it from the connector.
-
You can then remove the keyboard by sliding it up.
-


To reassemble your device, follow these instructions in reverse order.
To reassemble your device, follow these instructions in reverse order.
