Этот документ имеет более свежие изменения. Перейти к последней непроверенной версии.
Введение
This task will normally be performed if the fan is faulty, broken, or if the user is trying to disassemble the entire device. You will start with removing the keyboard and continue to carefully remove parts within the laptop to finally disconnect fan for replacement.
Выберете то, что вам нужно
-
-
Using the plastic opening tool, carefully pry the top panel from the base.
-
-
-
Lift the side of the keyboard.
-
Disconnect the attached ribbon located underneath the keyboard.
-
Place your index finger in the hole on the right side of the keyboard tray and lift the tray.
-
-
-
-
Use your fingers to lift the battery and gently disconnect the wires from the base.
-
-
-
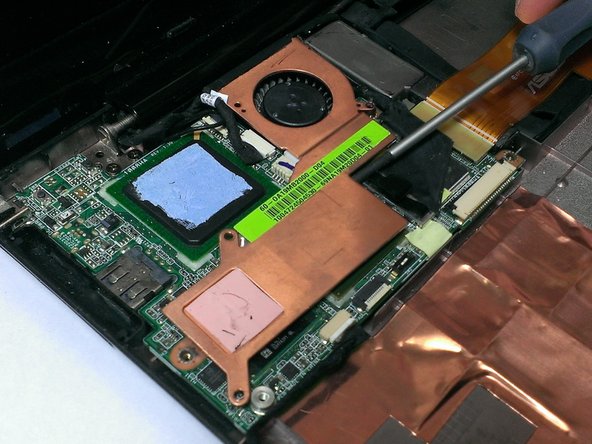
Remove the 2mm screws on the copper heat sink on the left side of the device.
-
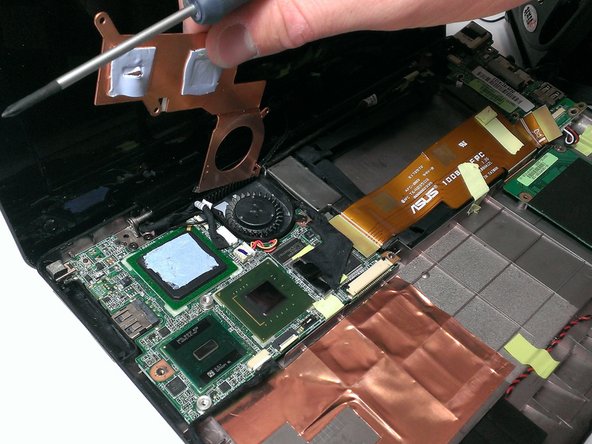
Use a flathead screwdriver to remove the heat sink. Make sure to remove the adhesive tape from the top of the heat sink.
-
-
-
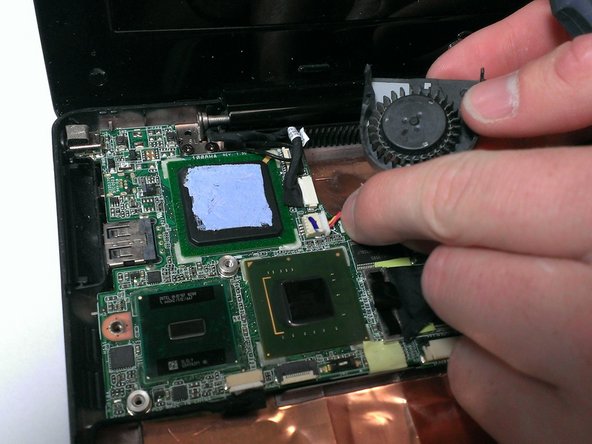
Remove the small white connector attached to the fan (make sure to pull from the white connector and not with the wires as this can cause damage to the component)
-
Replace with new fan!
-


To reassemble your device, follow these instructions in reverse order.
To reassemble your device, follow these instructions in reverse order.
Отменить: Я не выполнил это руководство.
2 участников успешно повторили данное руководство.
Команда

Cal Poly, Team 21-52, Johann Spring 2013 Участник Cal Poly, Team 21-52, Johann Spring 2013
CPSU-JOHANN-S13S21G52
4 членов
Автор 11 руководств