Эта версия возможно содержит некорректные исправления. Переключить на последнюю проверенную версию.
Выберете то, что вам нужно
-
Этот шаг не переведен. Помогите перевести
-
Locate the 5 clips located at the top of the keyboard. Insert a metal spudger into the clip openings on the keyboard to remove the keyboard.
-
-
Этот шаг не переведен. Помогите перевести
-
Before fully removing the keyboard, remove the back lighting cable and keyboard data strip.
-
In order to remove these cables, push forward the black retention clips and pull out the cables.
-
-
Этот шаг не переведен. Помогите перевести
-
Remove the 4mm screws located under the keyboard with the PH0 screwdriver.
-
-
-
Этот шаг не переведен. Помогите перевести
-
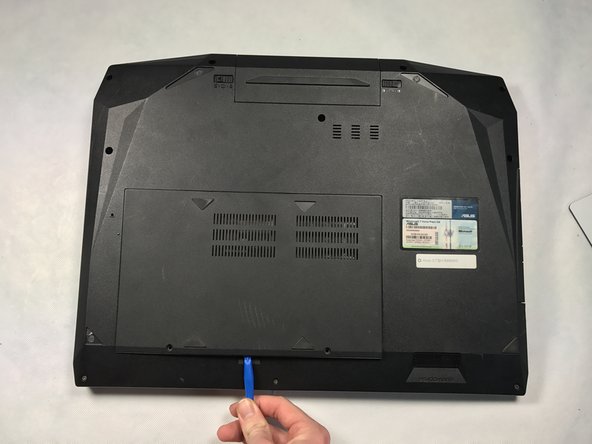
Using a PH0 screwdriver, remove the two, 4mm screws .
-
Using either your finger or a plastic opening tool, remove the back panel.
-
-
Этот шаг не переведен. Помогите перевести
-
Using the PH0 screwdriver, remove the nine, 4mm screws on the bottom of the laptop.
-
-
Этот шаг не переведен. Помогите перевести
-
Using a metal spudger, remove the back cover of the laptop.
-
-
Этот шаг не переведен. Помогите перевести
-
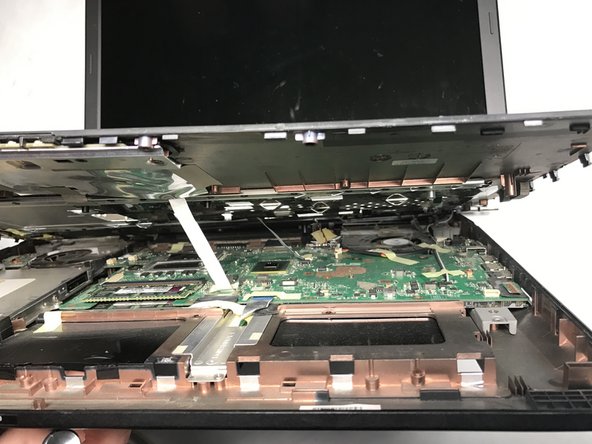
Remove the four, 4mm screws located on both of the hinges using the PH0 screwdriver and flip open the device.
-
-
Этот шаг не переведен. Помогите перевести
-
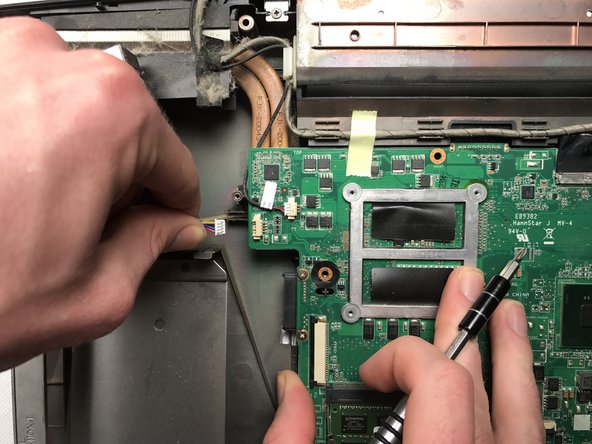
Locate the fan and remove the three 2mm screws with the PH0 screwdriver.
-


Отменить: Я не выполнил это руководство.
3 участников успешно повторили данное руководство.
Команда

Cal Poly, Team 22-11, Maness Winter 2017 Участник Cal Poly, Team 22-11, Maness Winter 2017
CPSU-MANESS-W17S22G11
3 членов
Автор 5 руководств
Один комментарий
Some steps missing, regarding screws to remove: 1 screw that holds optical drive; once that is removed, 2 screws in the drive compartment; 2 screws in the battery compartment; 3 screws from the bottom of the motherboard.