Введение
After many years of intensive use, most of laptops begin to heavily overheat and also to become noisy, mainly due to dust and to a dried up thermal paste.
Take your time to manage correctly the task, there are many ways to break some components while doing this.
However it's not as hard as it seems, in my mind everybody can manage successfully by taking a few simple precautions.
-Again, Take your time!
-Disconnect all power cables.
- Use a grounded wrist strap or touch a safely grounded object or a metal object, to avoid damaging the motherboard due to static electricity
-Be organized and do not mix the different types of screws. Reassembling a computer takes way more time. Feel free to take pictures when disassembling components which you don't feel being able to reassemble correctly on your own.
This guide can be applied more generally on the Asus K/A and X series (K43, K53, A43, A53, X43, X53).
In addition, opening your laptop voids the warranty. Be careful.
Выберете то, что вам нужно
-
-
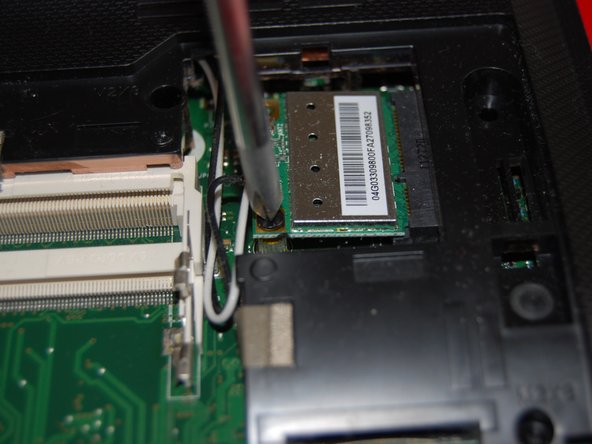
Wifi card
-
Hard drive
-
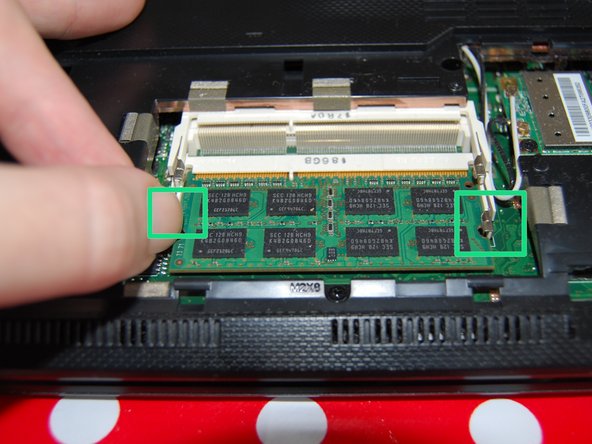
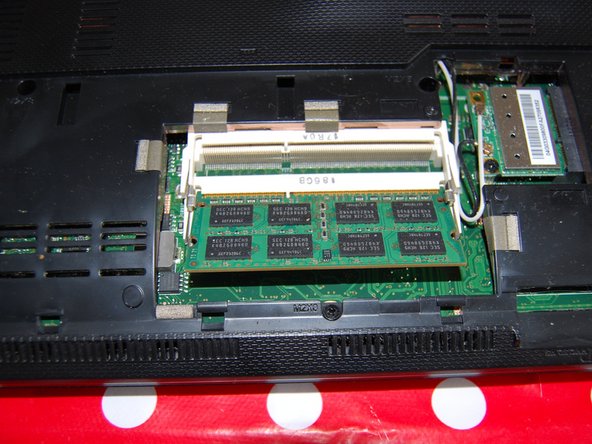
Ram memory
-
Release the tabs on each side of the chip by simultaneously pushing each tab away from the RAM.
-
-
-
Remove the single screw from the wireless card.
-
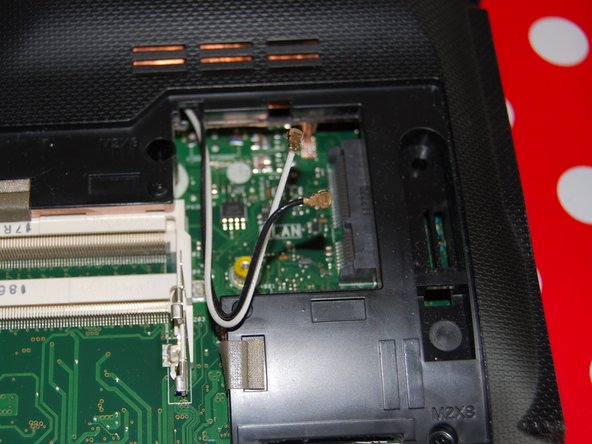
Remember the position of the cables. Here the white cable is on the top of the wifi card.
-
-
-
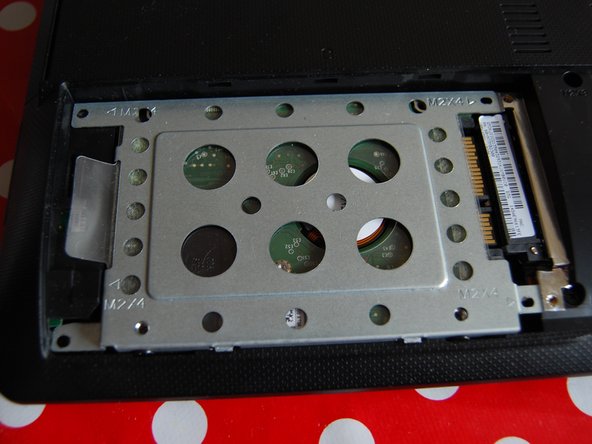
Remove the four screws from the hard drive cage.
-
Then slide the cage to the left.
-
Finally, remove the hard drive.
-
-
-
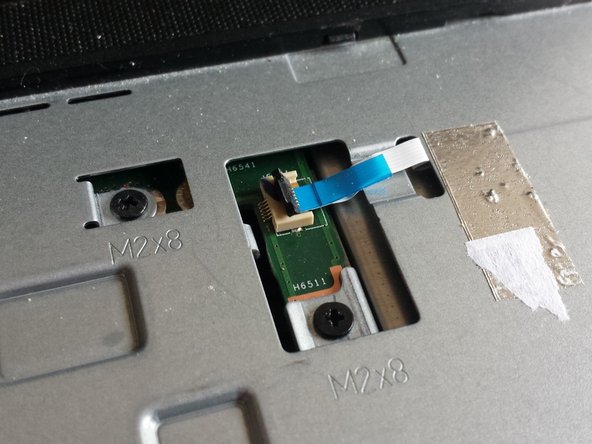
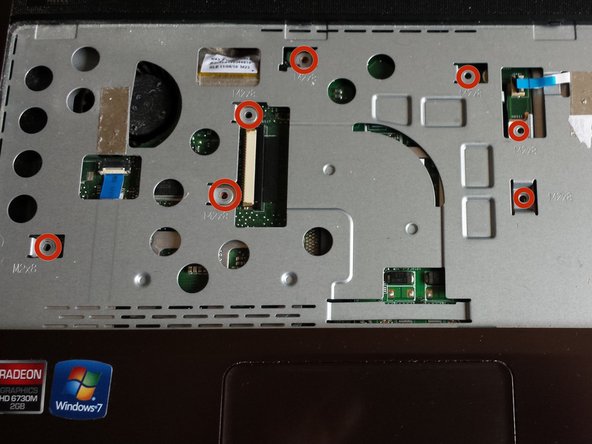
Remove the four M2X8 screws.
-
Remove the single M2X4 screw.
-
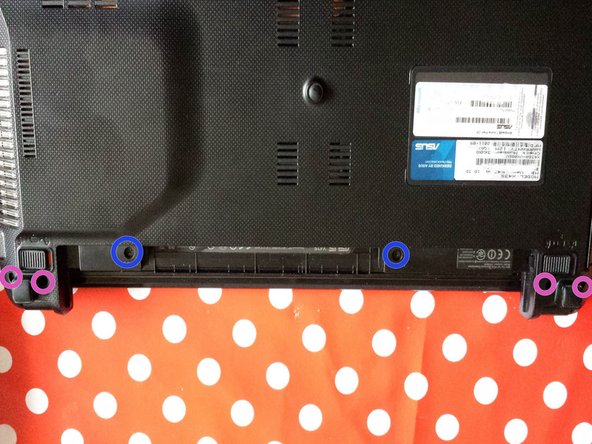
Remove the two M2.5X12 screws just below the battery
-
Remove the other four screws at each side, next to the battery.
-
-
-
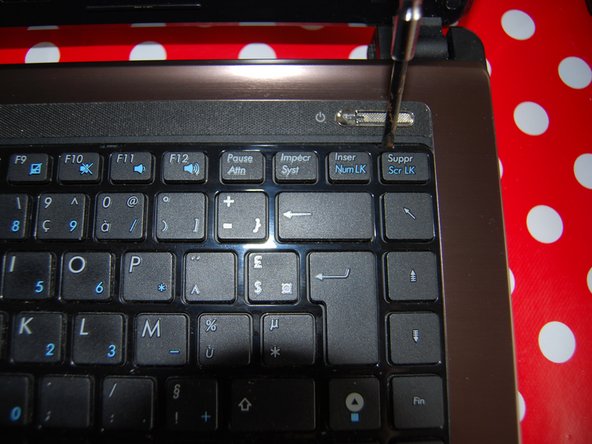
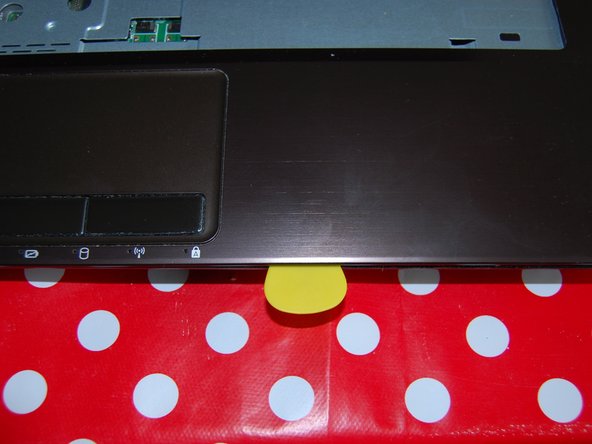
With a flathead screwdriver, push the clips in order to release the keyboard.
-
The keyboard is held by glue. Remove it carefully.
-
The keyboard's cable is just below the keyboard. Gently Remove the keyboard by lifting its upper part.
-
-
-
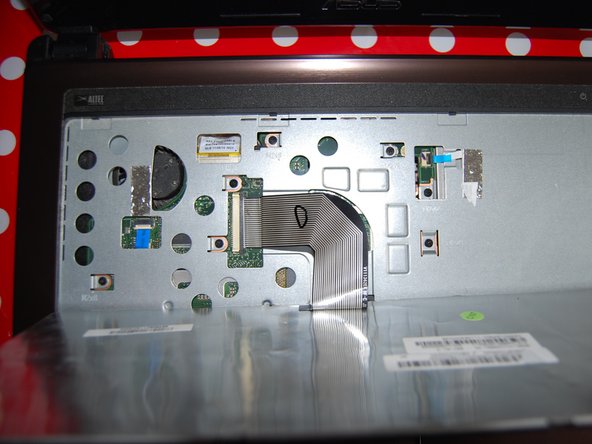
Now we are going to remove the keyboard connector.
-
Push gently each side of the black part of the connector with a pick.
-
-
-
Then we are going to remove the other two cables.
-
It's a bit different here. You will have to lift up the black part of the connector ( with an opening pick) , and then pull the cable.
-
-
-
-
Now you can easily remove the DVD/CD drive.
-
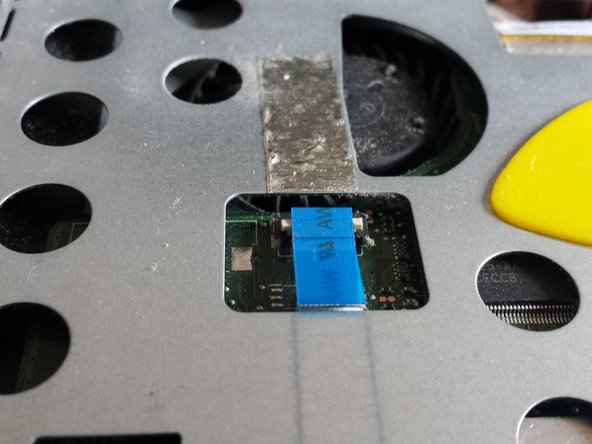
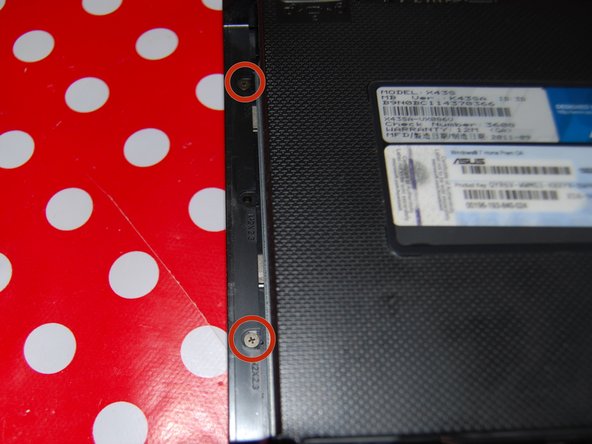
Just below the DVD/CD drive, there are two little screws to remove.
-
-
-
You can now remove the brown metallic cover by inserting a pick underneath. You'll have to insert the pick all around the cover in order to remove it.
-
We now have access to the motherboard.
-
-
-
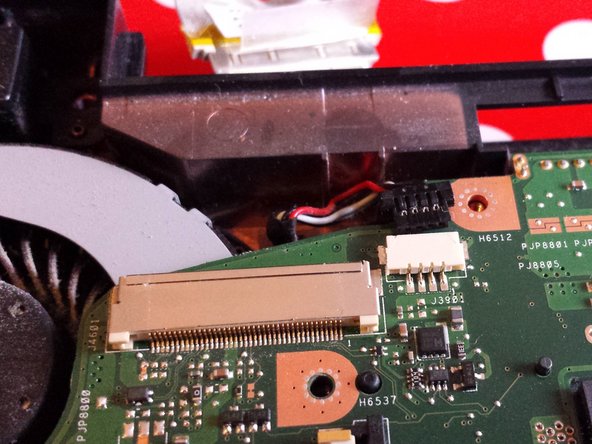
For this screen's cable you will have to proceed the same way than the step 8 with the keyboard's cable. Push gently each side of this cable to release it.
-
Then remove the little one.
-
-
-
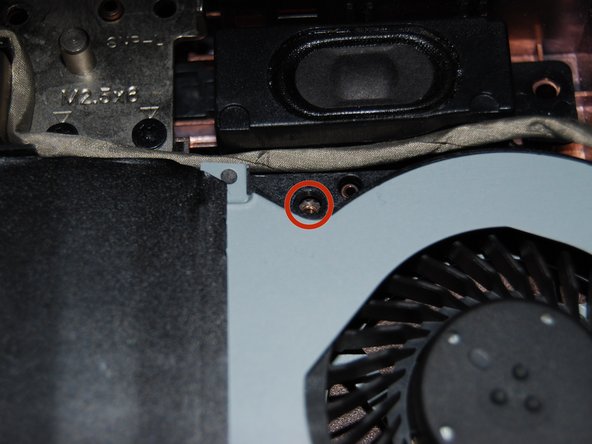
To completely release the motherboard, remove this two screws.
-
You can now easily remove the motherboard from the case.
-
-
-
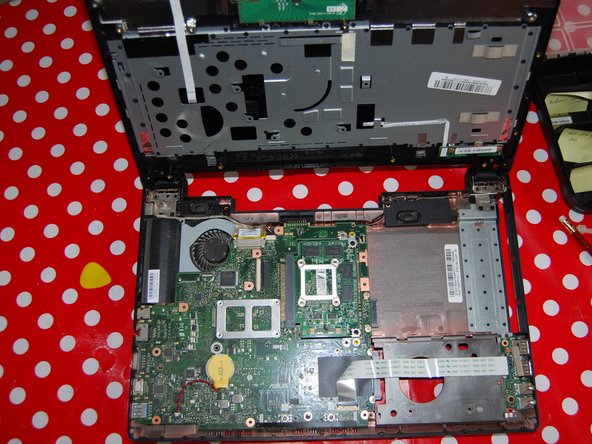
Here we are ! The motherboard is now fully released.
-
The CPU.
-
The GPU.
-
Disconnect the fan cable.
-
-
-
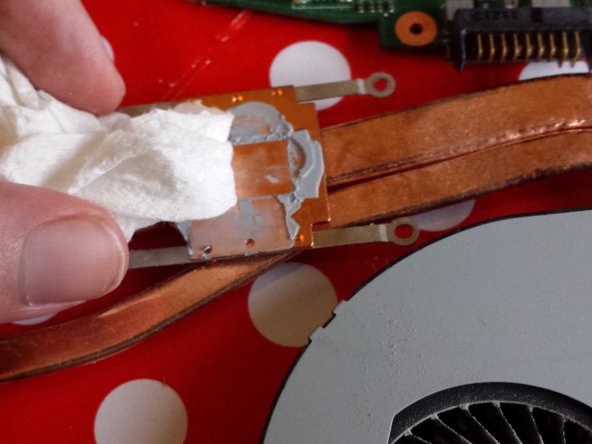
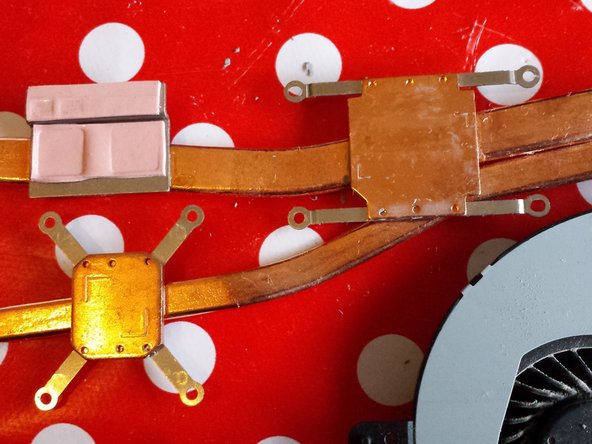
Clean both surfaces with alcohol and paper towels.
-
Do not remove the pink thermal pads.
-
-
-
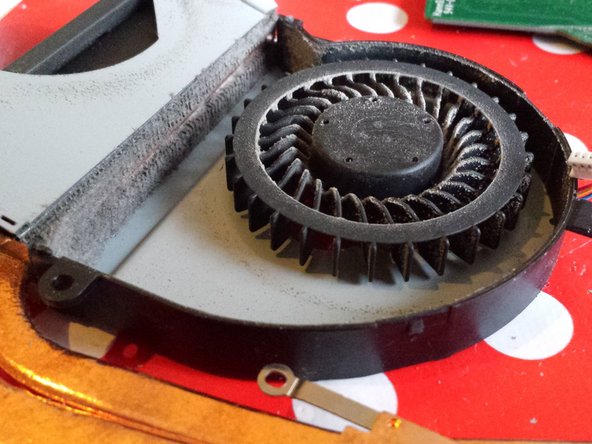
We are now going to clean the fan.
-
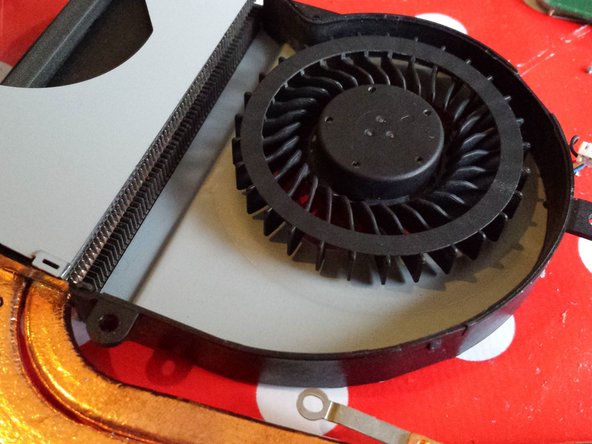
Use a flathead screwdriver to unclip the grey part of the fan.
-
Take a vacuum cleaner and a brush and clean everything.
-
-
-
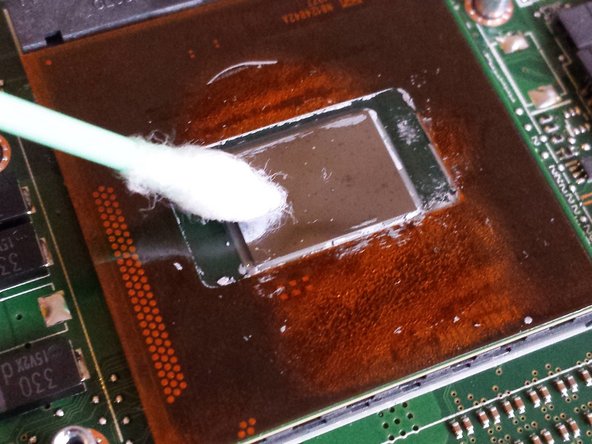
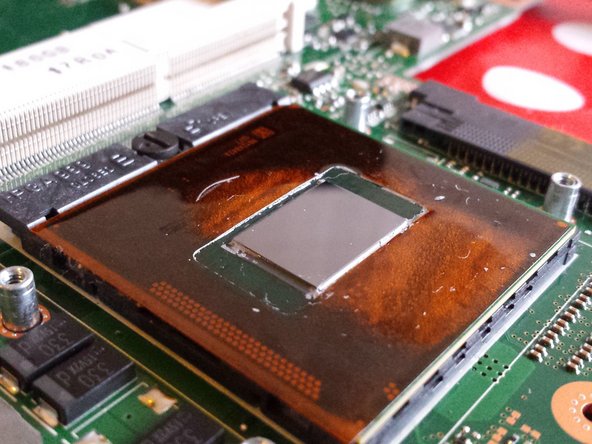
Scratch the old thermal paste from the surface of the CPU with a pick or a plastic opening tool .
-
Use alcohol, q-tips and paper towel to completely remove the residual traces of thermal paste on the CPU.
-
-
-
This is time to replace the old paste with a new one. Buy a good quality paste to ensure a proper heat dissipation.
-
-
-
"Put a small drop ( 4-5 mm diameter) of thermal paste onto the centre of the heat-spreader."
-
-
-
It's almost done!
-
Replace the cooler on the CPU and GPU by slightly moving in all directions to spread the thermal paste.
-
Screw the cooler.
-
Do not forget to reconnect the fan cable.
-
Reassemble the laptop and.... enjoy the silence of the computer!
-


To reassemble your device, follow these instructions in reverse order.
To reassemble your device, follow these instructions in reverse order.
Отменить: Я не выполнил это руководство.
17 участников успешно повторили данное руководство.
3 Комментариев
Wow! BEST Step by Step Instruction Guide ever seen by far.... this guide just saved me almost $50 or more service charge if i had relied from a IT tech. Thanks men!
pls also let me know how fix the screen there seems to be loose connection my laptop get white scree when i move hinges
Apply light pressure to the right of the asus logo (while you are facing the screen), and about an inch from the edge of the screen. This is usually where the connector to the screen is. Hope you solve it as I did mine,