Введение
This guide will show how to replace the battery for the Asus MeMo Pad 10 ME102A
Выберете то, что вам нужно
-
-
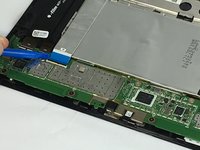
Insert the blue plastic opening tool into the seam between the back panel and the chassis.
-
-
-
Slide the plastic opener around the tablet. There will be spots of resistance. These should gently pop open as the tool slides through the seam.
-
-
-
-
After all of the clips have been opened, the back panel should be free to remove by hand
-
-
-
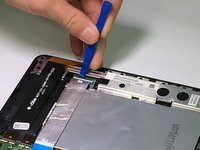
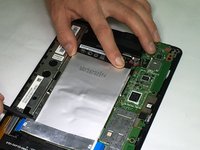
Unplug the blue ribbon cable which runs across the top of the battery near the left-hand speaker. It connects by plugging into a white and black plug on each side. To unplug the ribbon cable, gently pull up the black tabs with the small plastic opening tool.
-
-
-
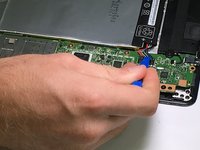
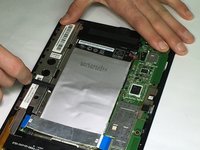
Unplug the battery cable located on the opposite side of the battery. Use the plastic opening tool to gently push it out of the socket on the motherboard.
-
-
-
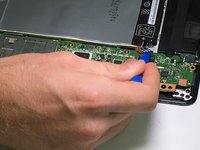
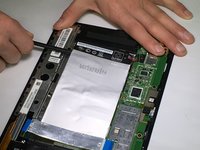
Separate the battery from the chassis by sliding the nylon spudger under the battery along the 3 glue strips. The glue needs to be gradually separated. The battery will lift free once the glue has been separated.
-


To reassemble your device, follow these instructions in reverse order.
To reassemble your device, follow these instructions in reverse order.
Отменить: Я не выполнил это руководство.
2 человек успешно провели ремонт по этому руководству.
Команду

USF Tampa, Team 11-3, Blackwell Fall 2016 Участник USF Tampa, Team 11-3, Blackwell Fall 2016
USFT-BLACKWELL-F16S11G3
4 членов
Автор 10 руководств